
Create Projects and Clients
Please note: You need to have Manager or higher permissions to create projects or clients. Please contact an administrator in your account if you need increased permissions.
Navigating the Projects & Clients Section
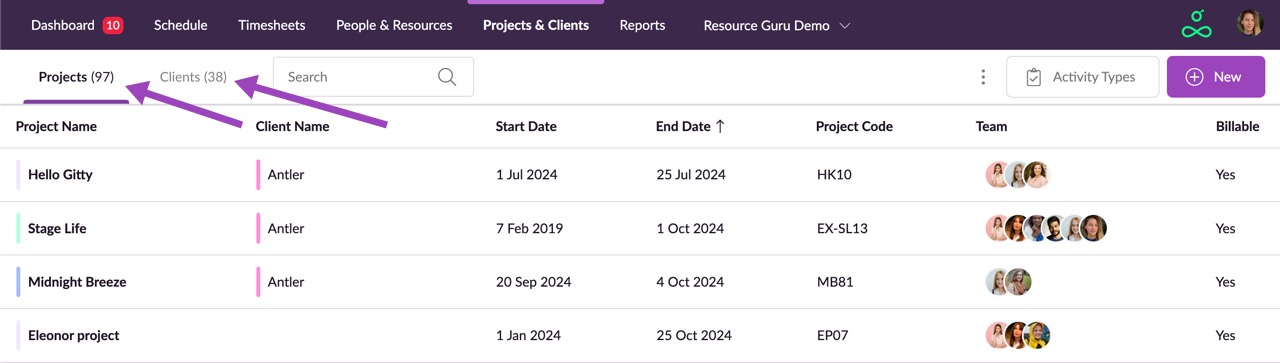
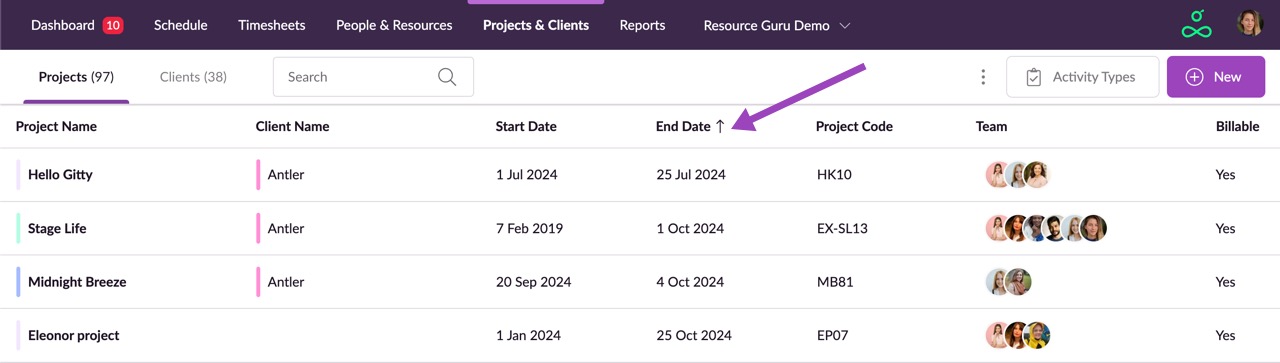
The Projects & Clients section of Resource Guru lets you quickly manage your projects and clients in one central location. Seamlessly switch between projects and clients using the tabs shown above, and order things the way you like by clicking on any column header to sort by that column. For example, to see all your projects grouped by client just click the Client Name header.
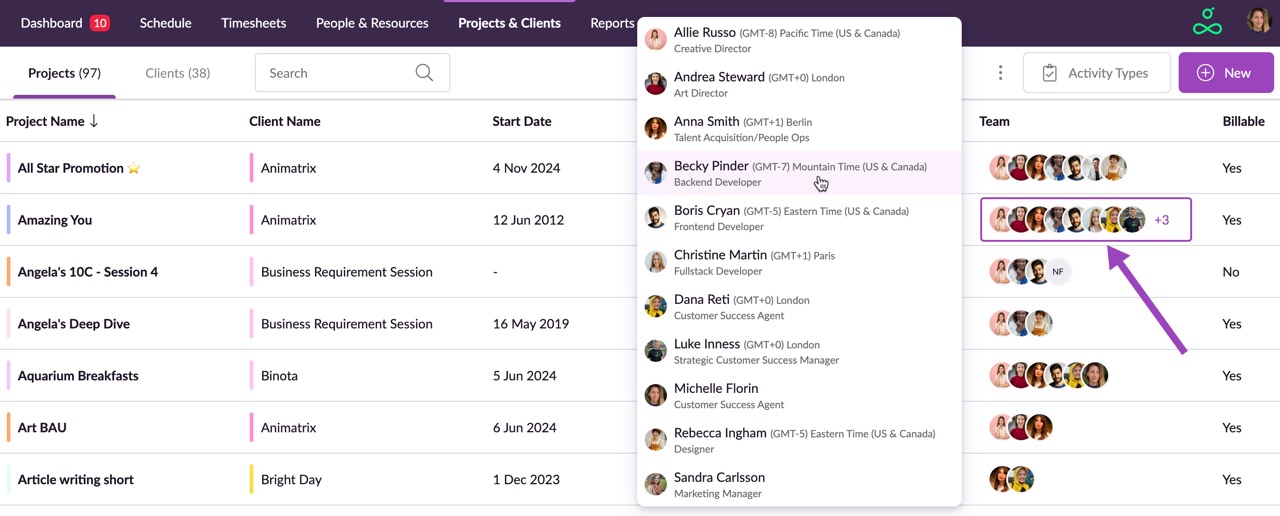
All people and resources that have been assigned or booked for a project will be displayed under the Team column. Click on any of the rows in this column to expand them, and then click on any of the people or resources listed to see their full details.

You can personalise which columns appear on the Projects table, including project custom fields.
Any user who can view Projects can now configure their own personal project columns:

Use the Search field to quickly focus on projects or clients that you’re interested in.
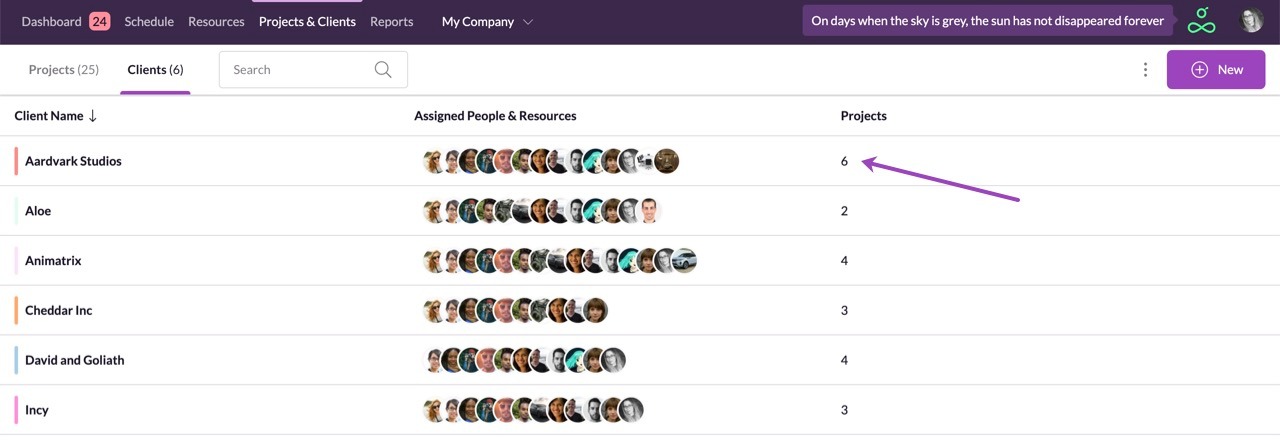
When reviewing the Clients section, you can click in the Projects column to quickly expand a list of projects belonging to that client.
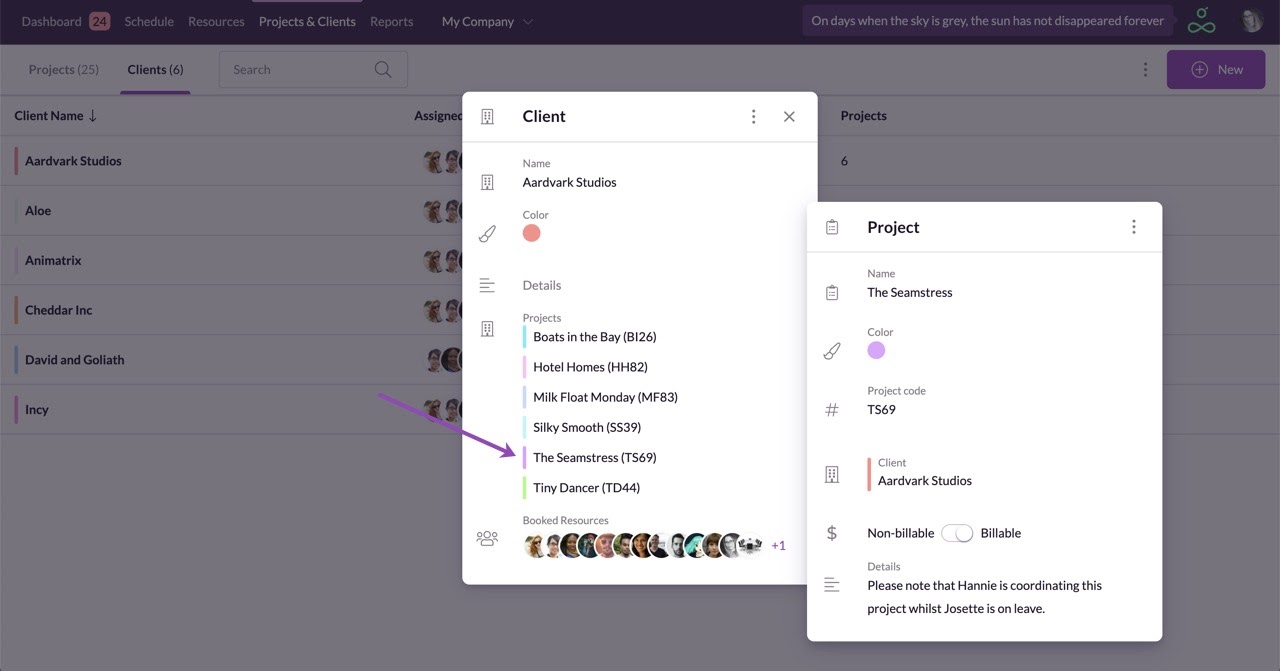
After expanding a client's projects, click on any of them to see or edit the details. Just like the changes you make in the Schedule, the Projects & Clients section supports inline editing, so there are no clunky “save” buttons to navigate when you make changes.
Creating Projects and Clients
To create a new project or client in Resource Guru, navigate to the Projects & Clients section, then choose New > Project or New > Client.
If you're setting up your account, you can save time by using our bulk import feature to add your projects in one go. Learn more here.
New Client
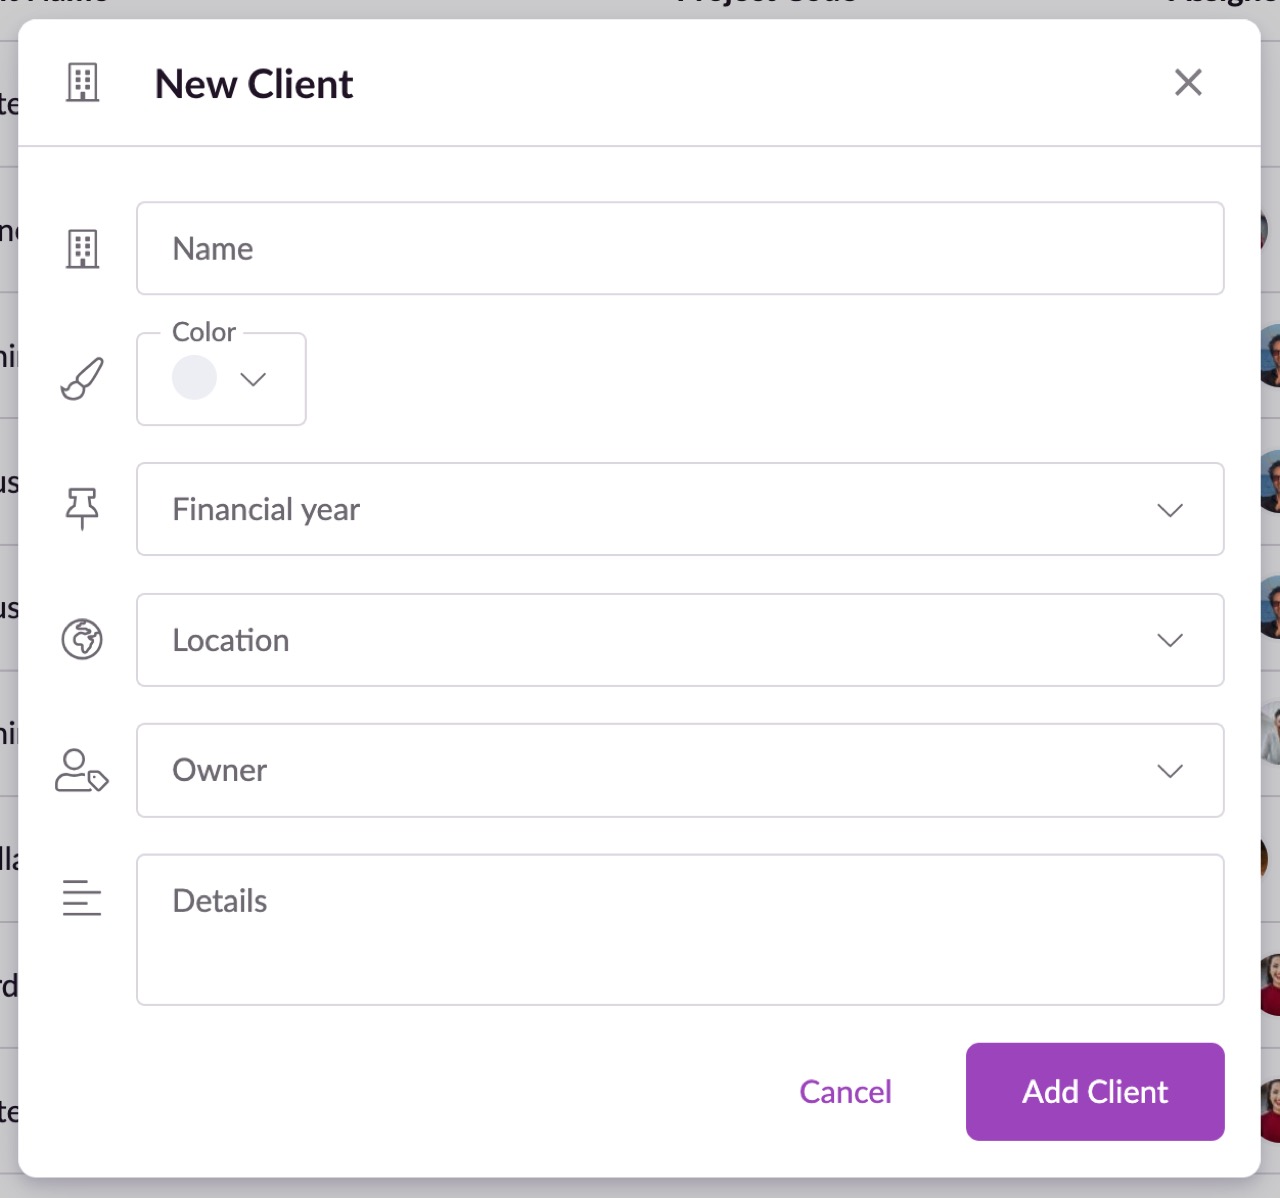
You will find 3 fields on the New client form:
Name - The name of your client.
Color - Assigns a color to your client. This works in conjunction with the Color by client option in the Schedule that lets you easily see bookings made for specific clients.
Details - Add information or links related to the client here.
All other fields are custom fields which you can set up in your Settings to be reflected on the New Person, New Booking, New Project or New Client form.
New Project
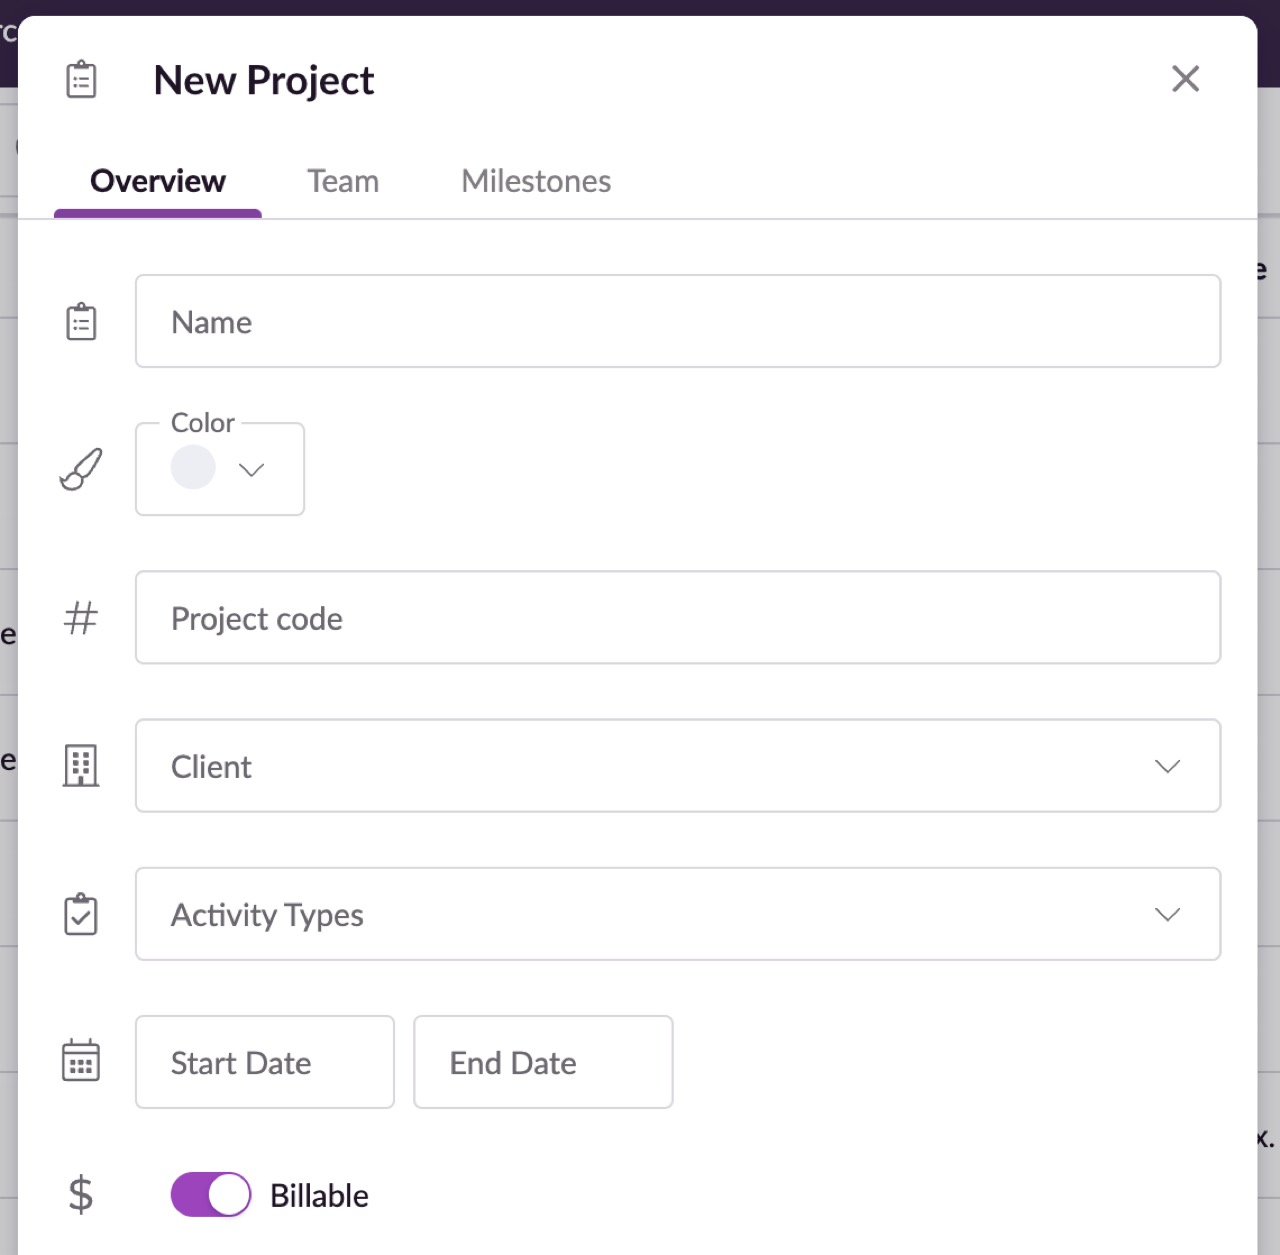
The New Project form also includes the above mentioned fields (Name, Color and Details), but in addition you will find the following options:
Project code - this field is prepopulated with an automatically generated code, but you can edit it manually if you’d prefer to enter your own code.
Client - this is where you can specify which client the project belongs to.
Activity Type - they help you categorize both your timesheet entries and projects in the Schedule, giving you a clearer picture of how time is allocated across different tasks and activities. Learn how to add and use them here.
Start and End date - here you can specify a start and end date for your project. Please note that if you set a start and/or end date for a project, your team will only be able to create bookings for the project between the dates that have been set. A booking clash warning will be displayed if you try to create a booking for a project before its start date or after its end date. You can track your start and end dates in the Schedule when using the Group by project/client filter.
Non-Billable/Billable - here you can specify whether bookings for this project should be Billable or Non-billable by default. You can override this default setting when you create a booking.
Adding Milestones - switch from Overview to Milestones in order to add deadlines and milestones to your project. Find out how to add and use them here.
Adding Project Teams - switch from Overview to Team in order to assign people as team members to your project. Find out how to add project teams here. When a person is added to a project team, you can also apply a rate, based on the rate they’re currently assigned to in Settings or on their resource profile. For more information on rates, please have a look at this article.
All other fields are custom fields which you can set up in your Settings to be reflected on the New Person, New Booking, New Project or New Client form.
Guru tip
Click on a column header eg. End Date to sort your projects by that parameter.
Editing Projects and Clients
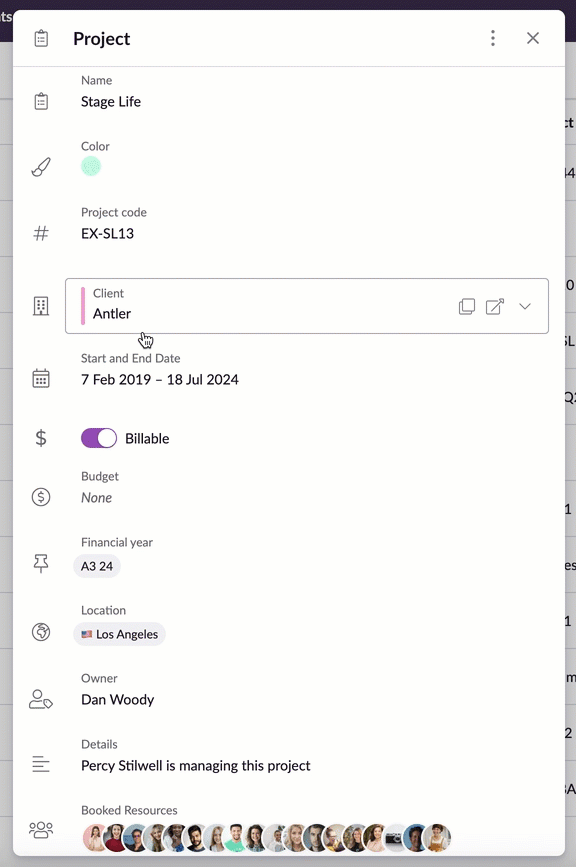
To edit a project or client, click on it in the Projects & Clients section. Then, click on any of the fields to make changes. Once you’ve finished editing just hit return or click out of the edited field in order to save your changes.
Archiving Projects and Clients
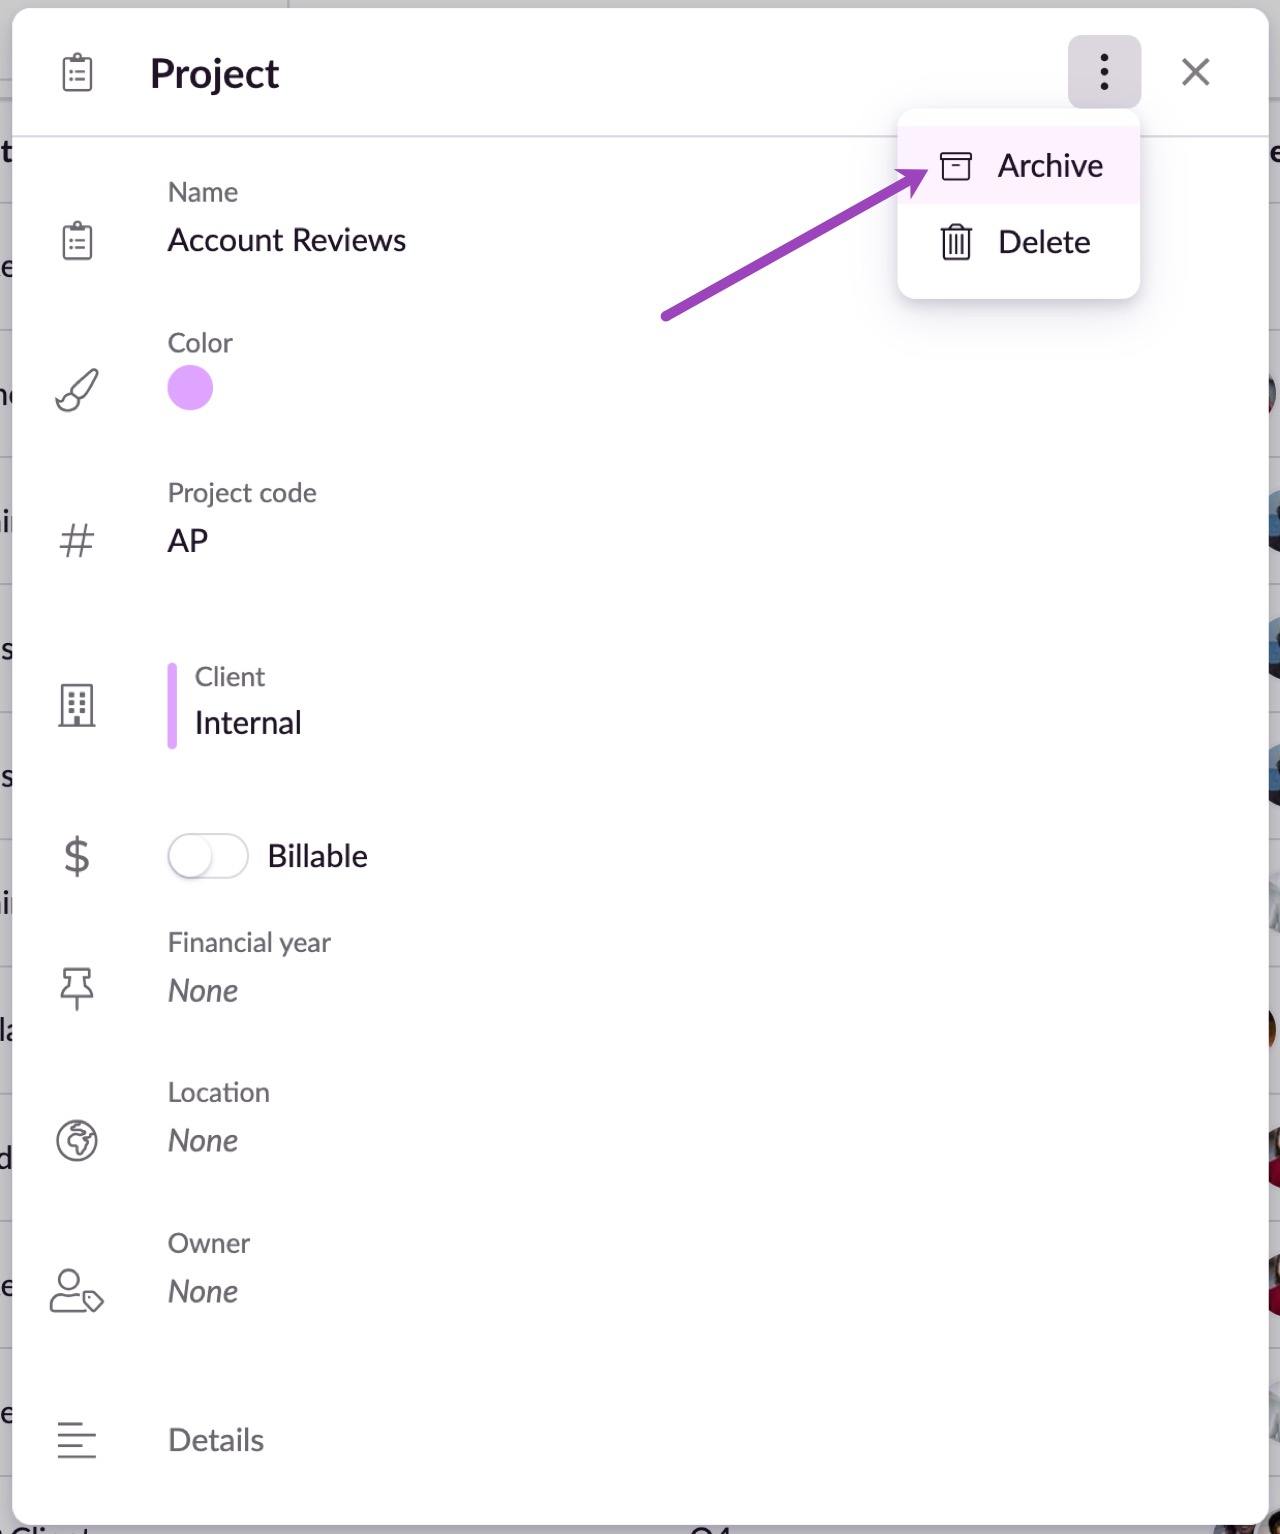
Projects and clients can be archived when they are no longer in use. To archive a project or client, just click on it in the Projects & Clients section, then click the options menu followed by Archive.
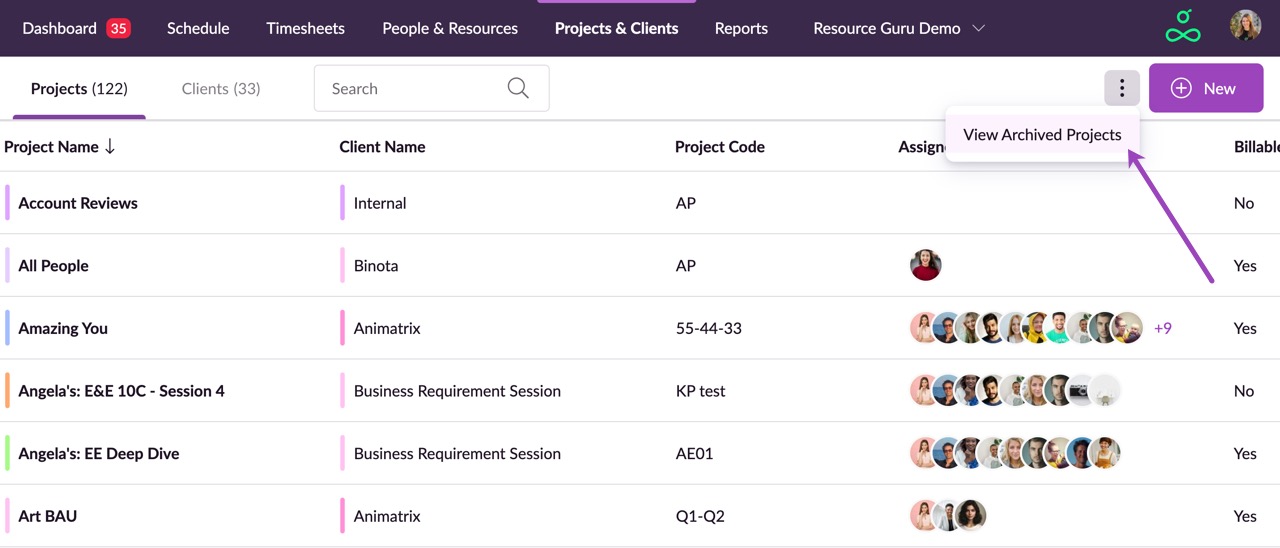
To view or reactivate archived projects or clients, click the options menu in the top right corner of the Projects & Clients section, then click View Archived Projects.
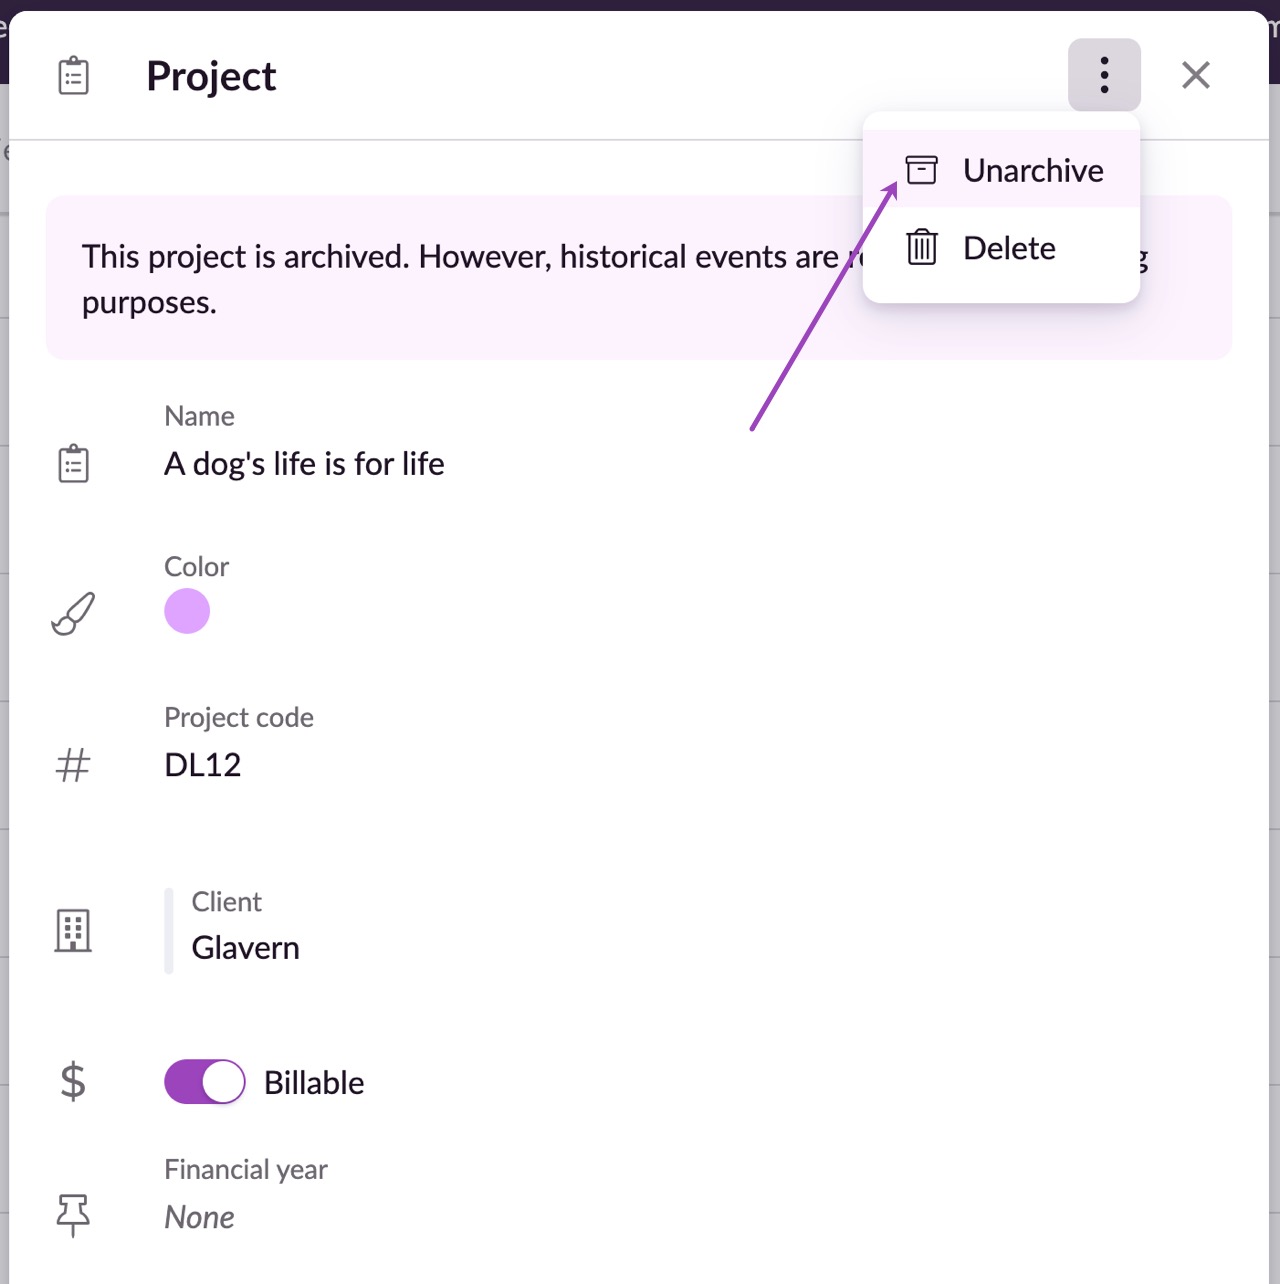
Next, click on the relevant project or client, then click on the options menu followed by Unarchive.
To keep your reports accurate, historical data for archived projects/clients will be retained and will still appear in Reports and the Schedule. However, future bookings for the archived project/client will be permanently deleted.
Historical bookings for archived projects/clients can’t be edited in the Schedule but you can completely delete them.
Deleting Projects and Clients
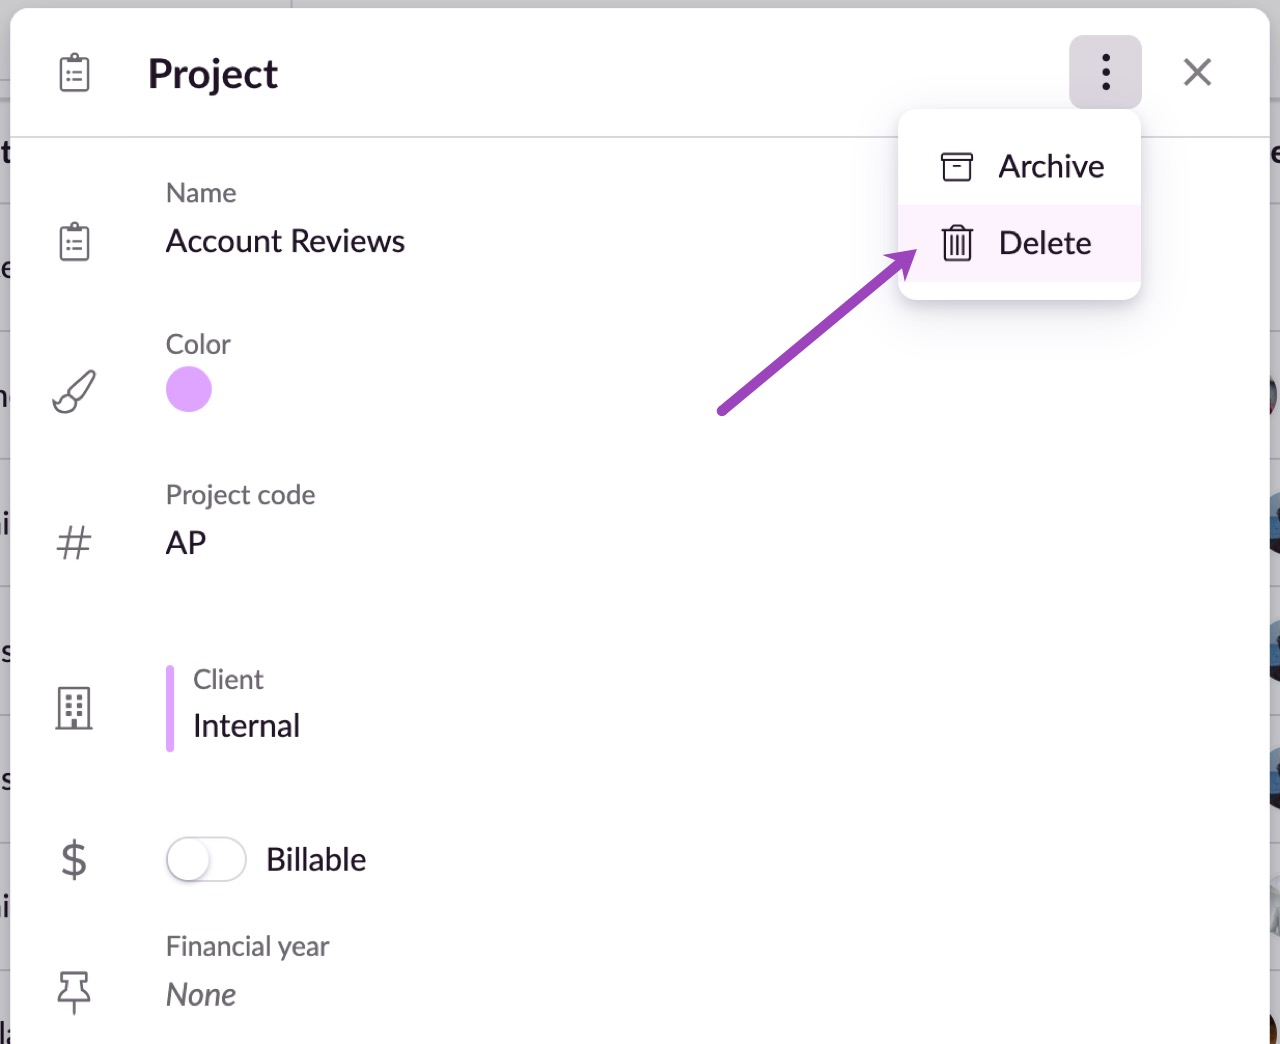
To permanently delete a project or client, click on it in the Projects &Clients section, then click the options menu followed by Delete. Unlike archiving, deleting a project or client can’t be undone.
To keep your reports accurate, historical data for deleted projects/clients will be retained and will still appear in Reports and the Schedule. However, future bookings for the deleted project/client will be permanently deleted.
Historical bookings for deleted projects/clients can’t be edited in the Schedule but you can completely delete them.