Group the Schedule by Project, Client, or Custom Field
Have you ever wanted a clearer view of who’s booked for a specific project or client, and when those bookings are taking place? Well, look no further because the Group By feature will give you exactly that!
When you use the Group By feature, you'll only see the people booked for the selected projects or clients, and you can group them by custom fields like department, location, and more. Bookings those people have for other projects or clients will be subtly faded into the background. This gives you a clear, focused view of the project timeline while still being aware of other work commitments or time off. Let’s dive into how it works!
How to Group
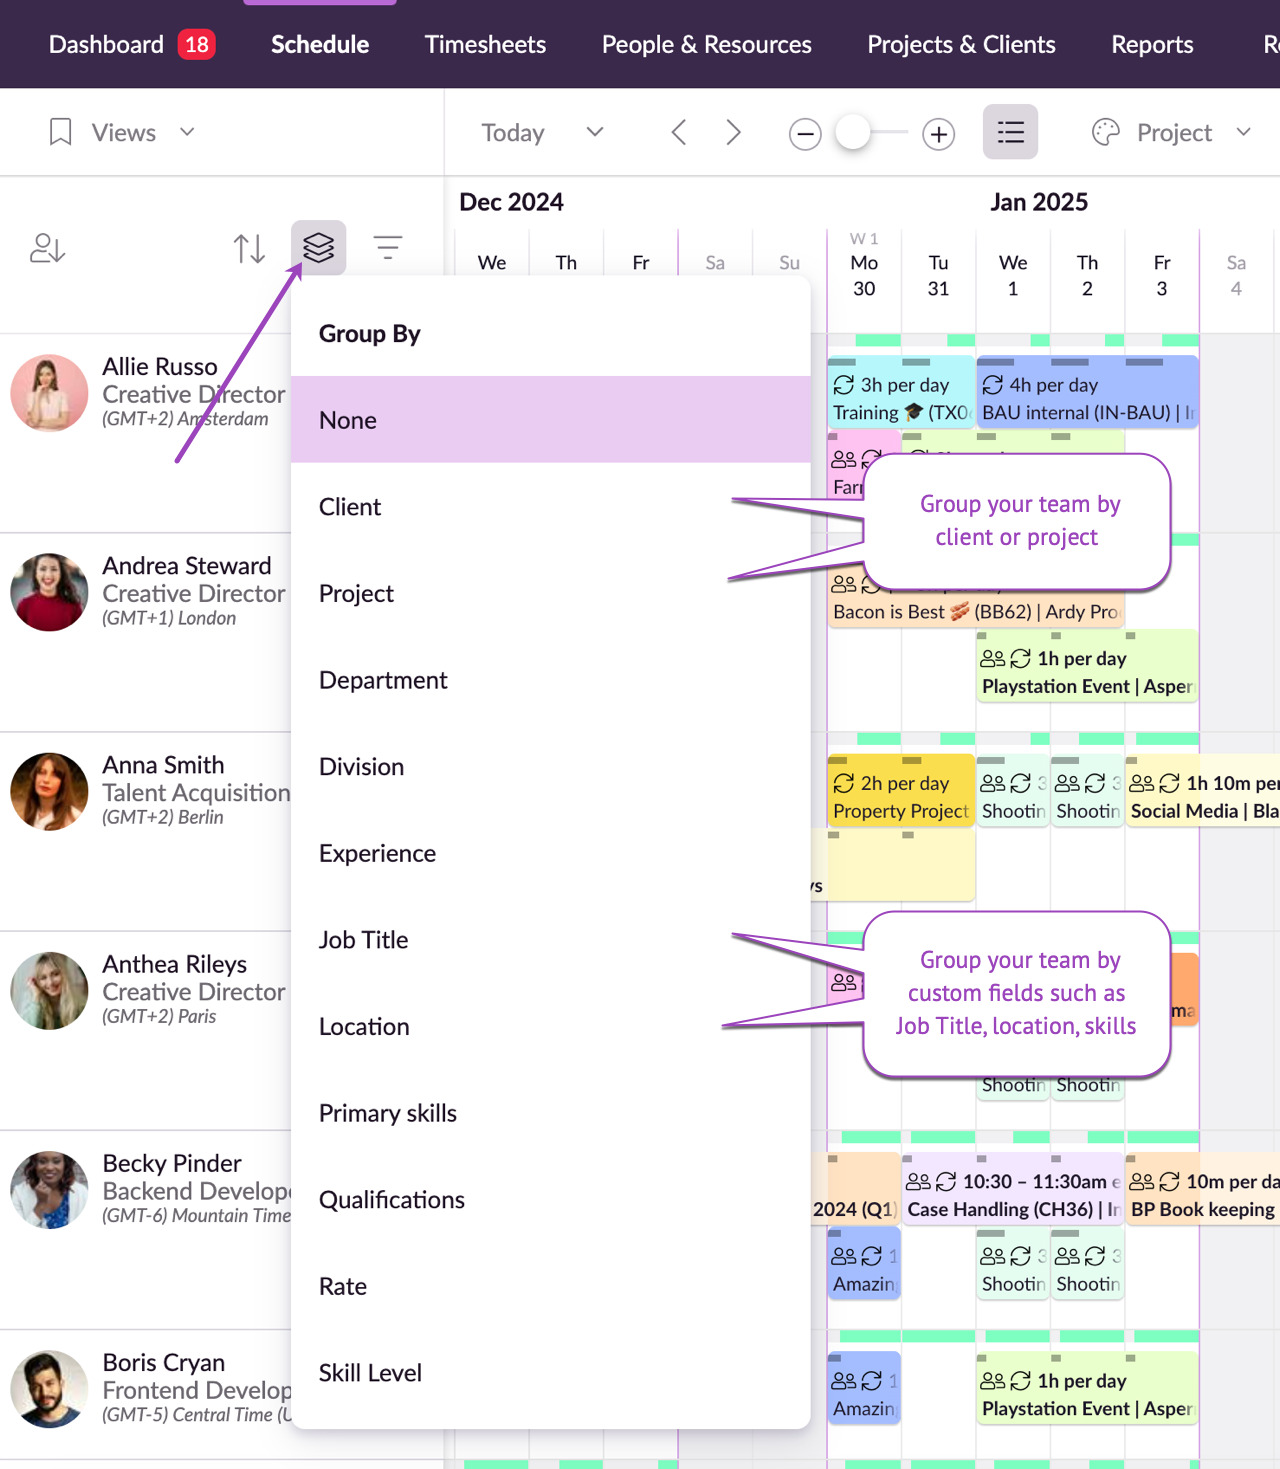
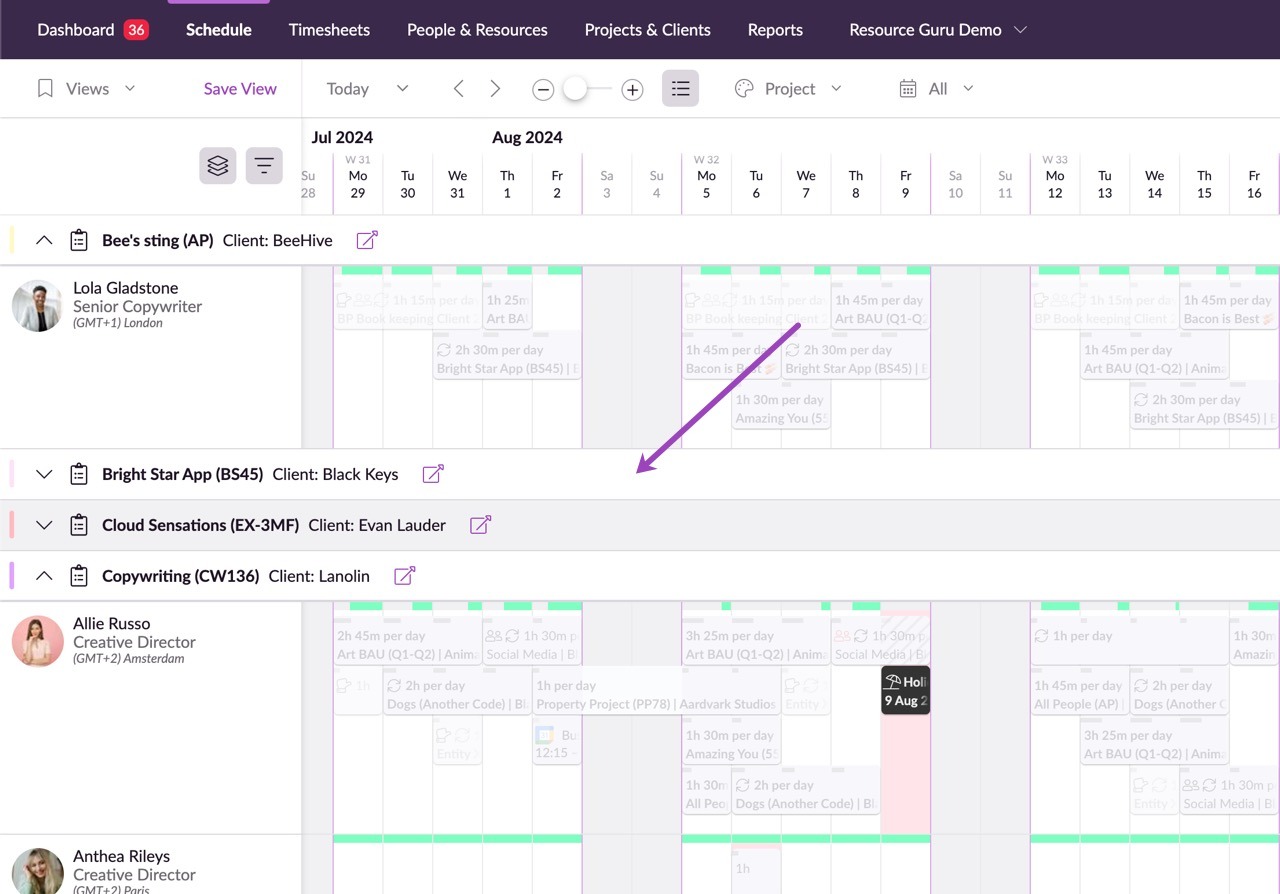
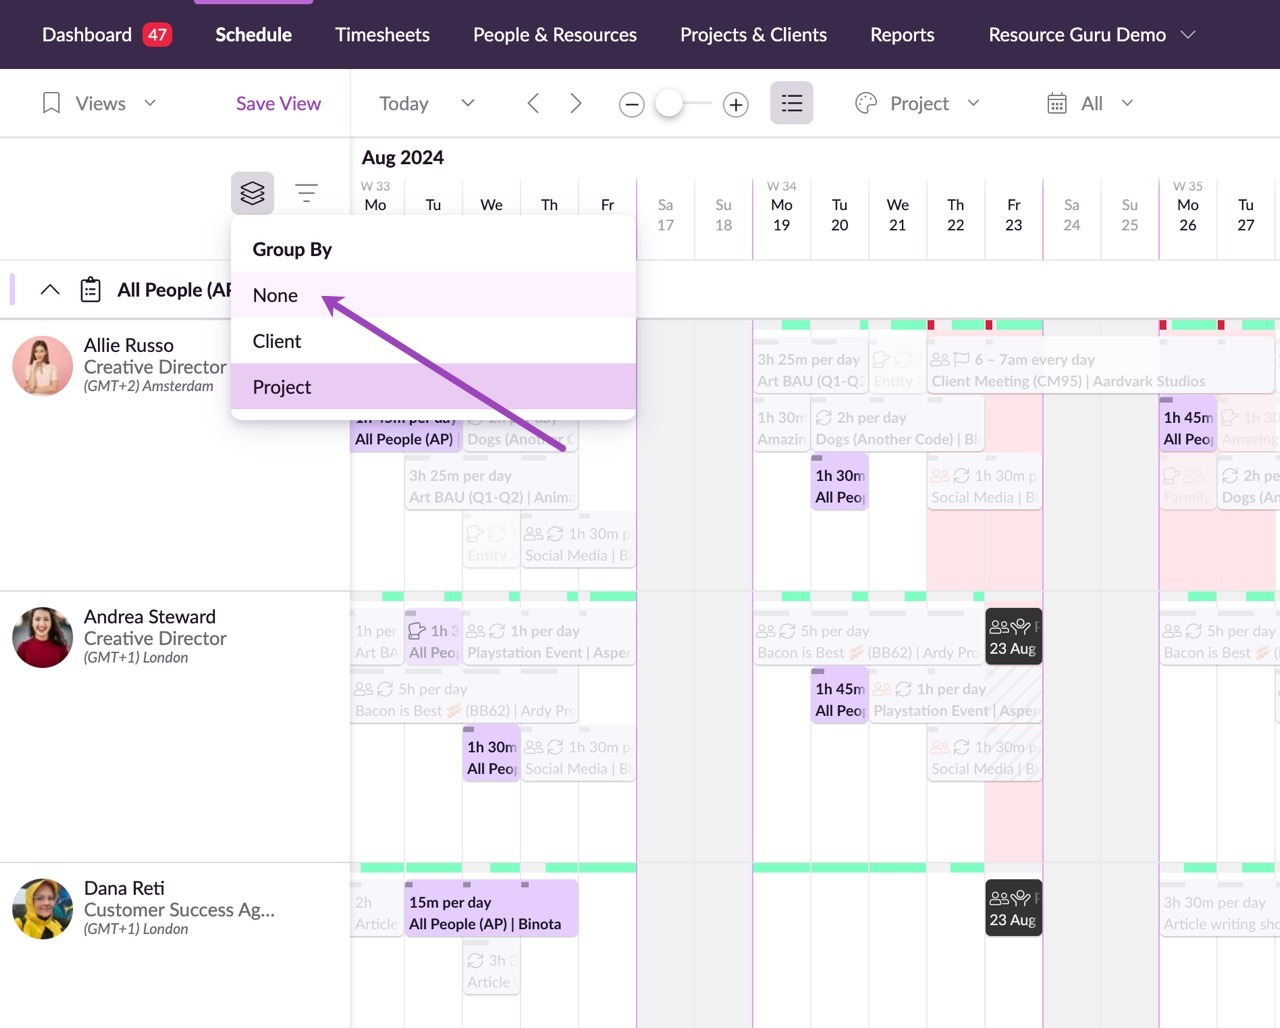
To group your team or other resources, head over to the Schedule and click on the Group icon. From here you can choose whether to group by Project or Client, by custom fields you have set up for your account or choose None to remove the group function.
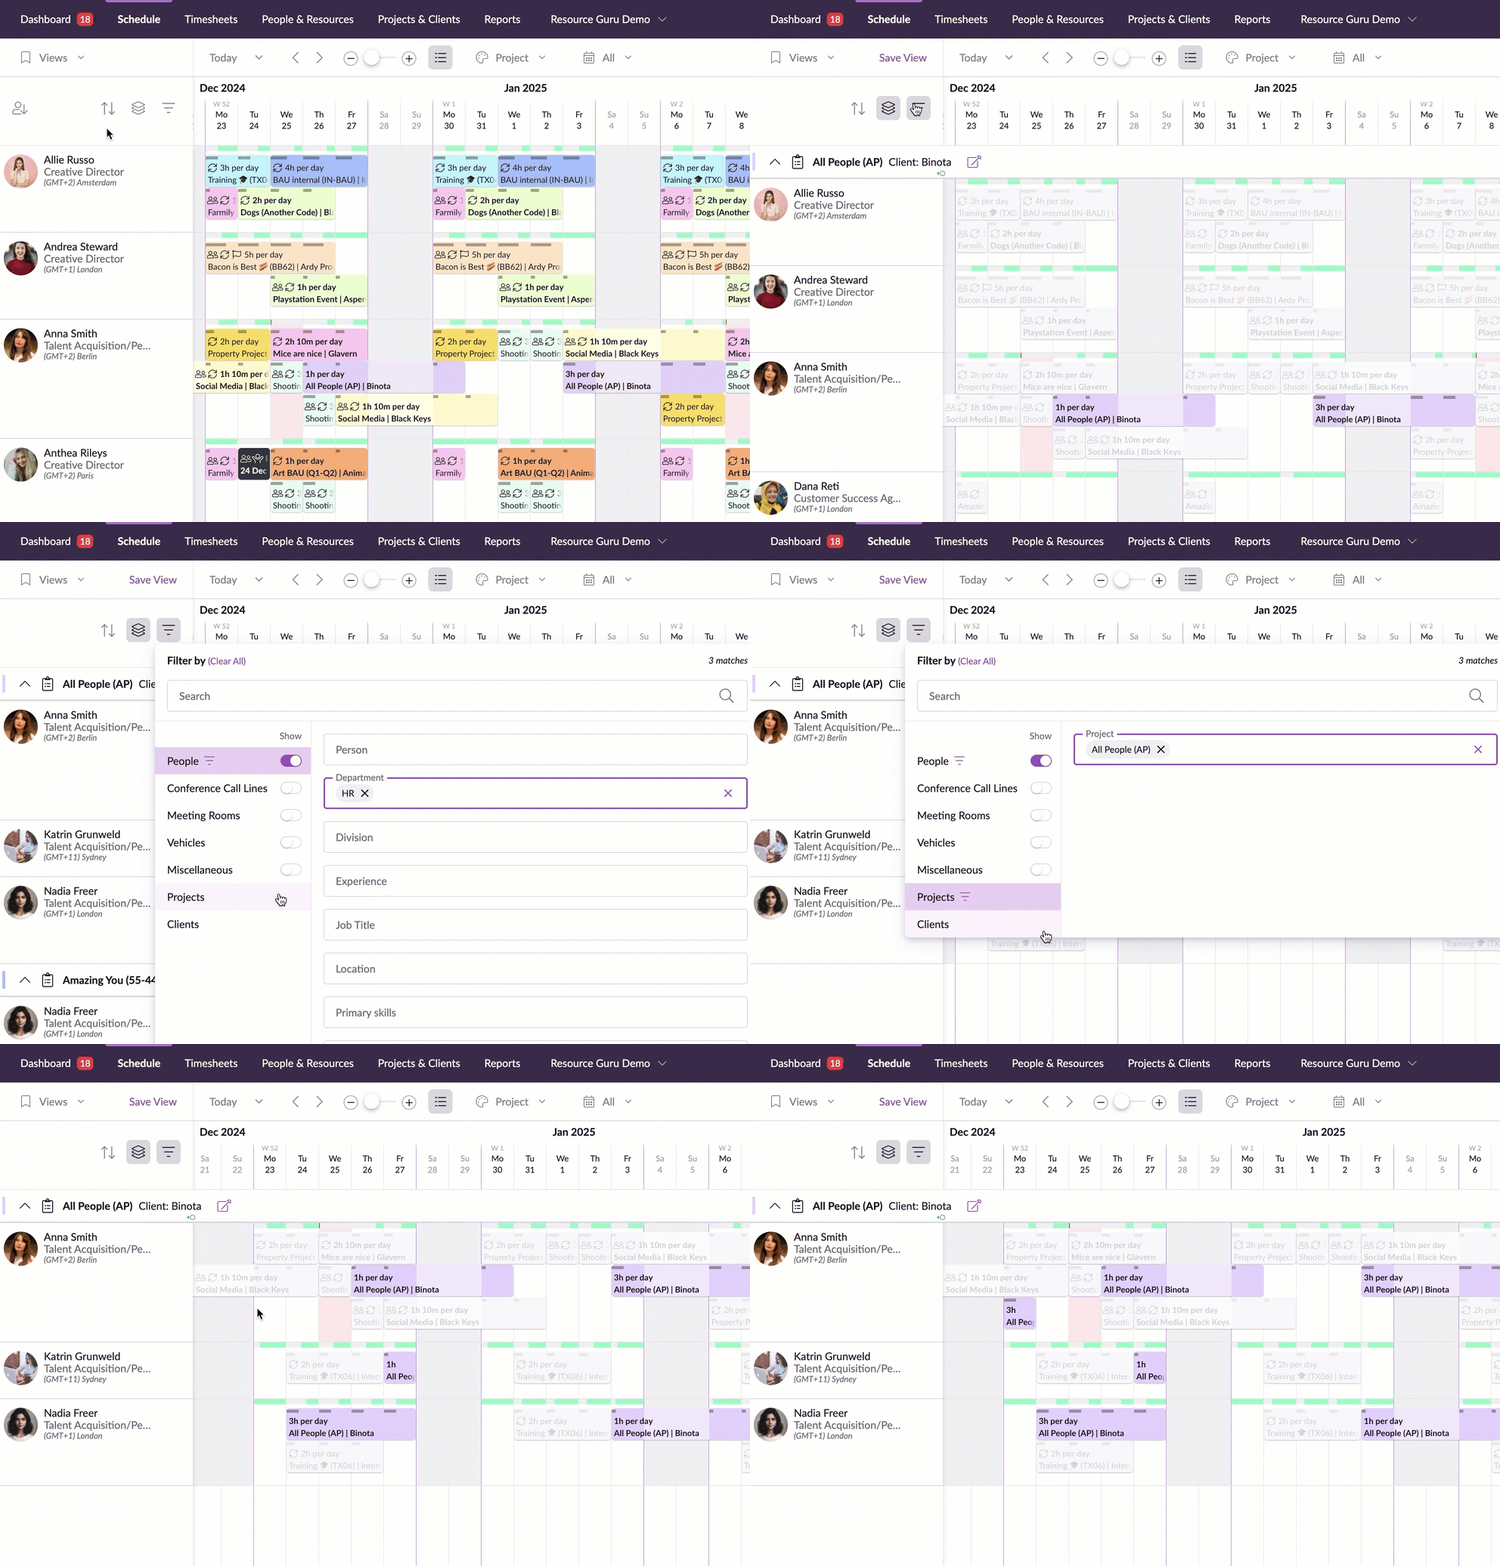
Whilst you can use the Group by feature alone, you probably won’t want to see all of your projects at once. So, just apply any relevant filters to really hone in on what you’re looking for. In the above example I can see all the HR time which has been booked on projects. To get this view I filtered by Department to display only the HR team, I grouped by Project and filtered by a specific Project to show only the work the HR team is responsible for.
Combine Grouping and Filtering
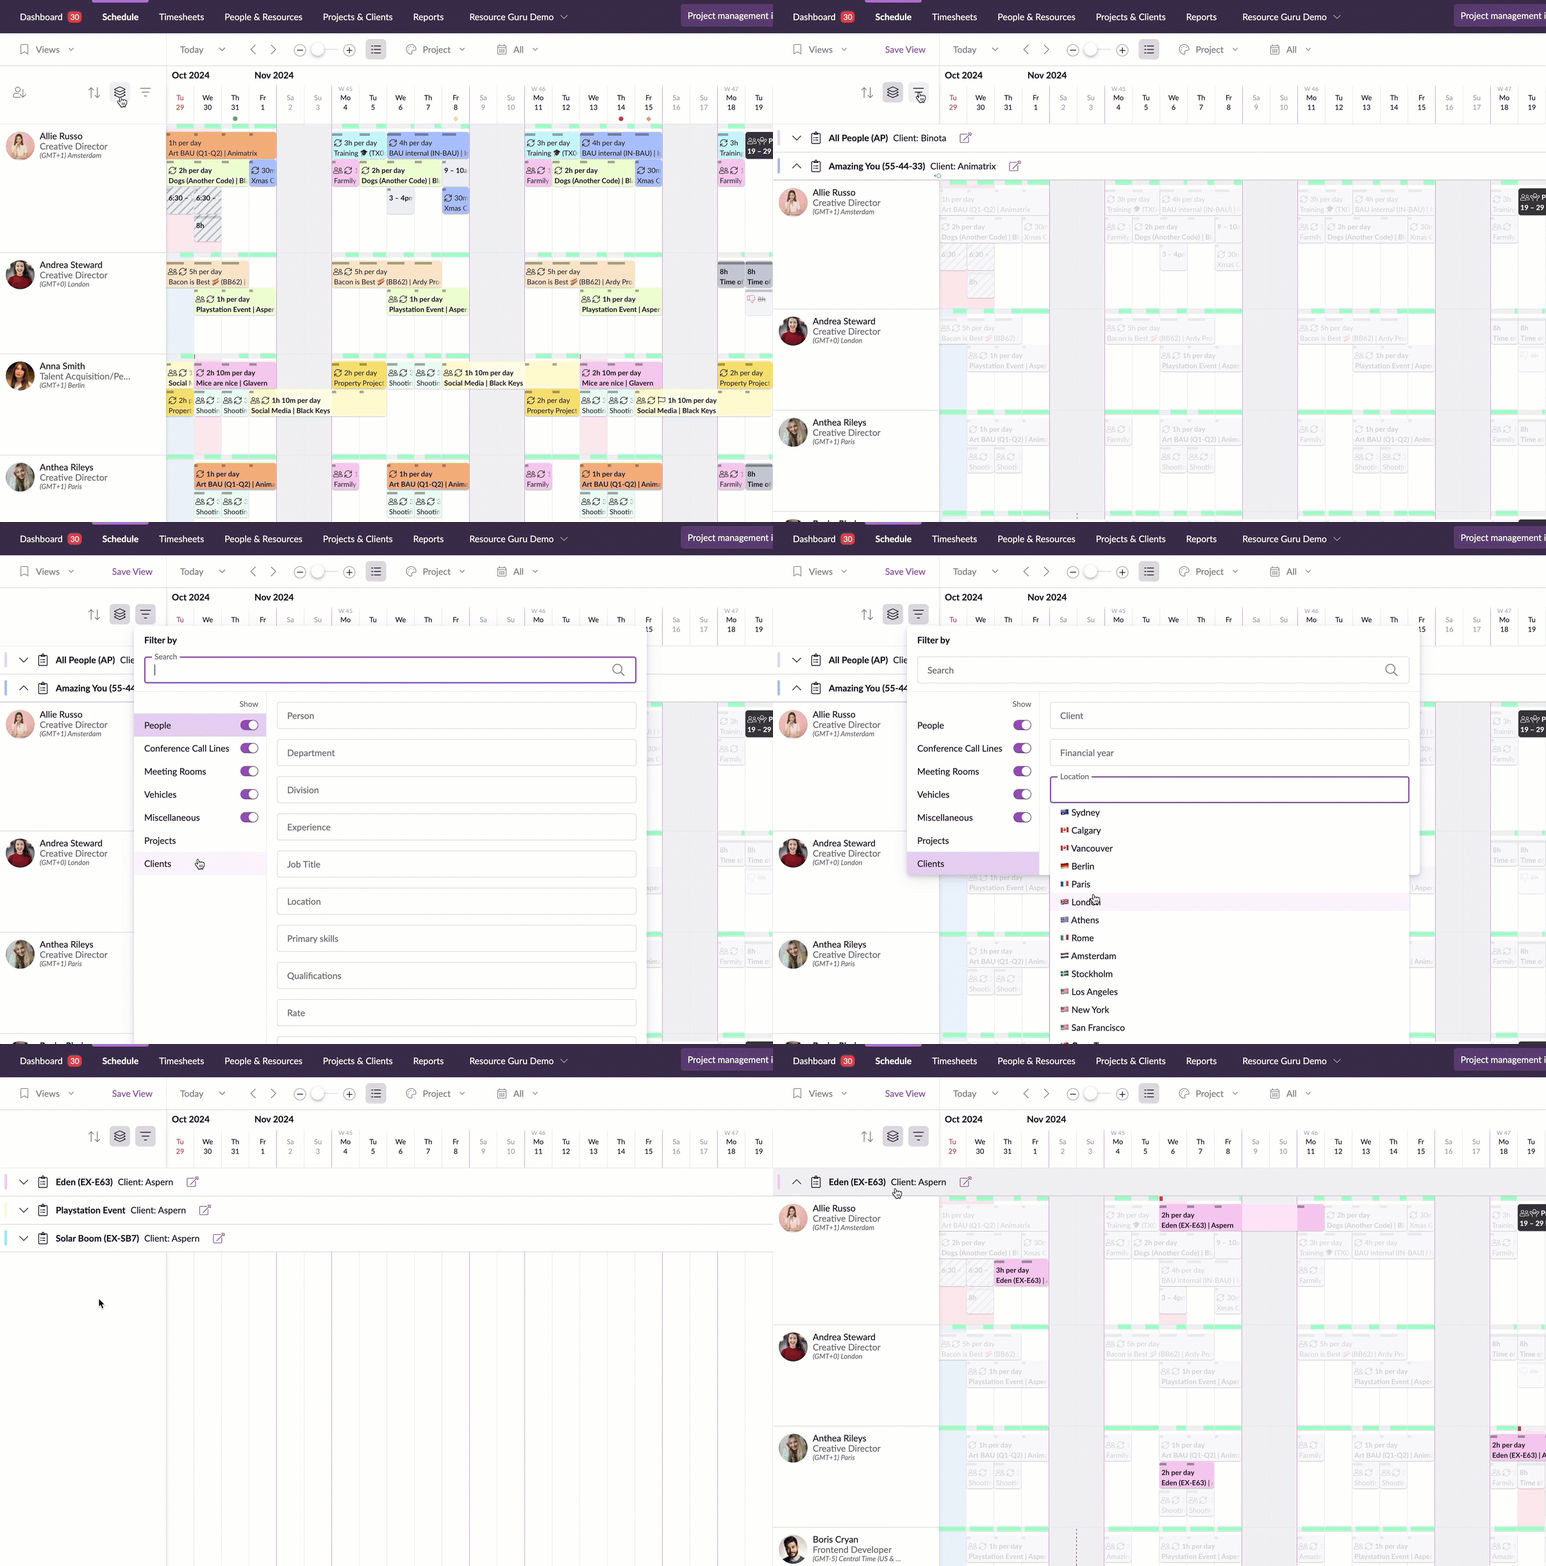
For example, if you’re responsible for clients in London and want to see the time your team has allocated to projects with London-based clients, you can use the Group by Project functionality. Then, go to Filter By and select all clients in a specific location to view only the relevant projects.
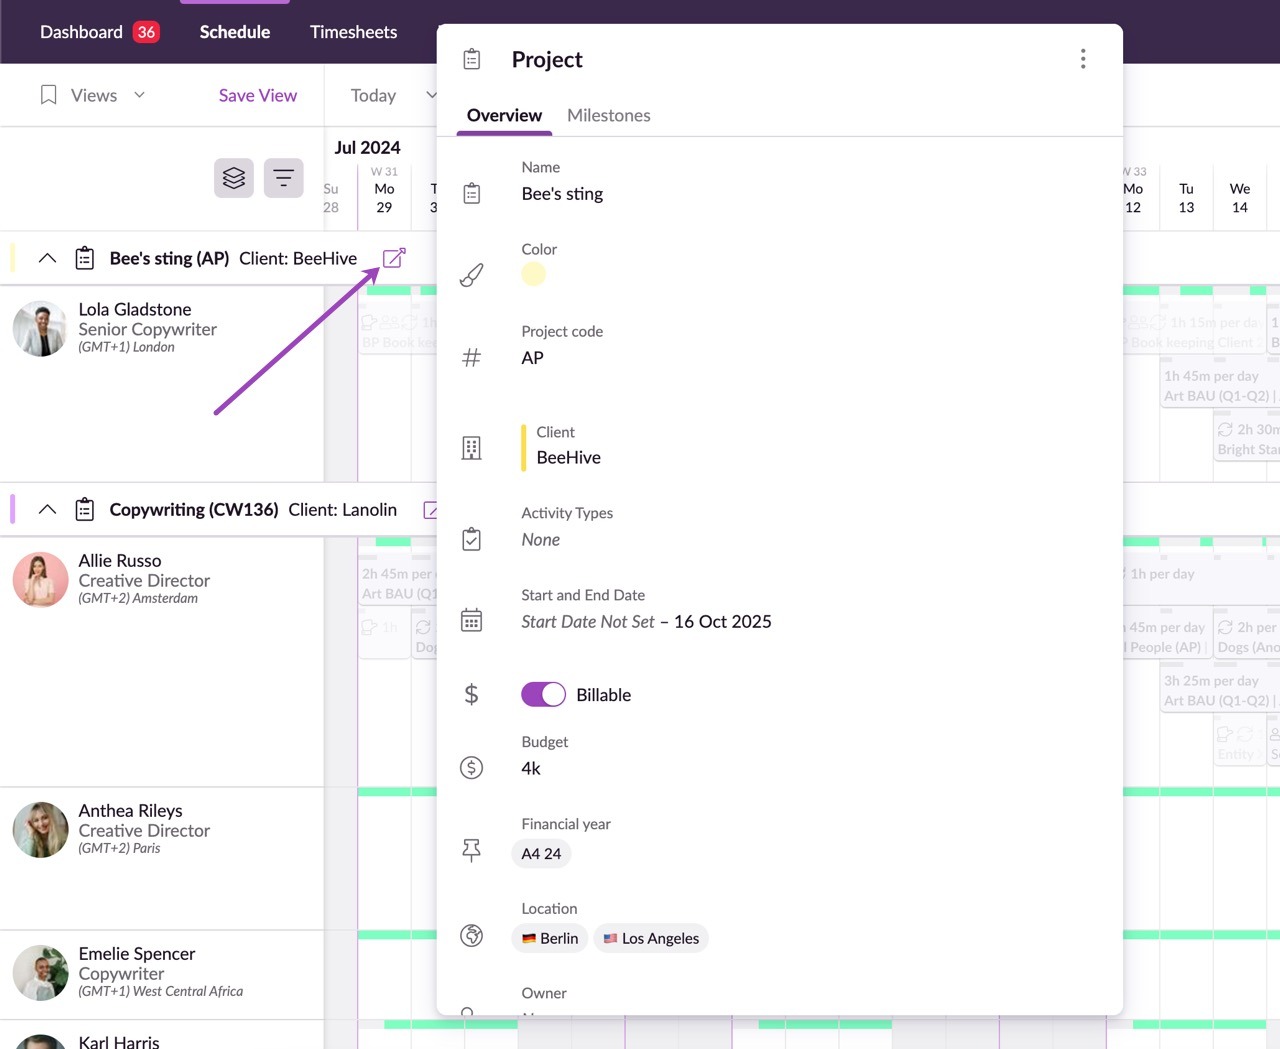
In the grouped view of the schedule, you can click on the icon next to the project or client name to expand the details and make any quick edits.
Groups will be expanded by default, but you can collapse or expand them manually by clicking on any of the project or client bars.
Budgets in Grouped View
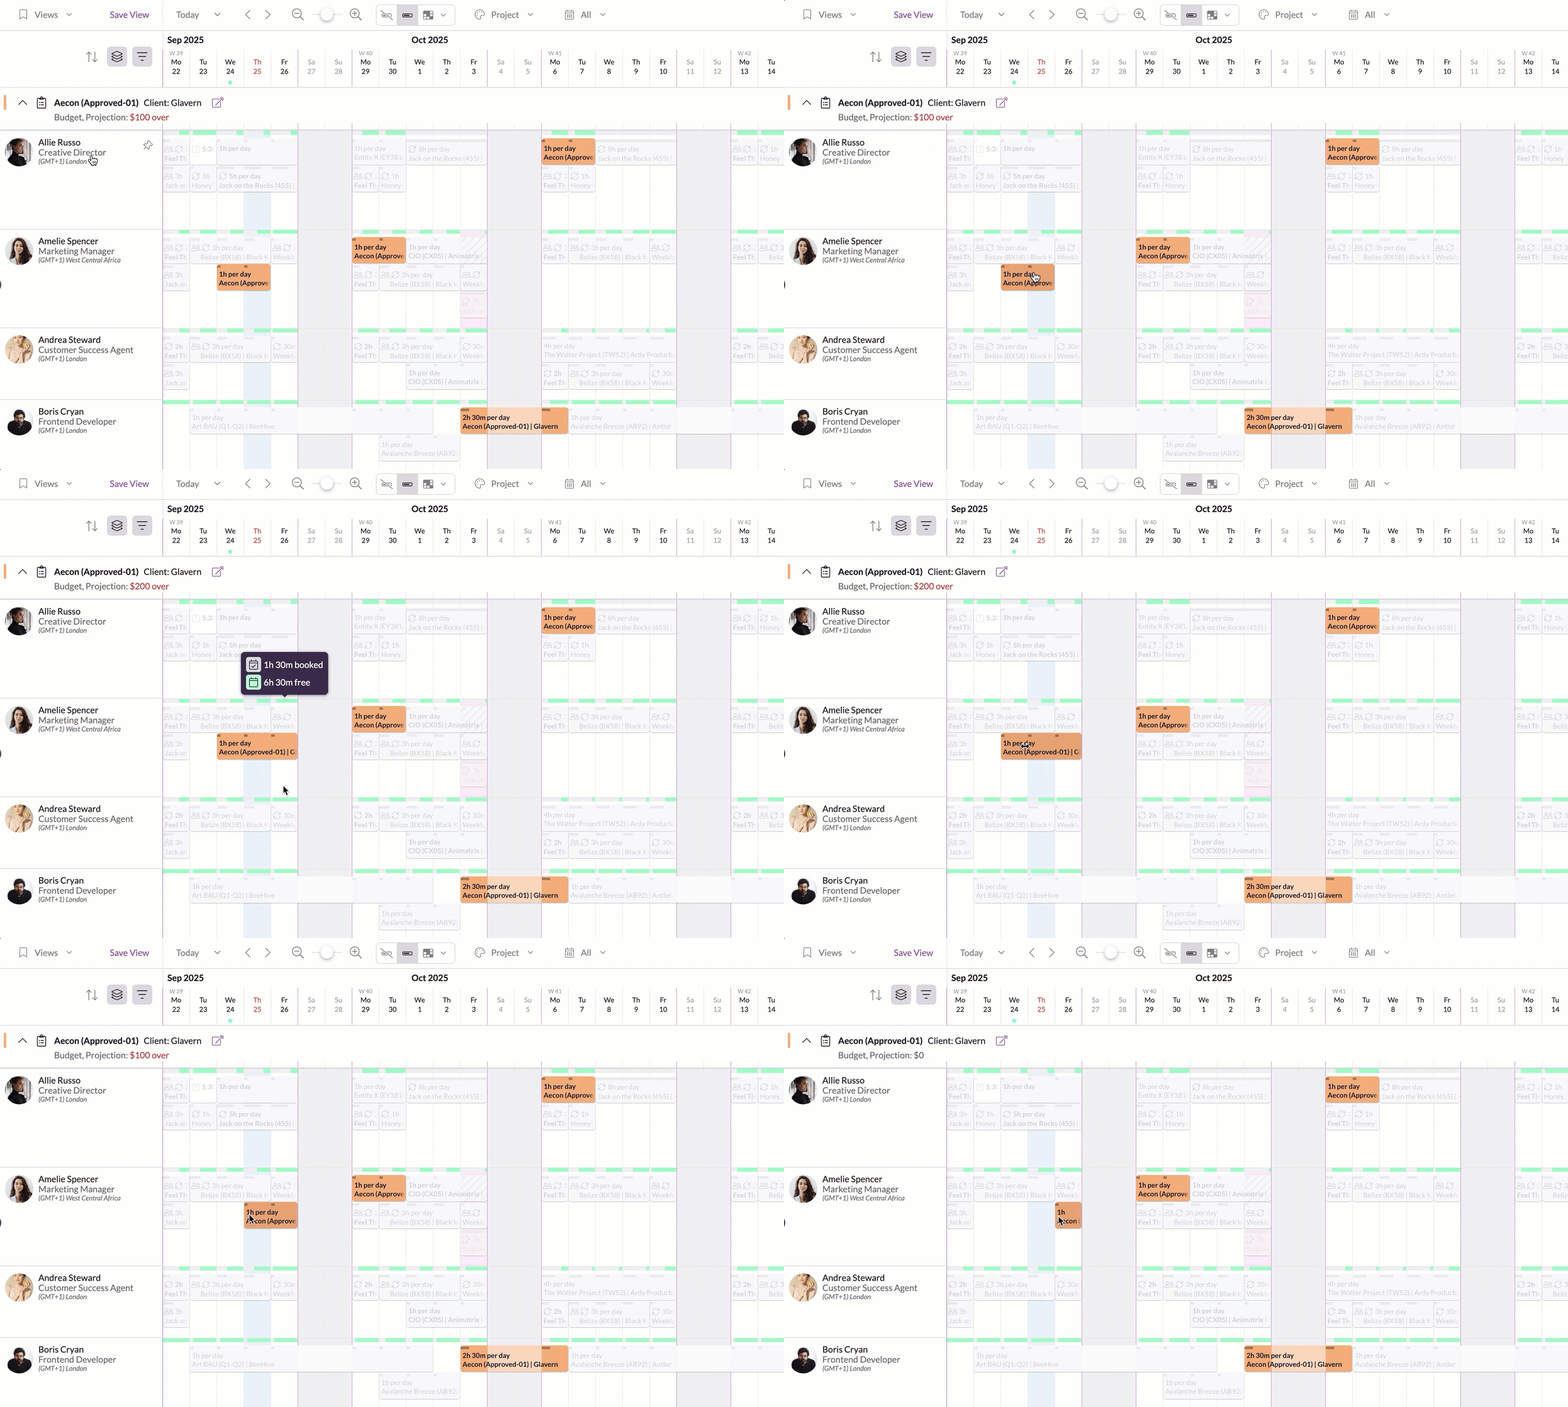
When you group the Schedule by Project or Client, you’ll also see the project’s budget status displayed at the top of each group.
The budget line shows the current projection compared with the total budget.
If the projection goes over budget, it will be highlighted in red with the amount exceeded.
As you add, edit, or remove bookings, the projection updates automatically, giving you a real-time view of how scheduled work impacts the budget.
In the example (GIF) above, the blue line indicates today’s date. As bookings are added or adjusted in the timeline, you’ll see the budget projection recalculate instantly.
This makes it easy to keep track of budget health while you’re scheduling, helping you avoid overspend and adjust allocations before it becomes a problem.
Milestones in Grouped Views
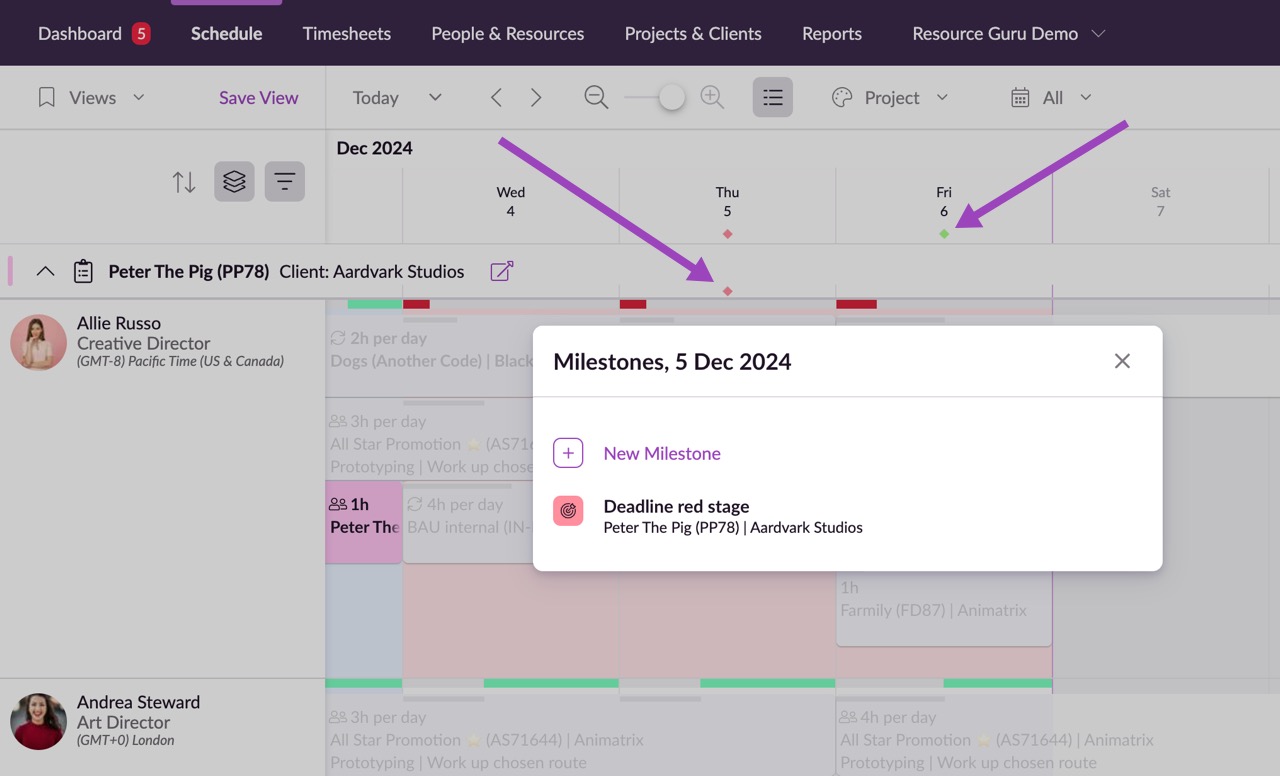
When grouping by project is applied, your milestones will appear directly in the Schedule—below the relevant date and in the project column. Simply click on the milestone icon to view its status and see any upcoming milestones.
Viewing Teams in the Schedule in Group by Project View
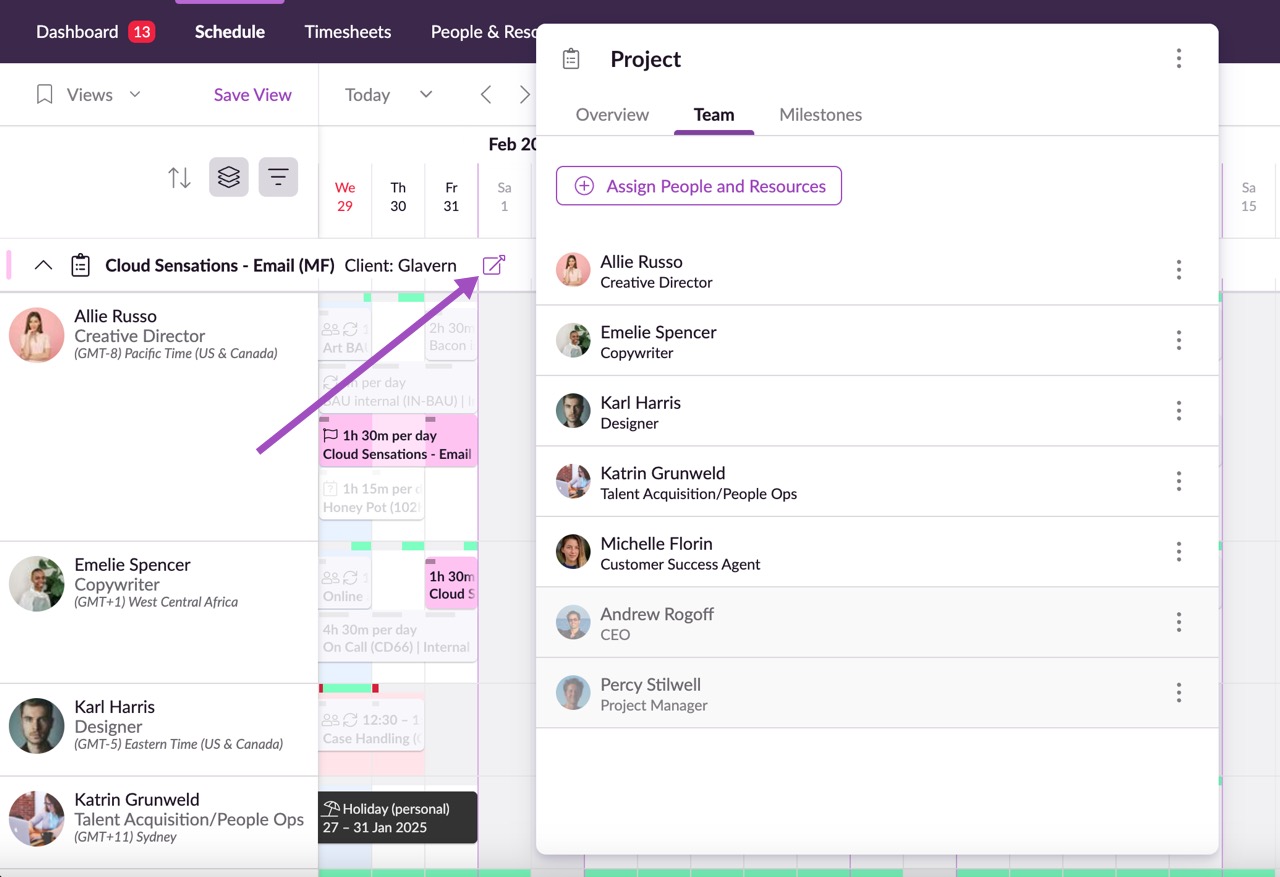
Once a team is added to a project, the Schedule will reflect this assignment when grouping the Schedule by project, making it easy to see the team’s involvement in one place. Hidden team members (here shown in grey) won't be shown in the grouped view.
Start & End Dates in Grouped Views
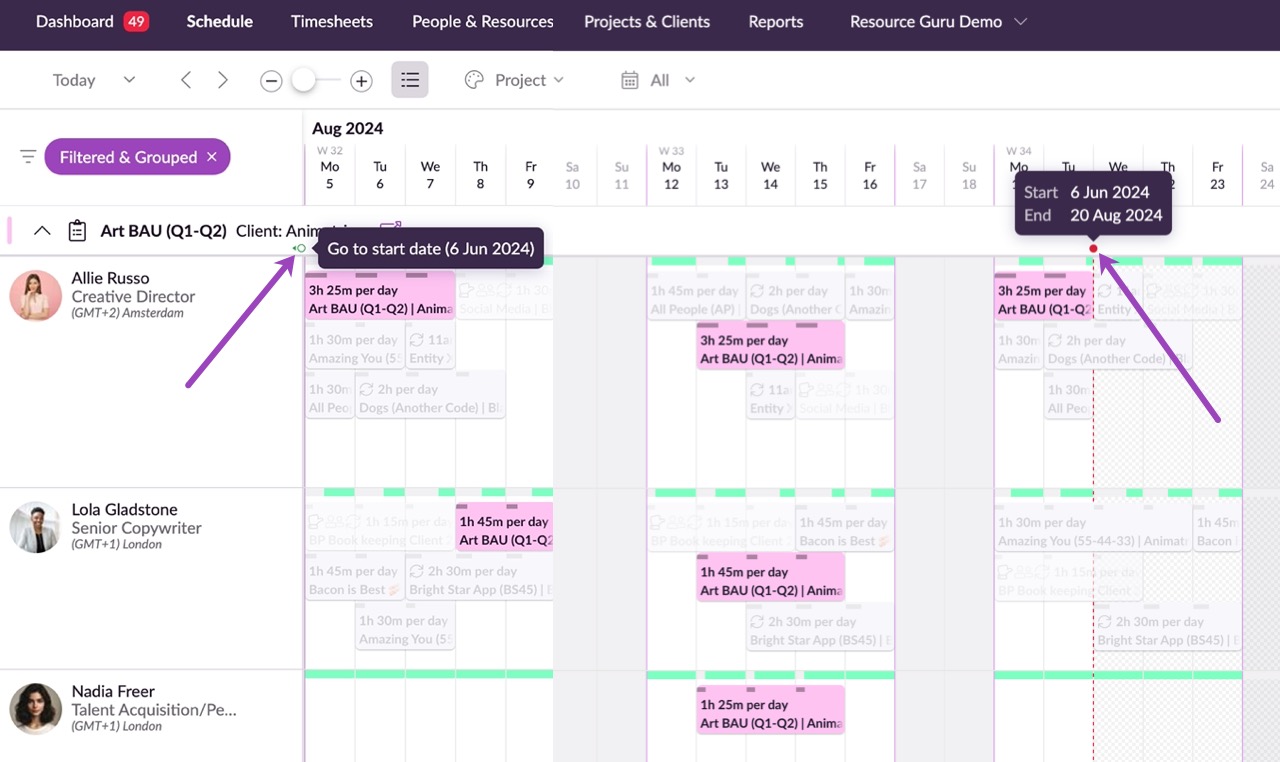
If you added a start and/or end date to your project, you can jump between the start and end date by clicking on the green or red circle in the relevant column.
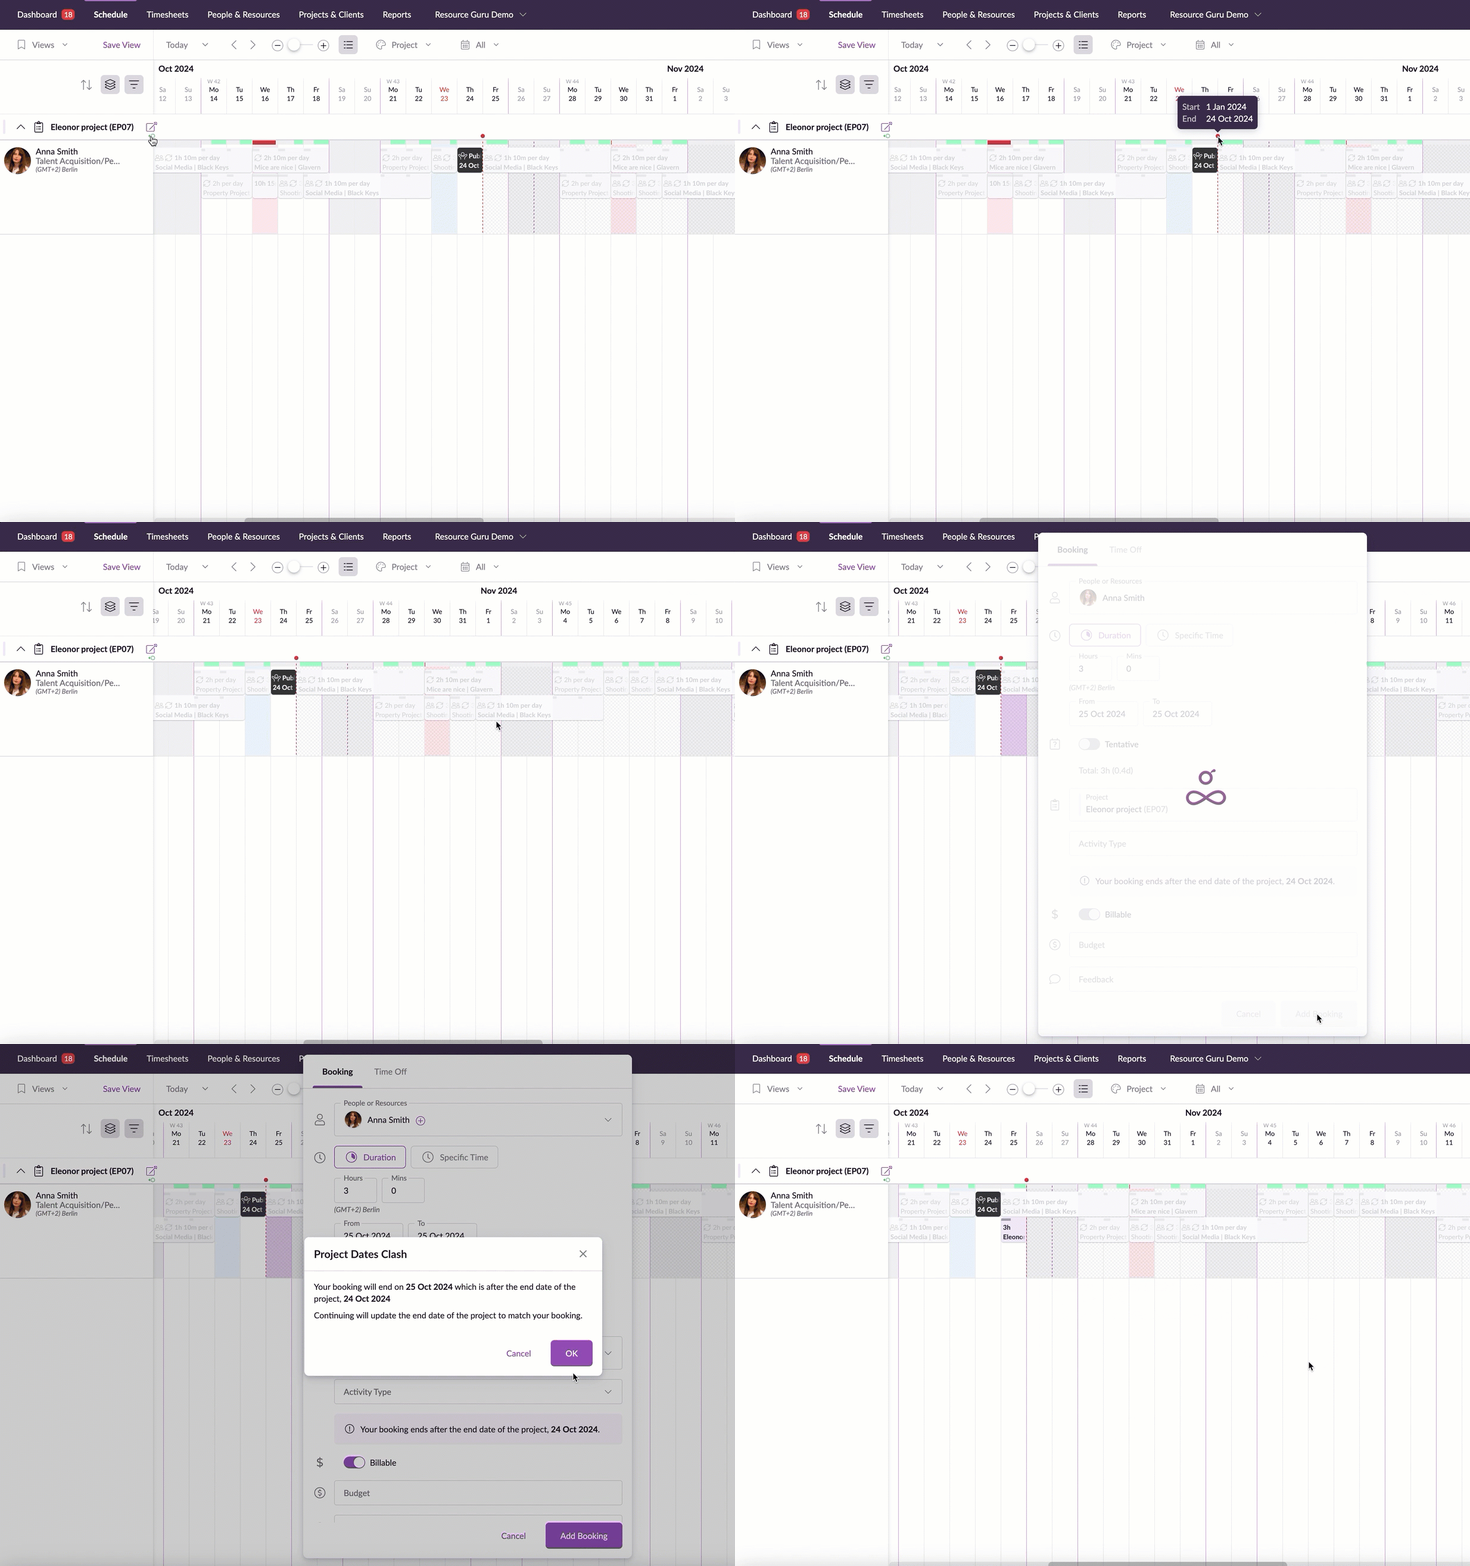
If you set a start and/or end date for a project, your team will only be able to create bookings for the project between the dates specified.
A booking clash warning will be displayed if you try to create a booking for a project before its start date or after its end date.
Finally, to remove any grouping, just click on the Group By icon and choose None.

