
Add People, Placeholders and Other Resources
Please note: Our pricing is based on the number of people and other resources you add to your account, whether people are invited or not and regardless of their permissions. You need to have manager or higher permissions to add people profiles and other resources. Contact an administrator in your account if you need increased permissions.
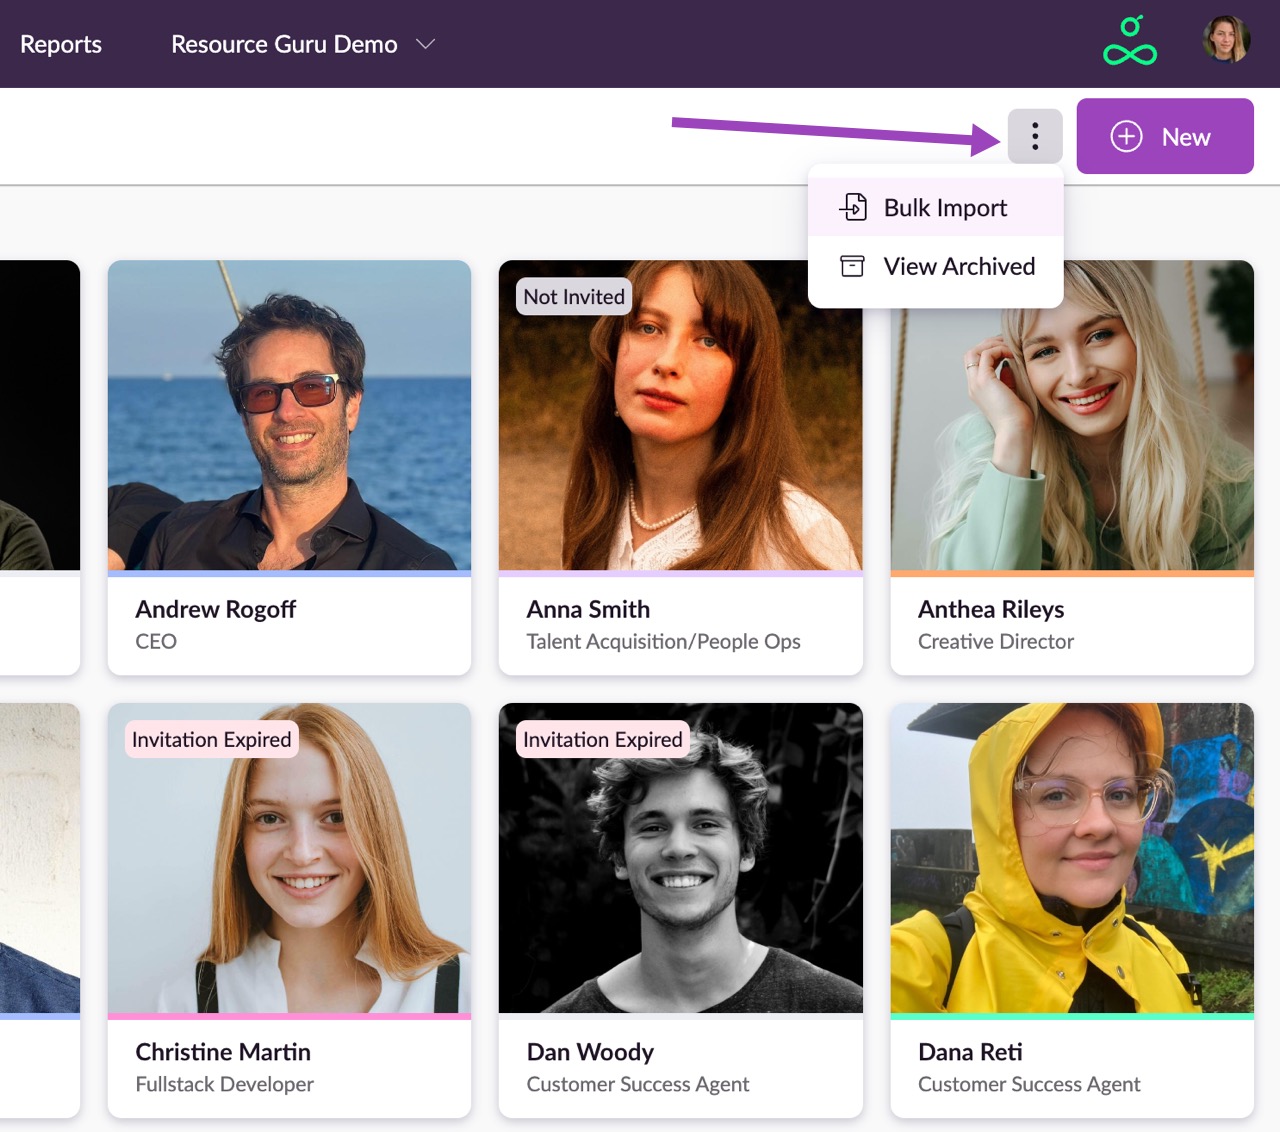
If you're setting up your account, you can save time by using our bulk import feature to add your entire team in one go. Learn more here.
Adding People
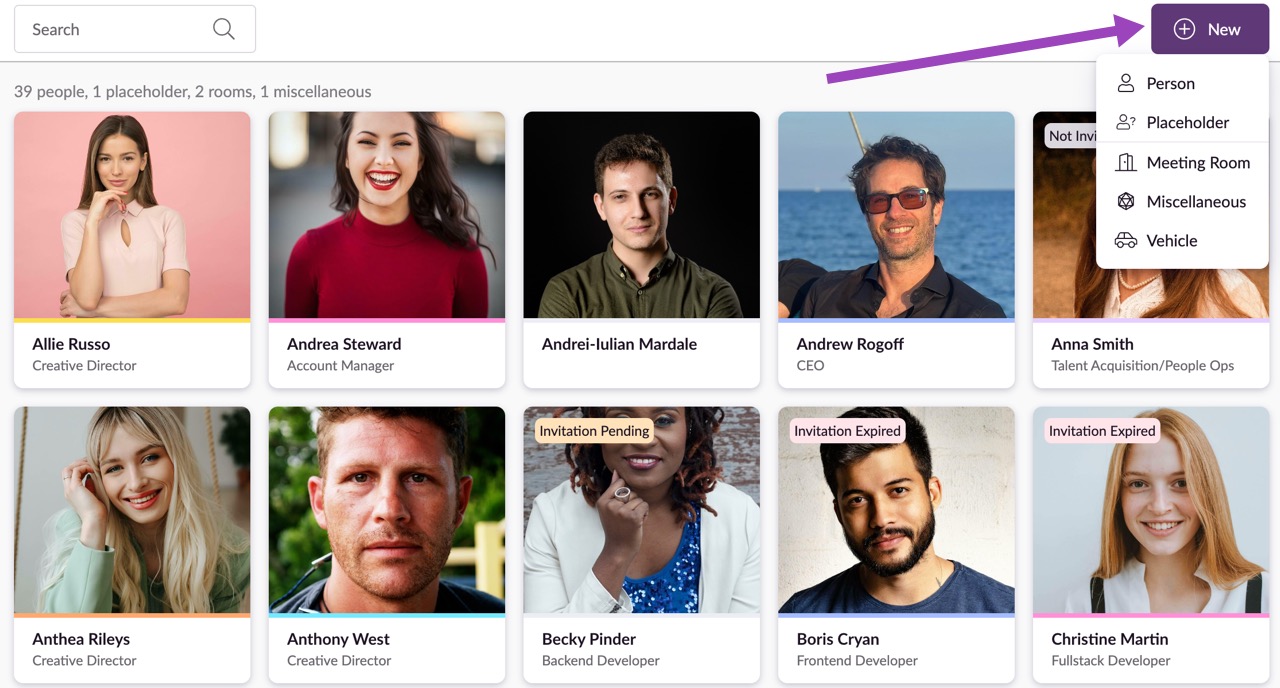
Select Person as your resource type from the +New button > dropdown menu.
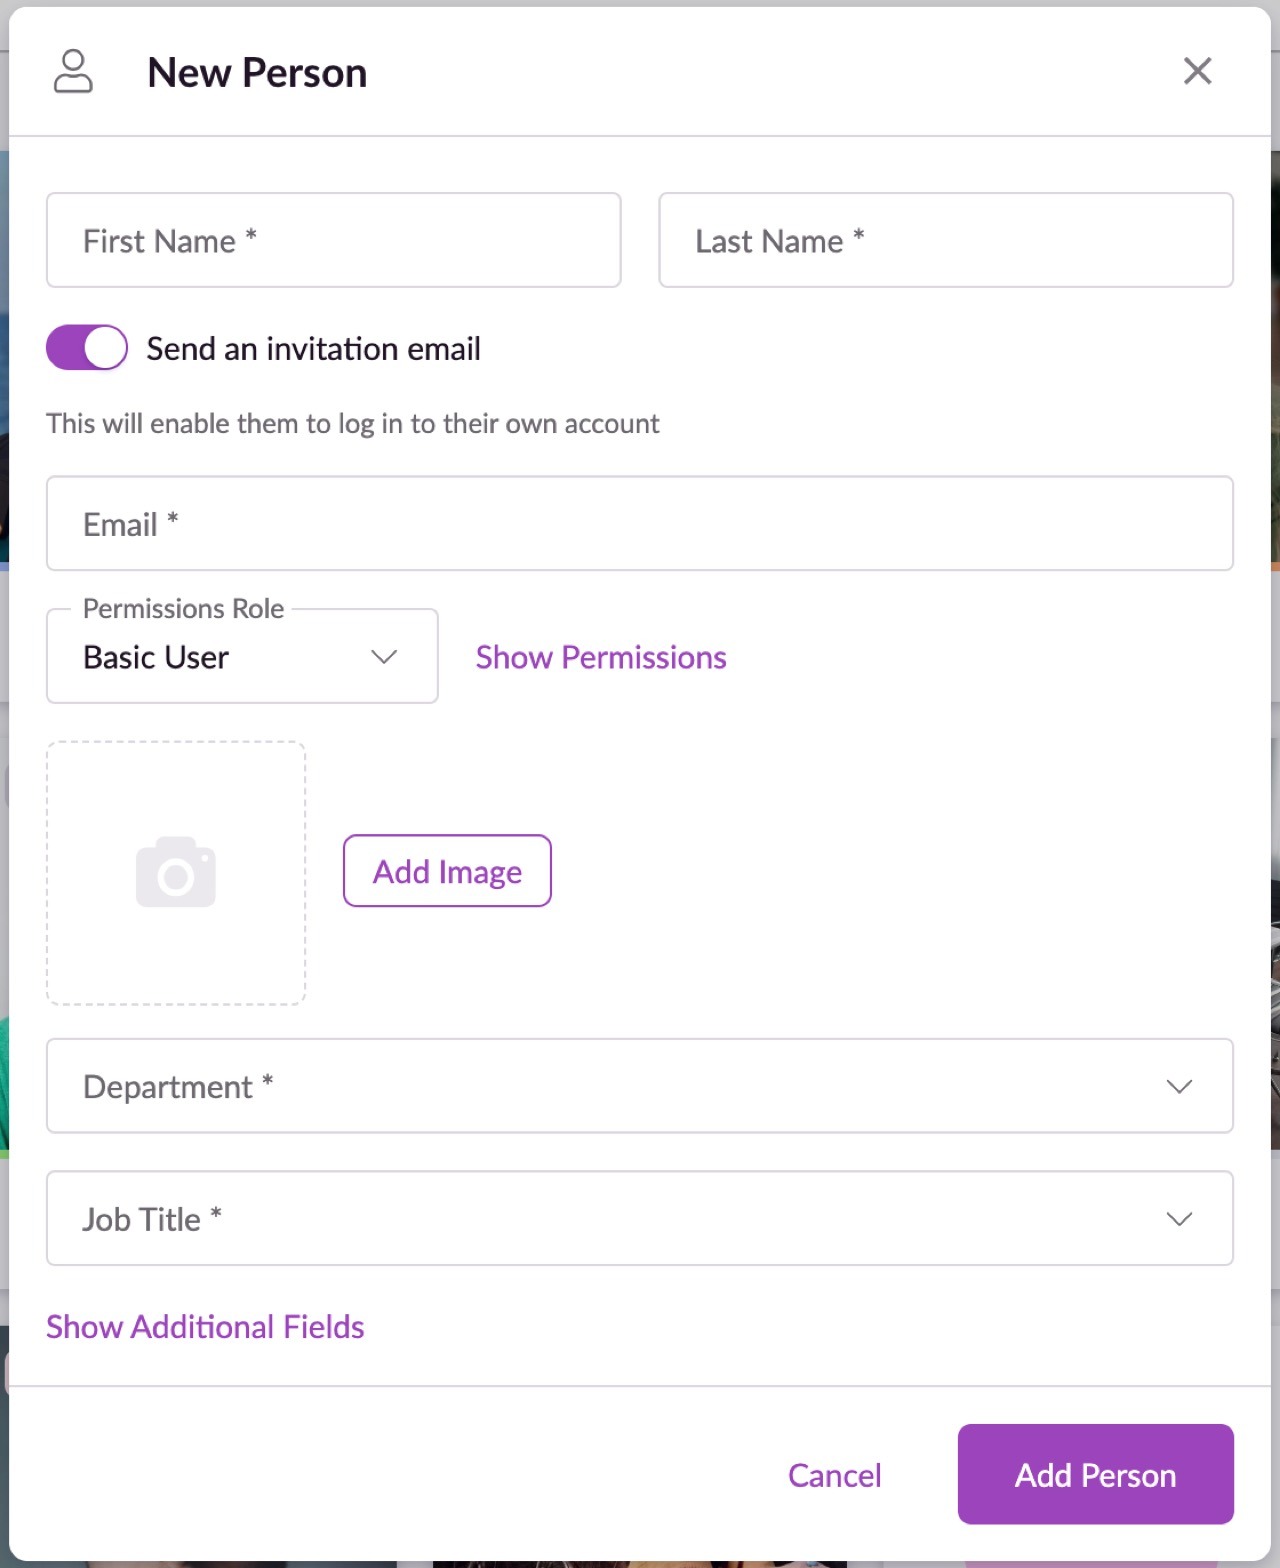
When adding a new person, you'll find several additional input options beyond those available for non-human resources such as Name, Time zone, Normal availability, Bookable status, what rate card they're assigned to, Booking approvers, Photo, and Notes:
Invite this person to join your account - If you want someone to have their own Resource Guru login, you’ll need to invite them into your account by leaving this option checked. You will also need to add a valid email address. You can always invite or re-invite an existing person at a later date by clicking Invite or re-send invite after the person has been added.
To invite a person who’s already been added to your account, click on their profile card in the People & Resources section, then click Invite on the left-hand column of the card. Choose their permissions before sending out the invitation.
Email - Adding an email address is optional if you’re not inviting the person into your account.
Permissions - If you’re inviting a person into your account, the permission settings will appear in the New Person form. You can read more about configuring permissions here.
Additional Fields:
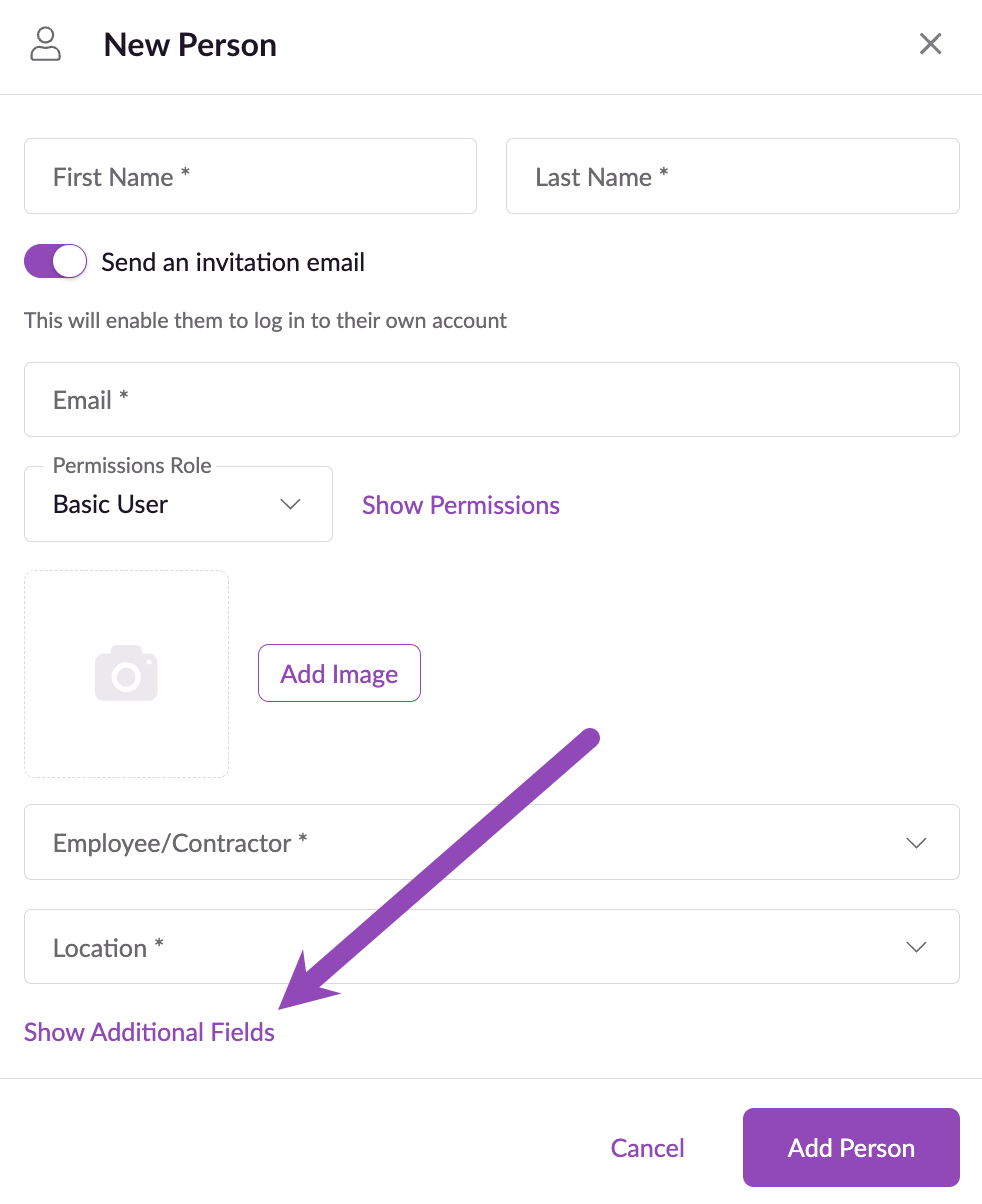
When you click Show Additional Fields you’ll be shown any custom fields you’ve created, along with Job Title, Department and Skills (which are default fields). You’ll also see the following:
Availability & Scheduling
After setting your time zone, designating whether the person is bookable, and assigning a reviewer for their timesheets, you can add their weekly recurring availability.
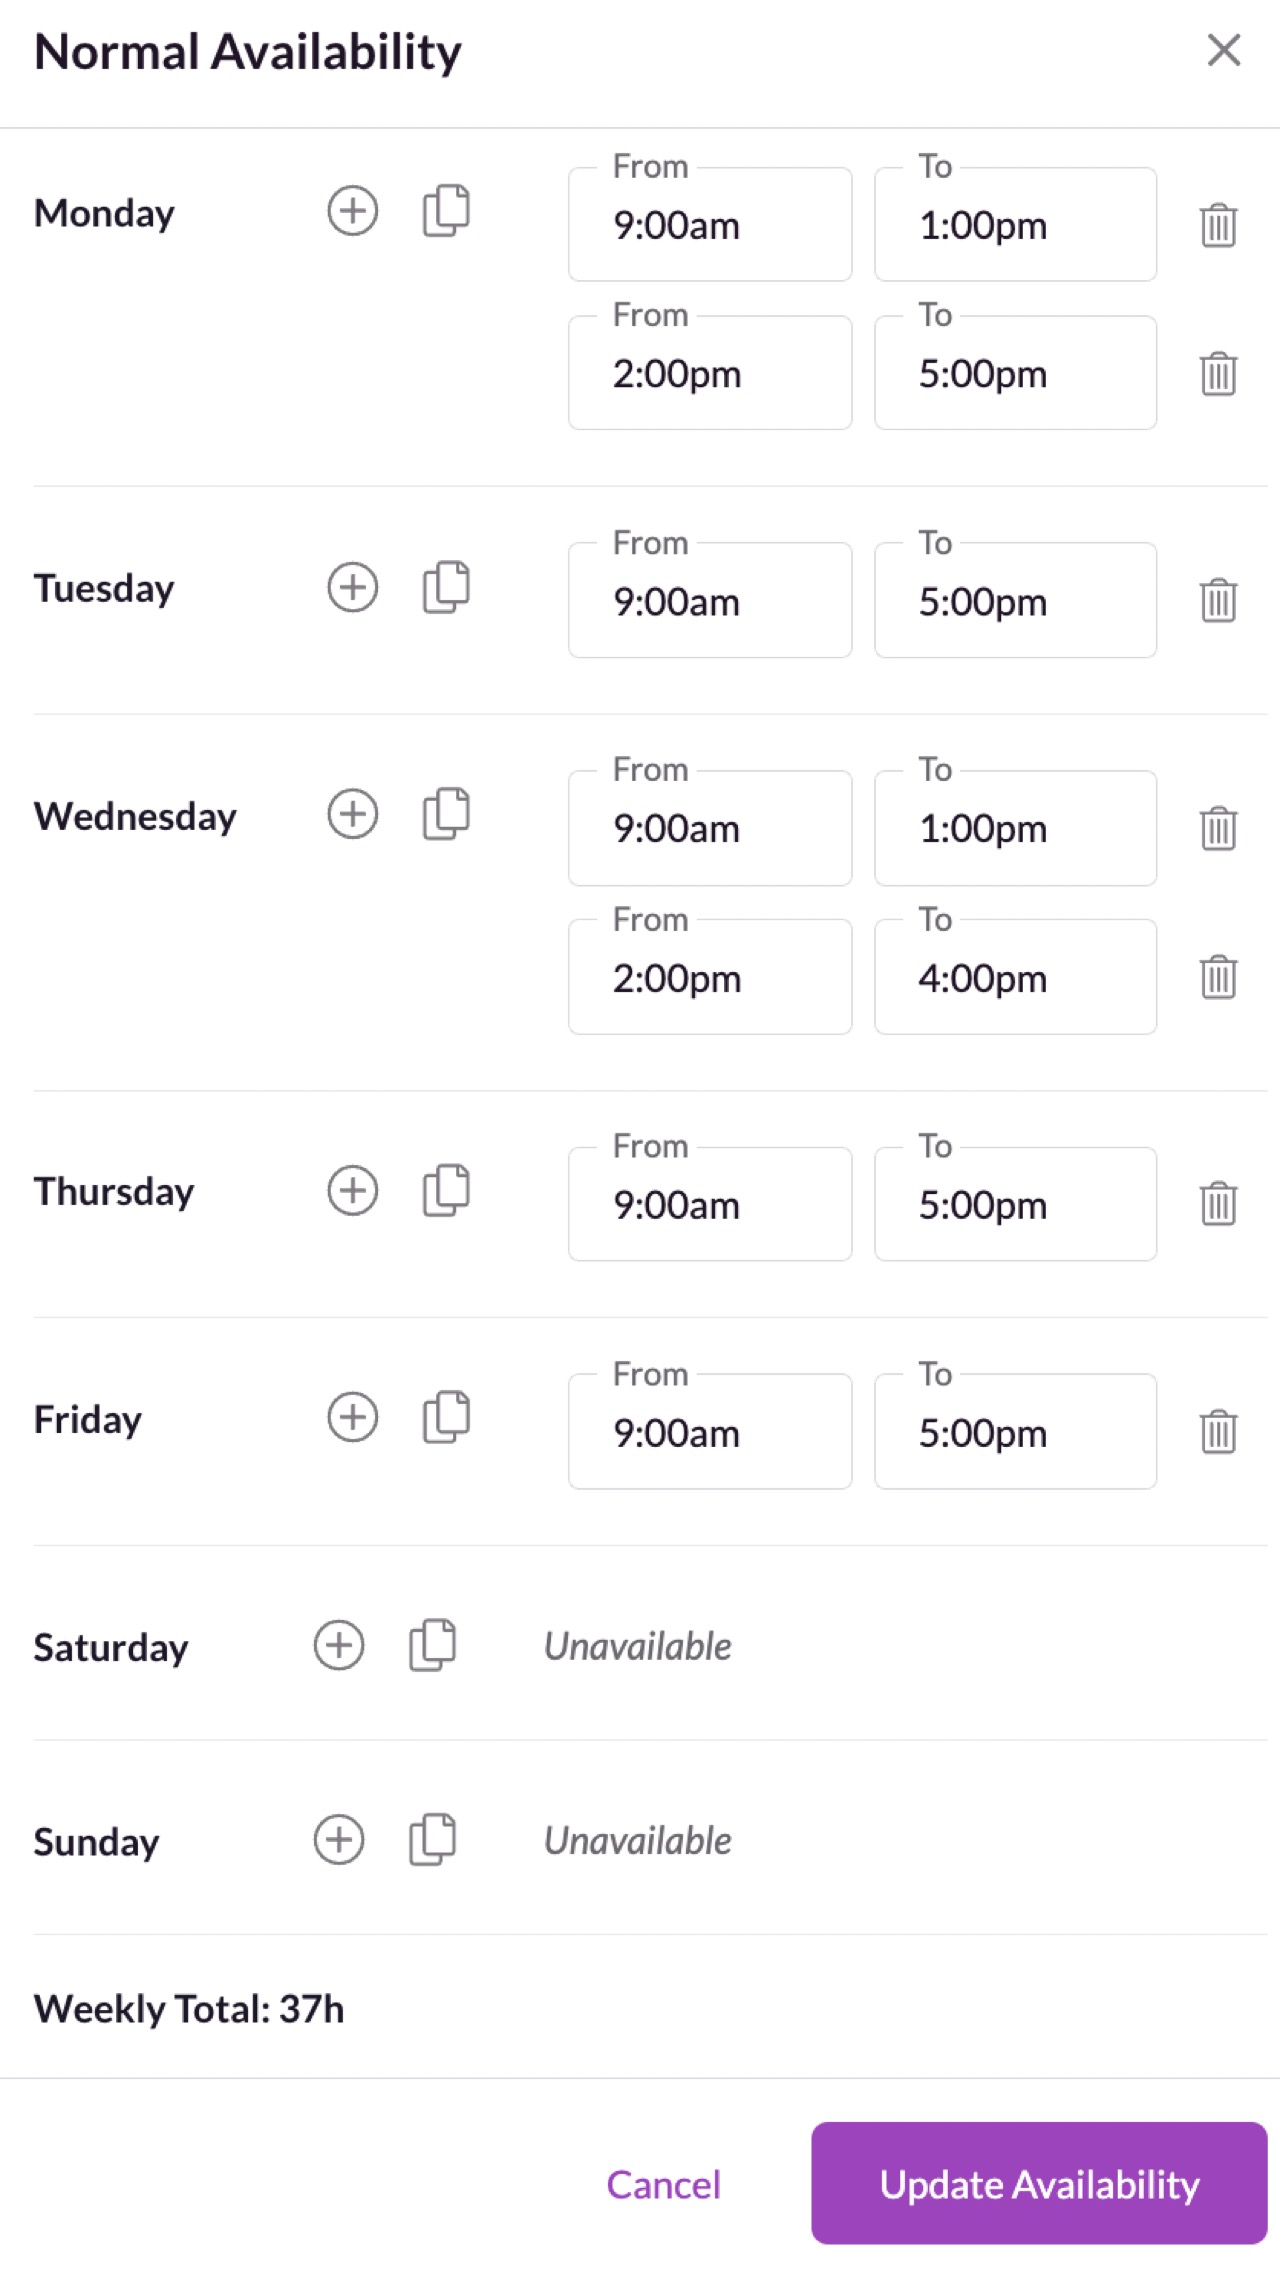
This is where you can configure “normal” availability, meaning the times that person or resource is typically available. Default availability is based on the settings in your account (only accessible to Admins), but you can override the default availability for each person or resource you add. To remove an existing time block, click the small trash can icon next to it. To add a new time block, click the + button for the desired day and a new block will be added; the times can then be edited.
Guru tip
Because Normal availability is based on the settings in your account, it’s a good idea to configure your account’s preferred default availability in Settings prior to adding resources.
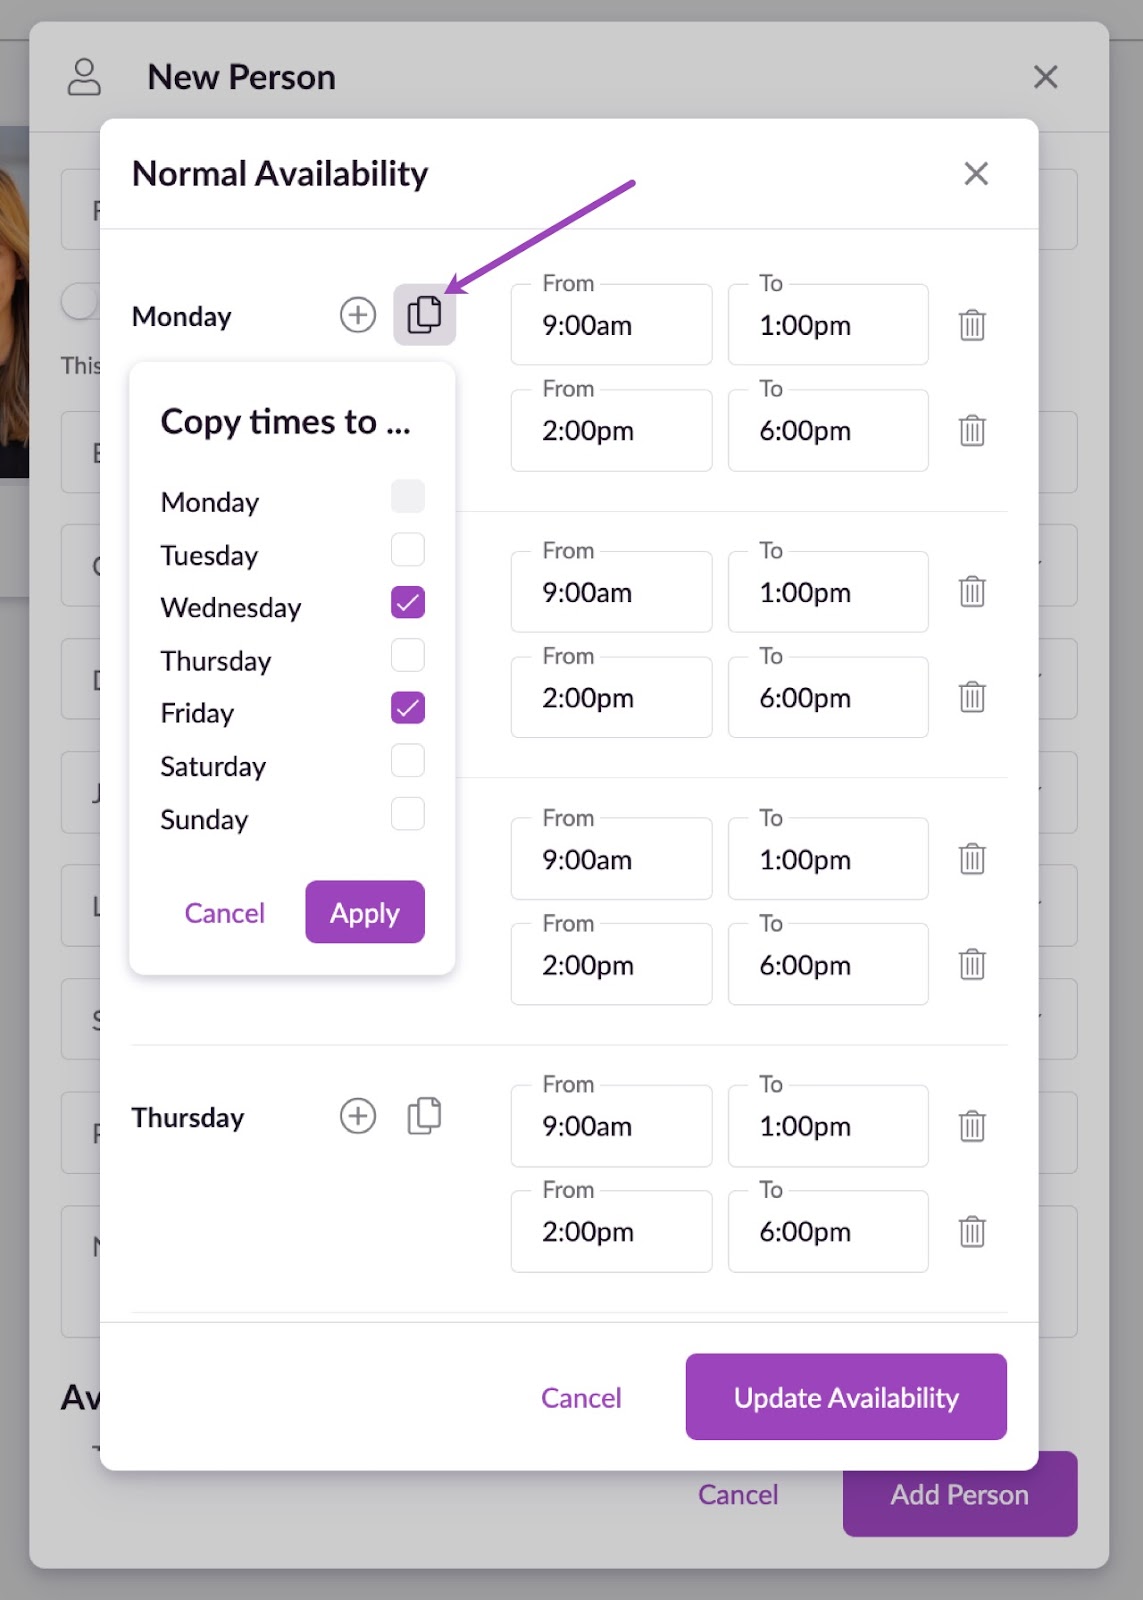
To speed up the process, you can copy the availability blocks from one day to other days. Click on the copy icon (next to +) and choose the days you would like to copy the time to.
Color
Assign a color to each team member. This works in conjunction with the Color by Booker option in the Schedule so you can easily see bookings that have been made by specific people. If a person has no profile picture, the color you assign to them will also be visible next to their name in the Schedule.
Adding Placeholders
Please note: The number of free placeholder resources available depends on your plan. The Grasshopper plan includes 1 placeholder, the Blackbelt plan includes 5, and the Master plan includes 10. If you exceed the allowance on your plan, any additional placeholders will be charged at your standard per-person rate.
Placeholder resources are ideal for planning projects in advance, when you know the scope of the work, but you’re unsure who it will be assigned to.
Instead of delaying your planning, you can "park" the booking on a placeholder to outline your project plans, then easily reassign it to the appropriate people or resources later. This allows you to forecast future work, gain clarity on resourcing needs, and plan accordingly.
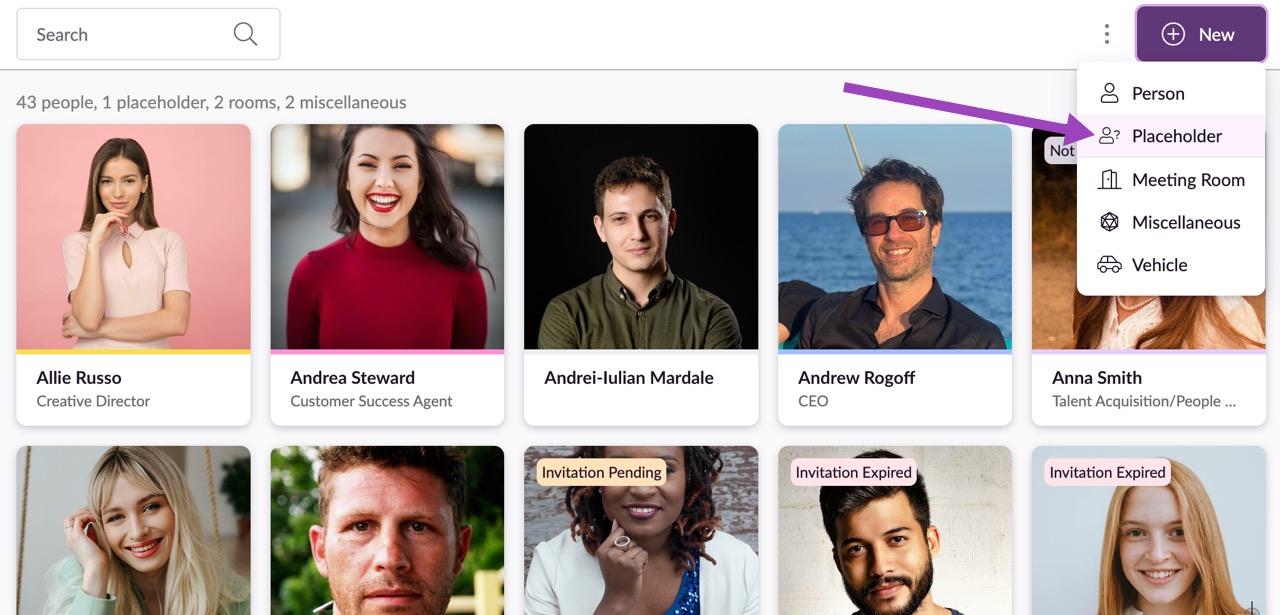
Select Placeholder as your resource type from the +New button > dropdown menu.
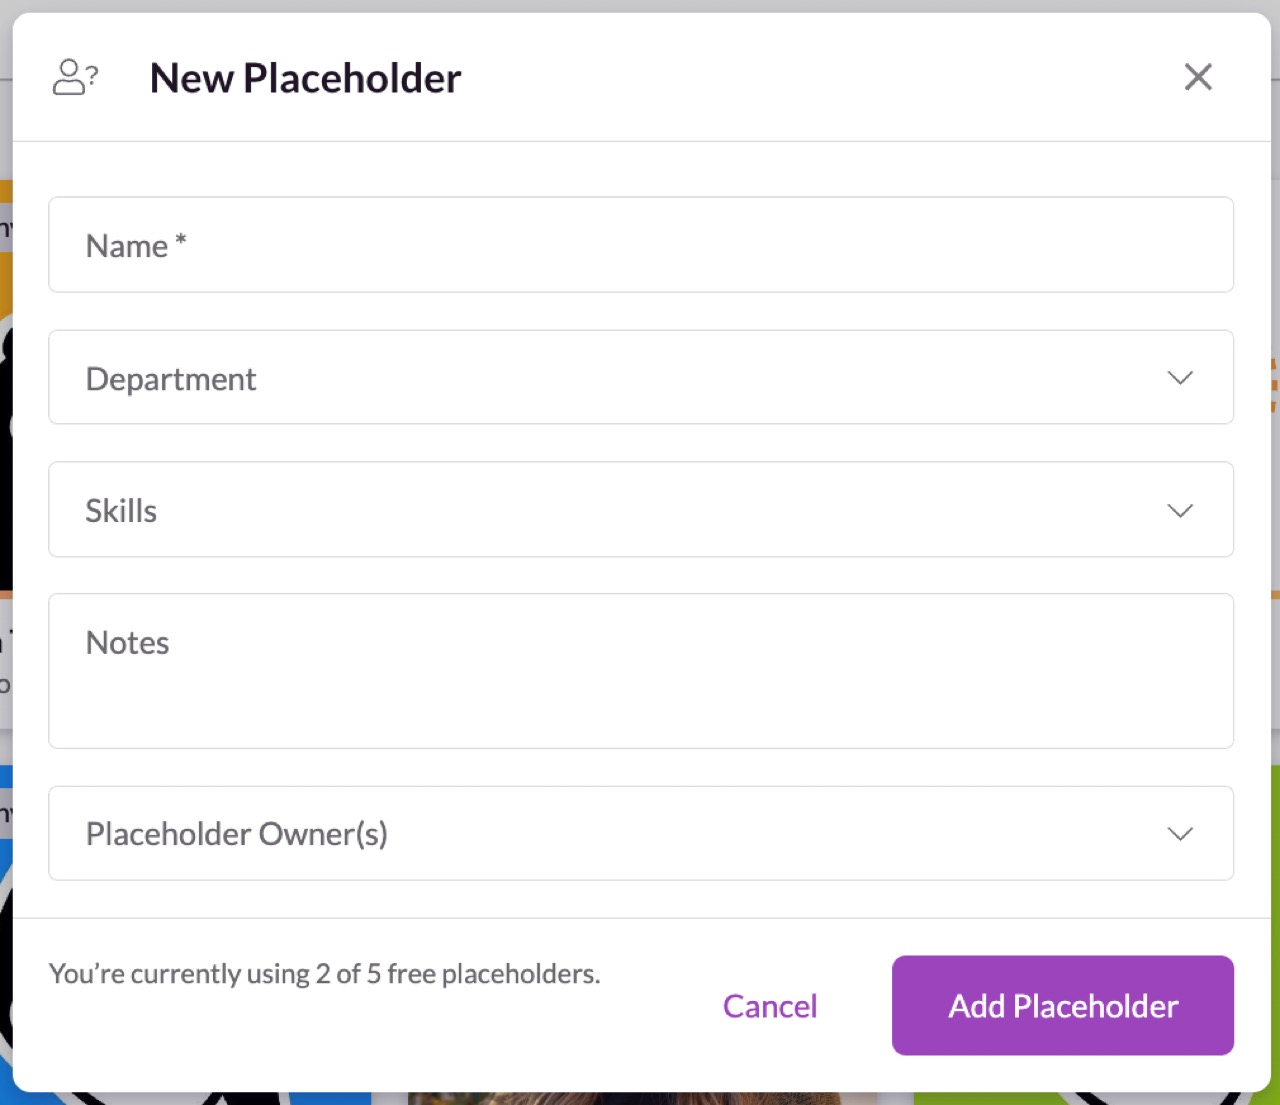
Just like other resource types, Placeholders can be customized and managed to support your planning workflow. You can assign them to a Department, allocate Skills, and add custom fields, allowing them to replicate the profile of the team members who might take on the work you’re planning. You can also assign owners, these are invited users and we suggest giving them permission to edit all bookings, responsible for reassigning work from Placeholders to actual team members or resources.
However, you cannot add a profile photo or customize their colour – these are unique so they stand out from other people and resources.
Managing Placeholder Bookings
You can create bookings for Placeholders just like you would for any other resource in your account. When you're ready to assign the work, simply drag the booking from the Placeholder to a person, or click into the booking to update the assigned resource.
If you're assigned as a placeholder owner, you'll receive updates in your Daily Schedule email, including the number of bookings that still need to be reassigned.
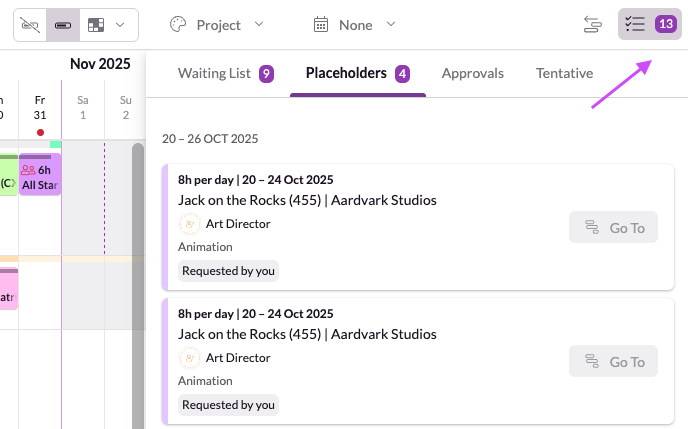
You can also view a list of your Placeholder bookings in the Actions Drawer, making it even easier to manage upcoming work and ensure nothing slips through the cracks.
Placeholders vs. Other Resources
There are some key differences though. Placeholders:
Have unlimited availability - you can add as many bookings as you like to a placeholder and time specific bookings can overlap. Clash management doesn’t exist so overtime and the Waiting List don’t apply to placeholder bookings.
Cannot be assigned downtime.
Have UTC time zone and will assume either the time zone of the person creating the booking or, if added to a multi-person booking, the time zone of existing bookings they’re added to.
Grouping and Filtering by Placeholders
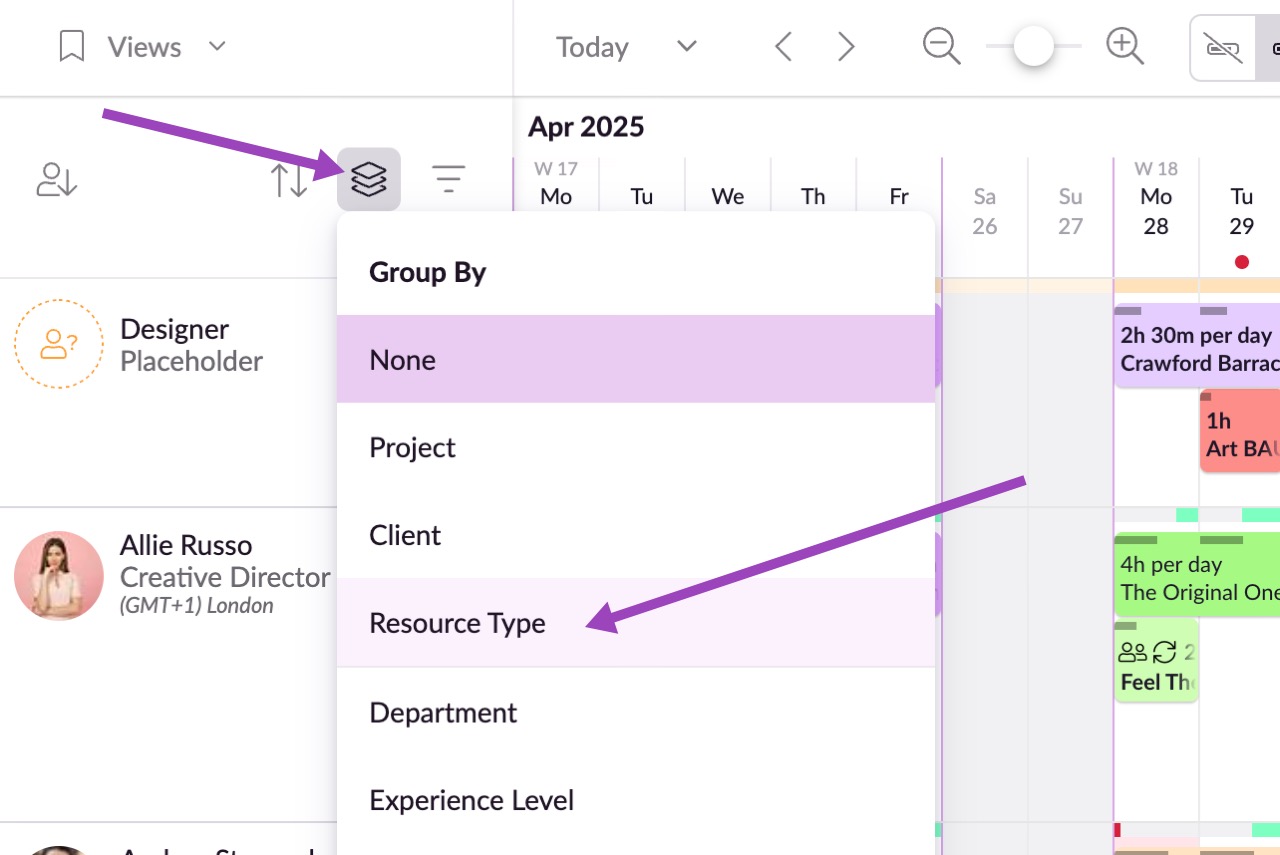
In the Schedule, you can group by Resource Type to view people, non-human resources, and placeholders separately.
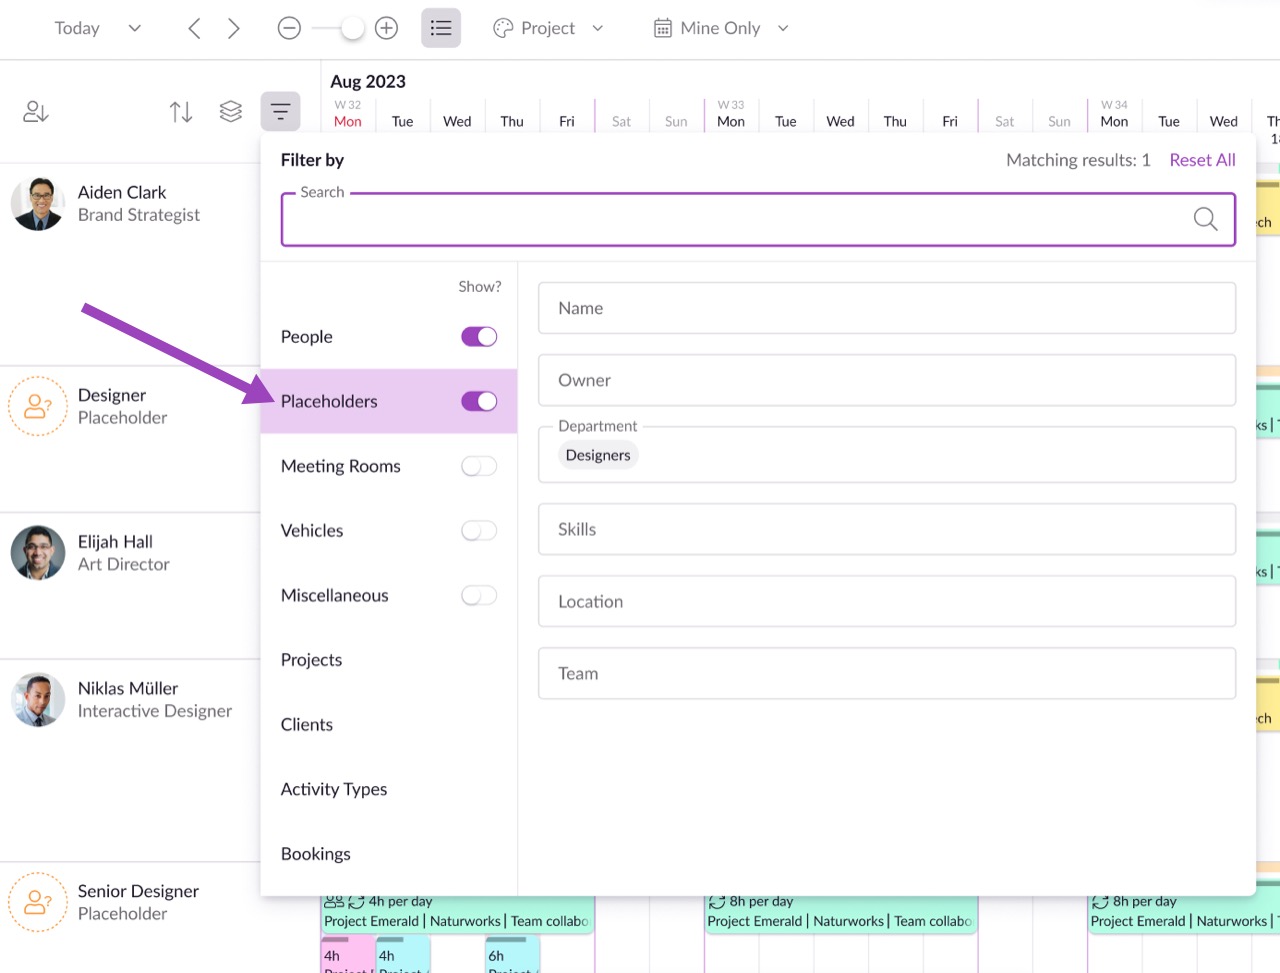
You can also filter by specific placeholders, using custom field attributes to quickly find the right one. Include them in Saved Views for easy access, or pin them to the top of your Schedule to keep them visible at all times.
When using the heatmap view, placeholders display the total time booked per day, rather than remaining availability, since there is no limit to how many hours they can be assigned.
Using Placeholders to Report on Capacity vs. Demand
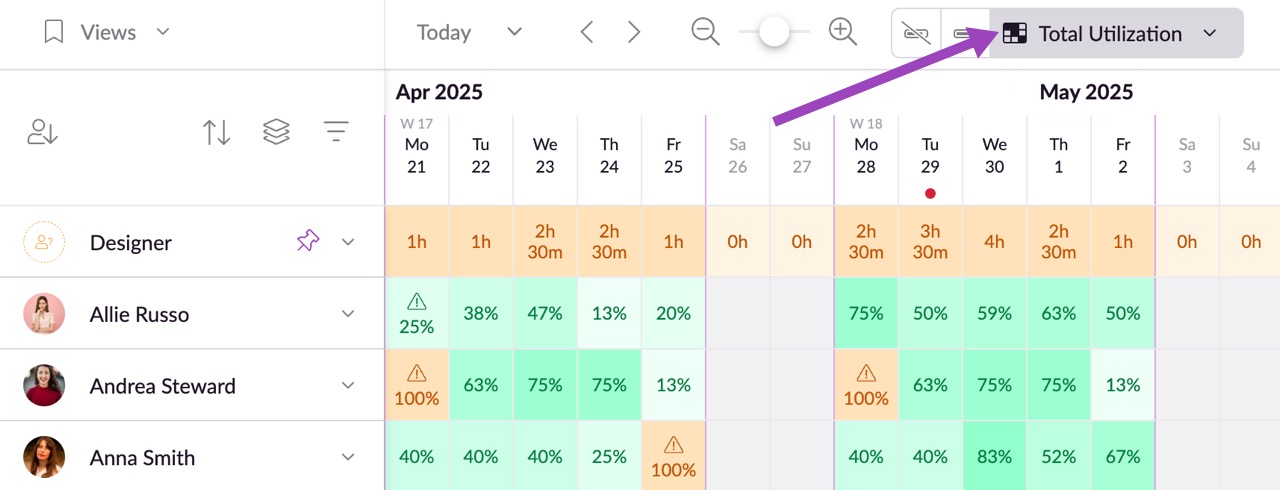
Placeholders are a great way to help you get visibility of capacity vs demand. For example, if I want to see how the design department is looking over the next few weeks, I can filter to “Designers” and “Design Placeholders” and save the view as “Design Capacity”. I can then go to the Utilization & Capacity report in Reports and apply that saved view using the filters.
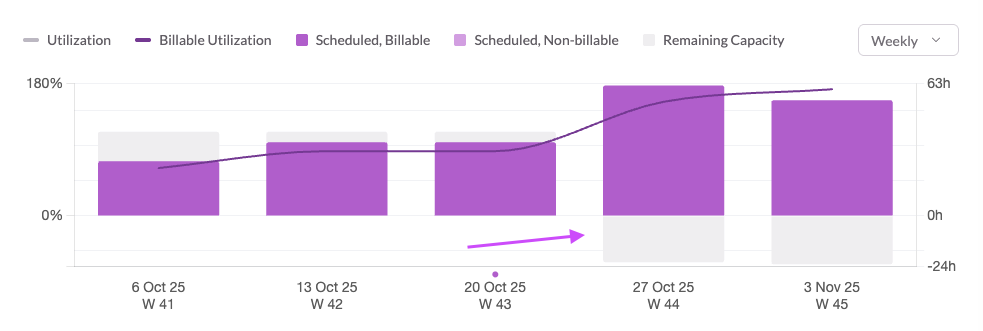
Here I can see that I’m going to run into trouble in the next two weeks if I don’t reallocate some work or get some freelancers to help.
Adding Other Resources
Please note: Other resources can only be booked for specific times, as opposed to durations (e.g., 4h); this is because they can’t manage their own time. See Creating bookings for details on the different booking types.
There are three different types of other resources: Meeting Room, Miscellaneous and Vehicle.
Once you’ve entered the basic information for your new resource, click Show Additional Fields to amend the resource’s availability, give it a color, and enter any custom field options.