
Set up of Approvers and Approving Bookings
Please note: Approval Workflow is included with the Master plans. If you’re a Blackbelt or Grasshopper subscriber, upgrade now to gain instant access to Approval Workflow.
The approval feature allows you to control who can approve bookings for which people or resources, giving you more power over how you manage your schedule.
People in your account can be set as Approvers; you can designate default approvers, or specify individual approvers for specific people or resources.
Enabling the Approval Workflow
For a full walkthrough on how to enable this feature, please see the article on Enabling and Disabling the Approval Workflow.
Setting and Editing Default Approvers
Default approvers are people who will automatically be set as an approver for any new people or resources that are added to your account. You don’t have to set default approvers, but if there are people in your team who have overall authority to approve bookings, then adding them here will save you time in the future.
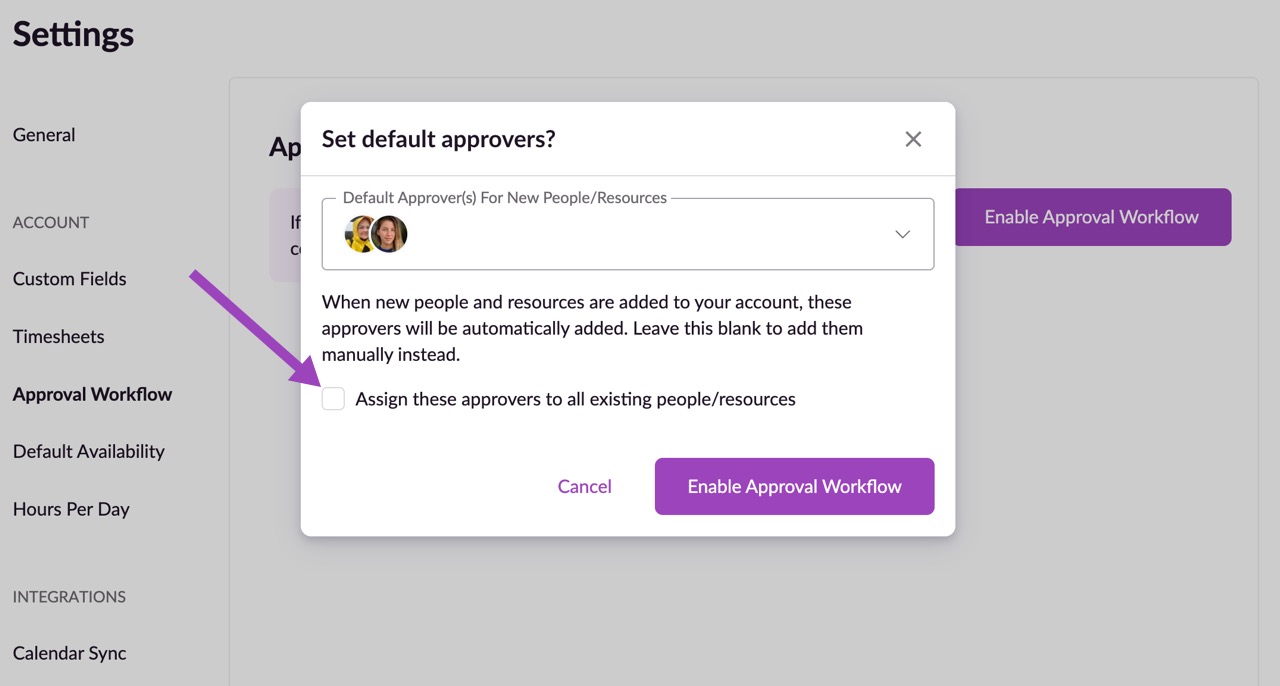
If you add a default approver you’ll see an option to assign the approver/s to all existing people/resources in your account. Checking this box will mean that the default approver/s are also set as approvers for existing people/resources in the account.
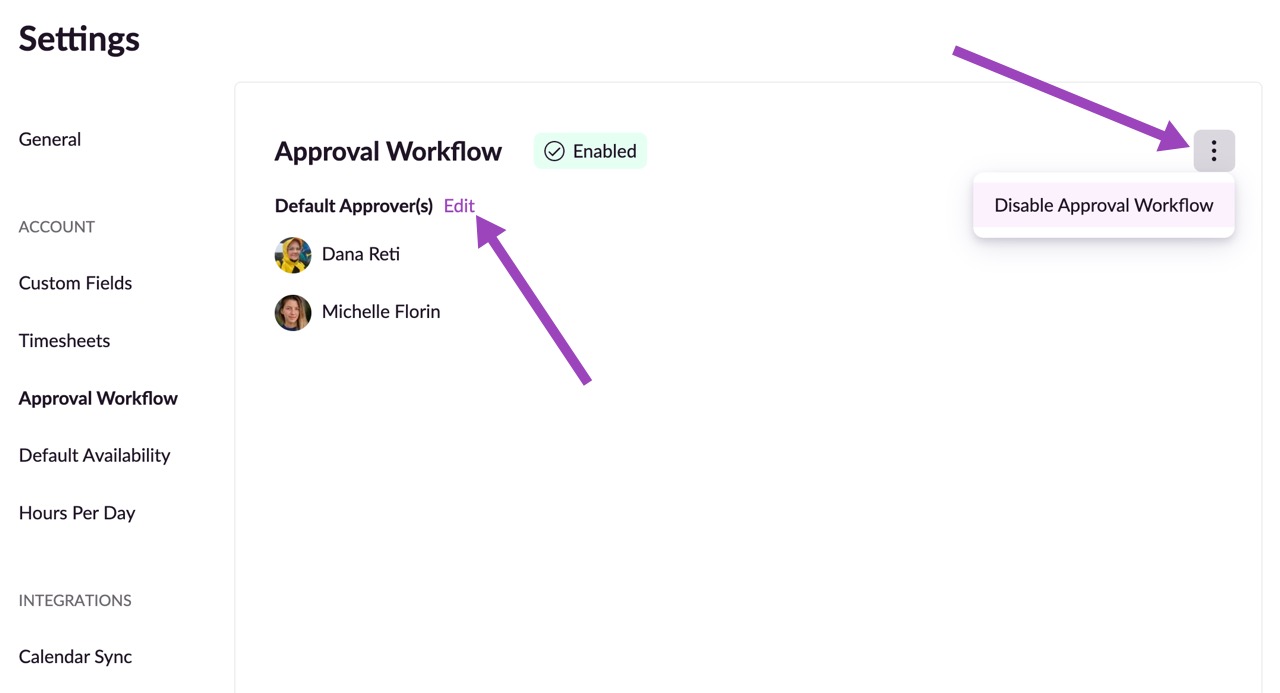
To edit default approvers in your account, click Edit next to Default Approver(s) in Settings.
Please note: You’ll need Administrator permissions in order to add or edit approvers.
Setting Approvers for Individuals
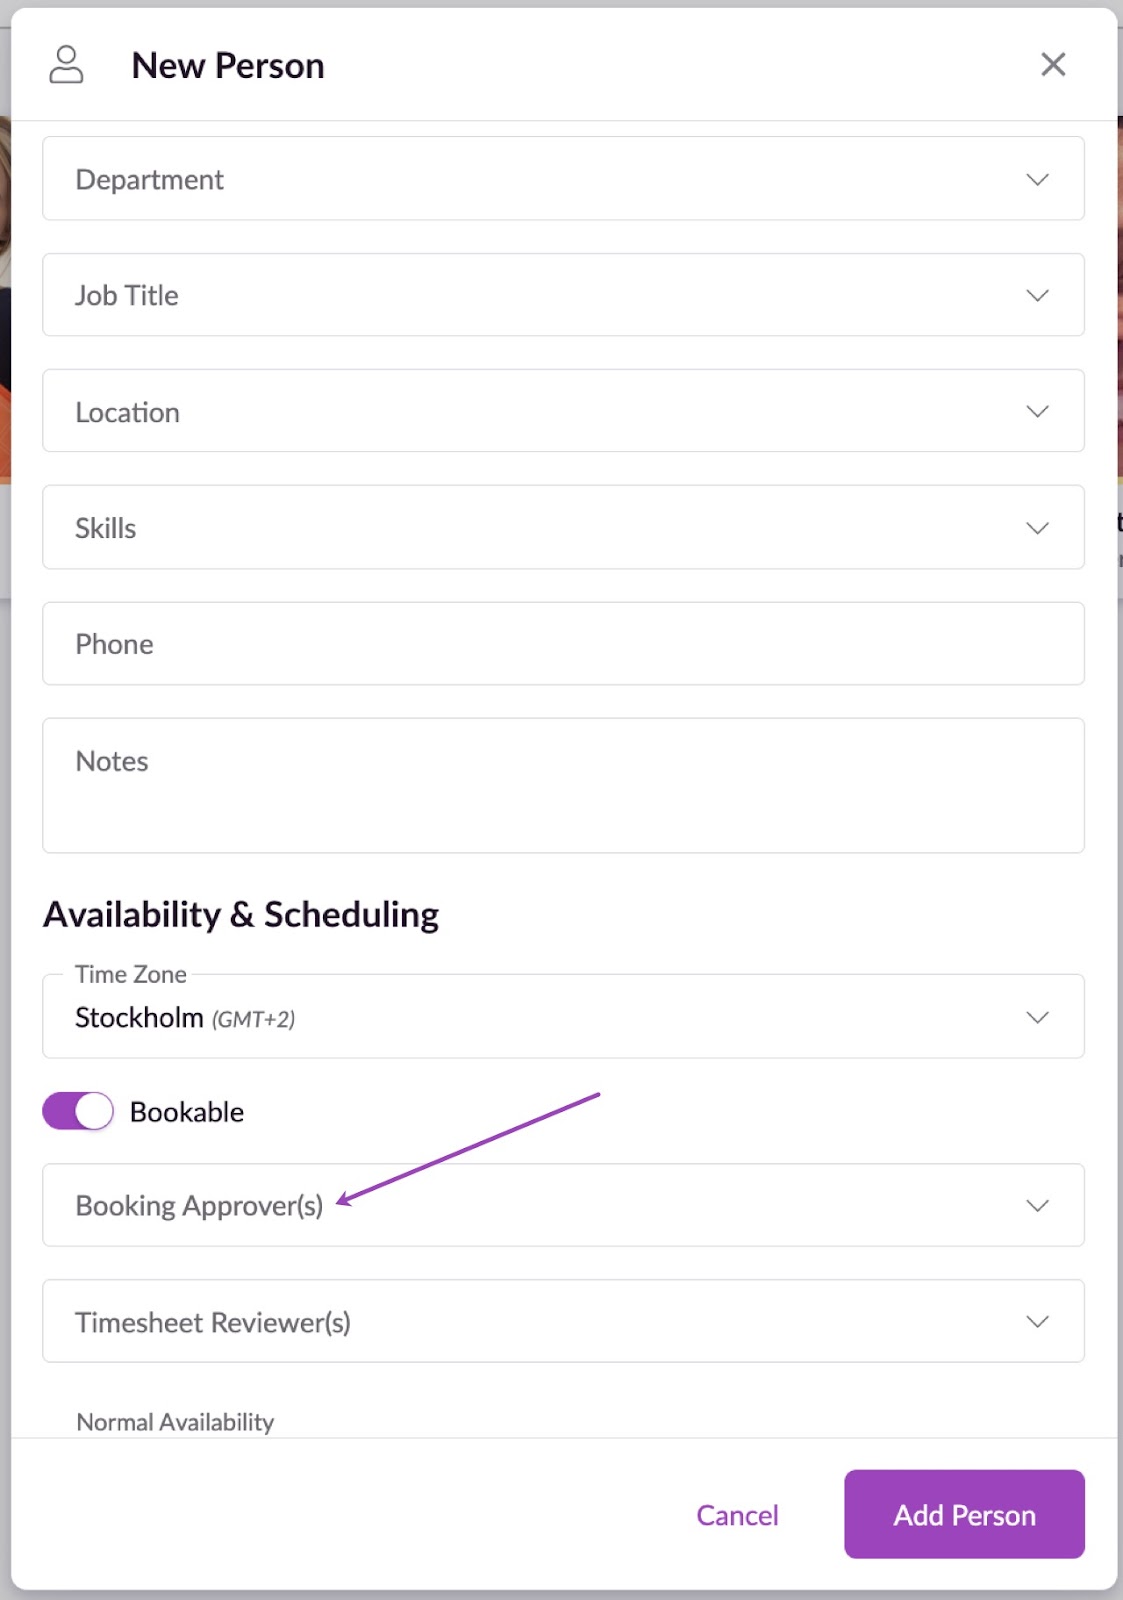
When creating a new resource, you’ll see a field called Booking Approver(s); you can add one or more approvers here. If there are default approvers in your account, they will be added to the New Resource form automatically, but you can remove them if required by clicking the X next to their name.
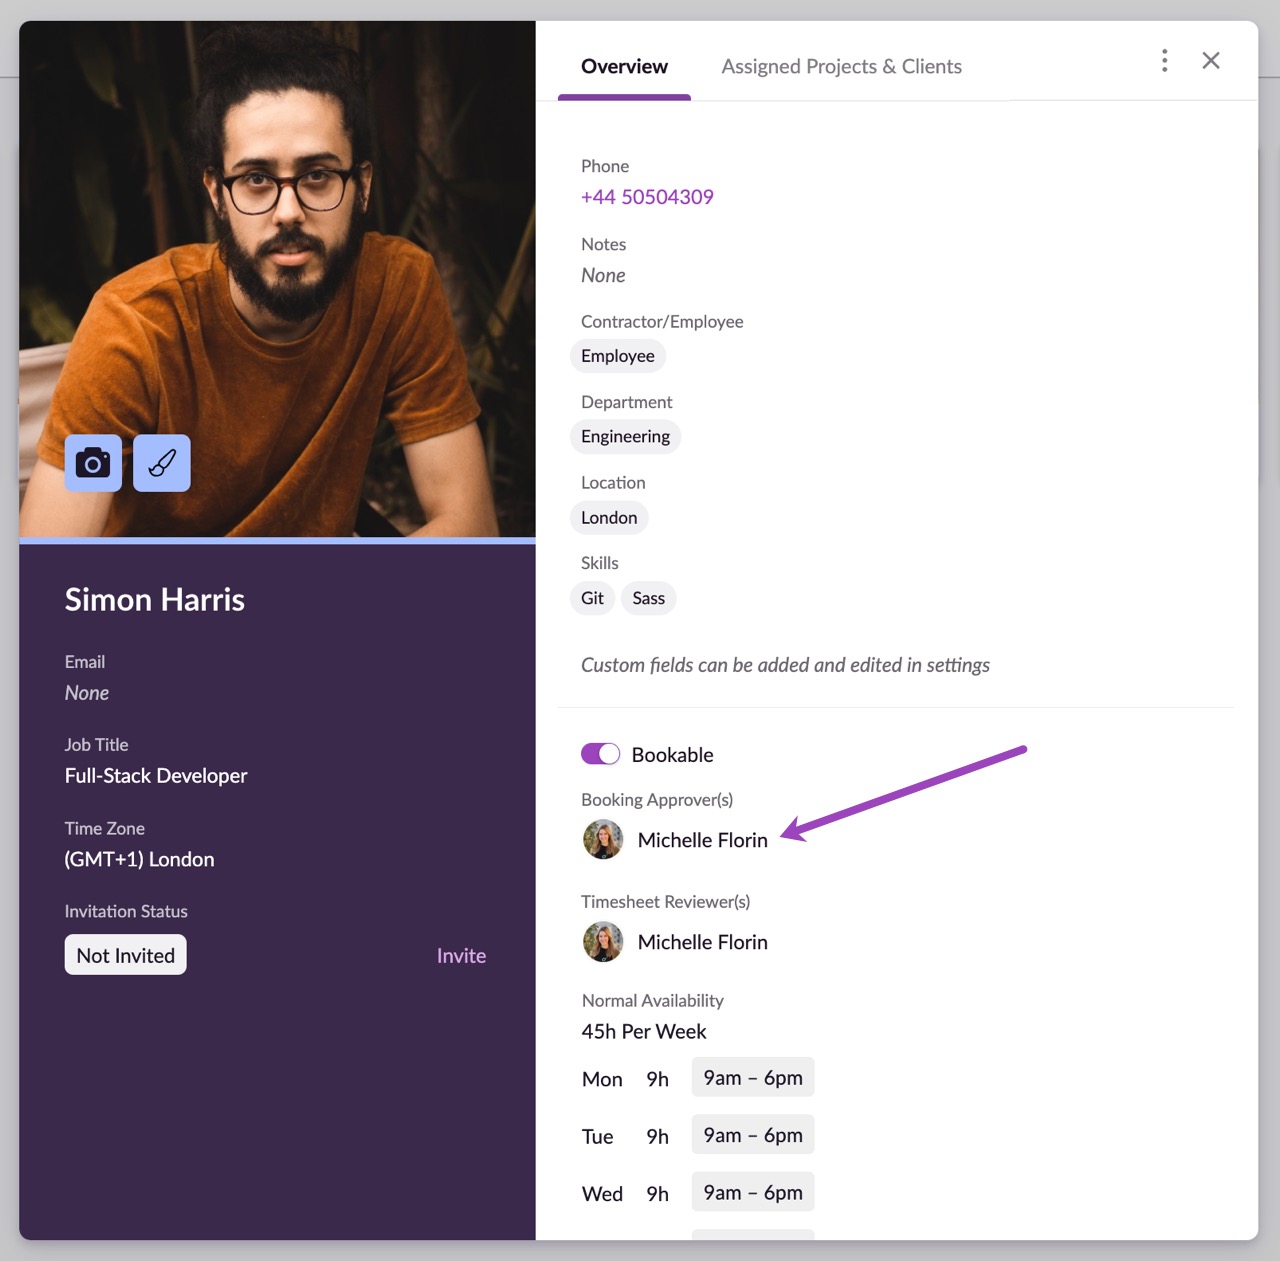
To set the booking approver of an existing resource, click to edit the relevant resource and then specify the bookers in the Booking Approvers field.
Setting Freelancers as Their Own Approvers
Anyone can be an approver, even those with Dashboard only access. So, if you work with freelancers who need to accept the bookings you make for them, but you don’t want to give them full access to the Schedule, that’s no problem. Just set their permissions accordingly and make them an approver for themselves; they can then approve any bookings which are made for them via their personal Dashboard or their Schedule.
Approving and Declining Bookings Via the Dashboard

If you are an approver you can review, approve or decline booking requests from within your Dashboard.
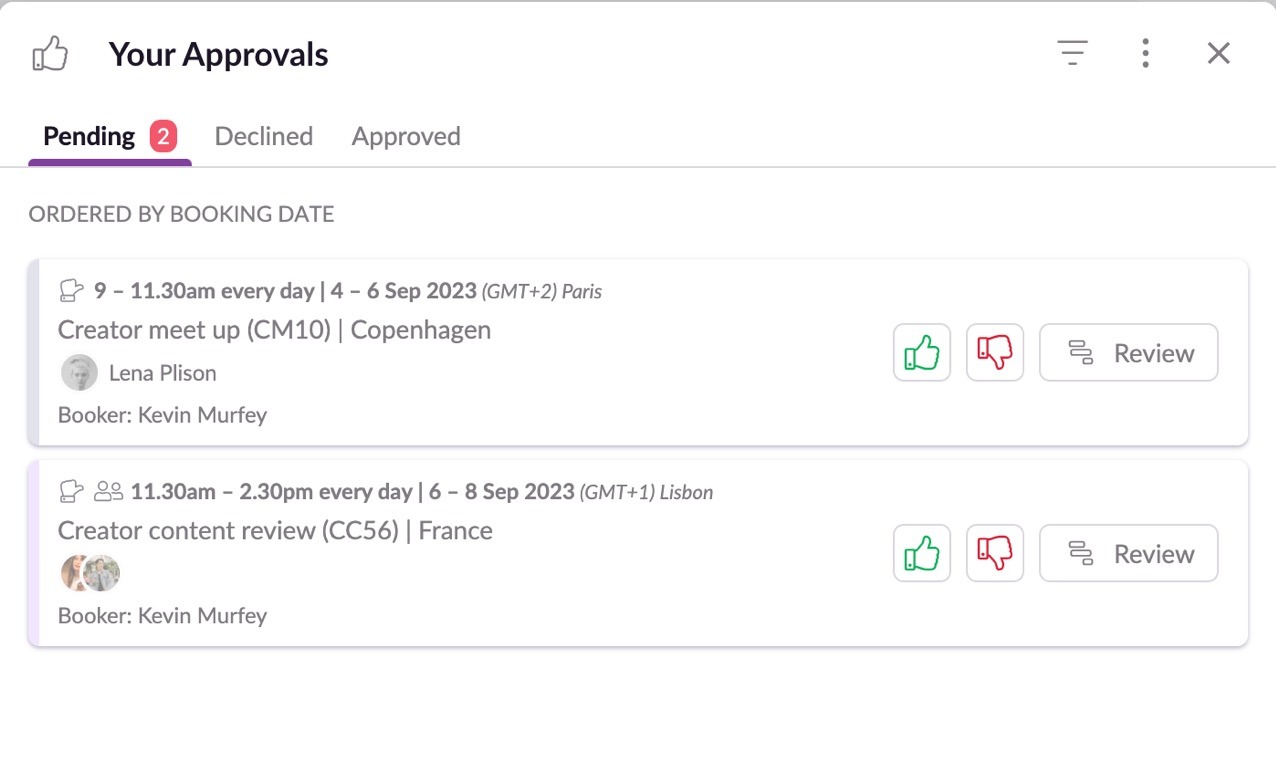
Just click on the green thumbs up icon to approve a booking, or the red thumbs down icon to decline it.
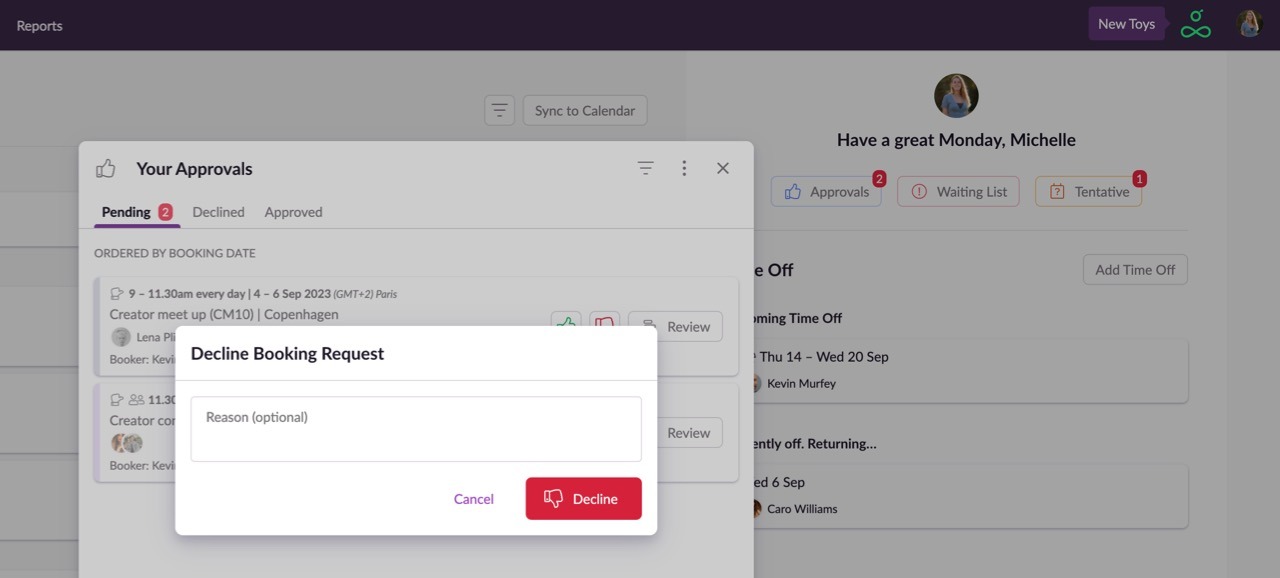
When declining a booking, you’ll have the option to specify a reason so the booker knows why the booking couldn’t be approved.
Viewing Someone Else's Approvals
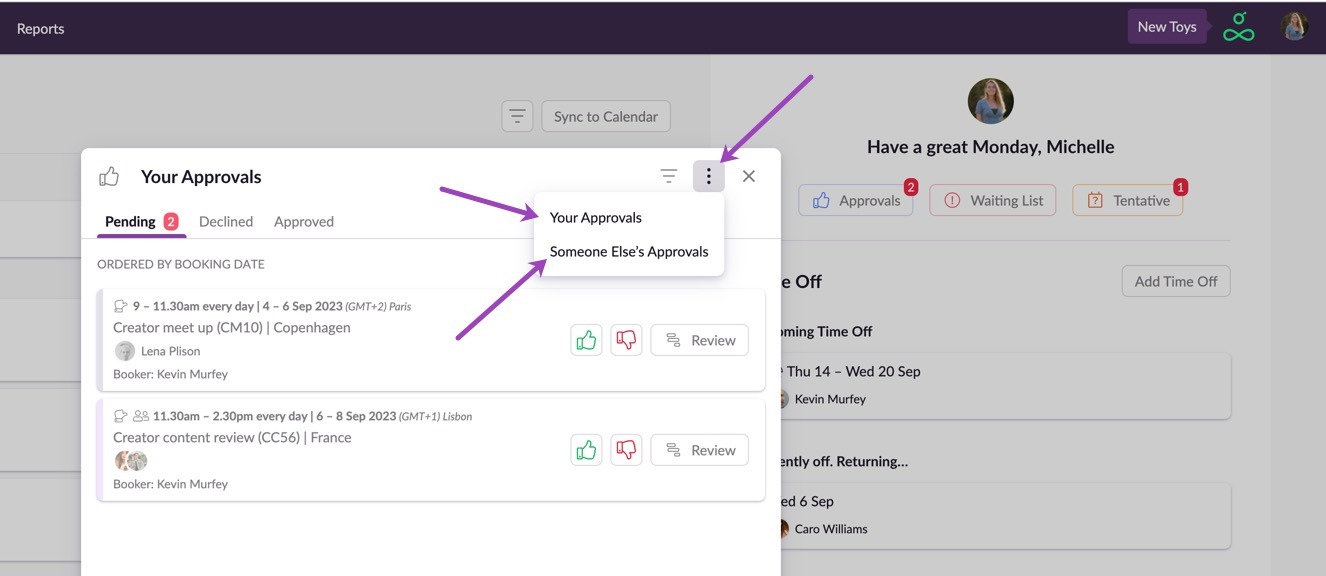
To view someone else’s approvals, click on the options menu and then choose Someone Else’s Approvals. From here you can select an Approver to view all the bookings which are pending their approval.
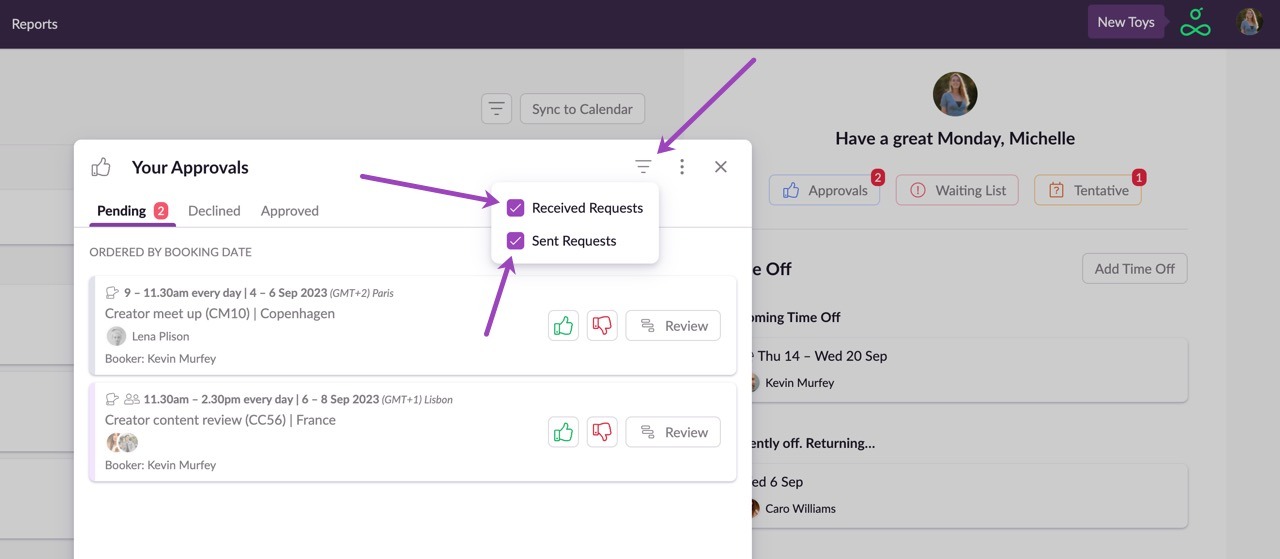
Use the checkboxes under the filters menu shown above to hide or display requests that have been sent or received. In the above example, Michelle is seeing bookings which require her approval (Received Requests) as well as bookings she has sent to other people for approval (Sent Requests).

If you need to change the status of an approved or declined booking, just switch between the relevant tabs and then click the thumbs up/thumbs down icon to move the booking into a declined or approved state.
Approving and Declining Bookings Via the Schedule
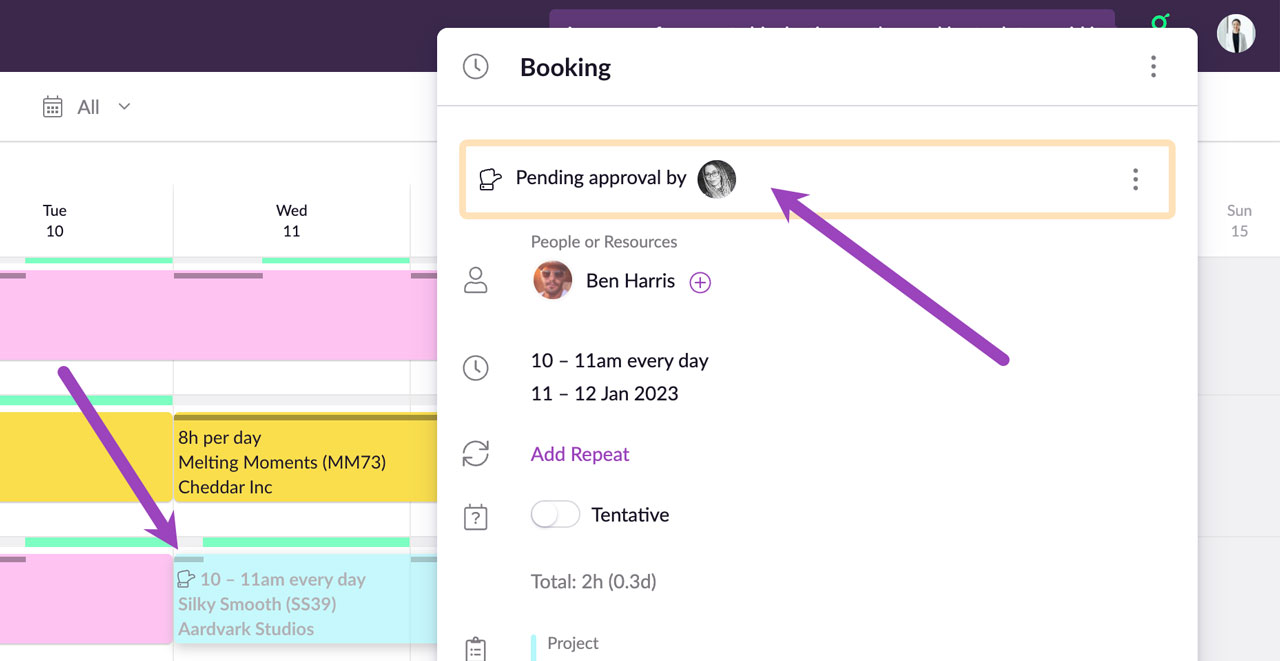
Bookings which are pending approval are displayed as semi-transparent with a “Pending” icon. If you click on a booking which is pending approval and you are not an approver for that resource, you’ll see the above note at the top of the booking form.
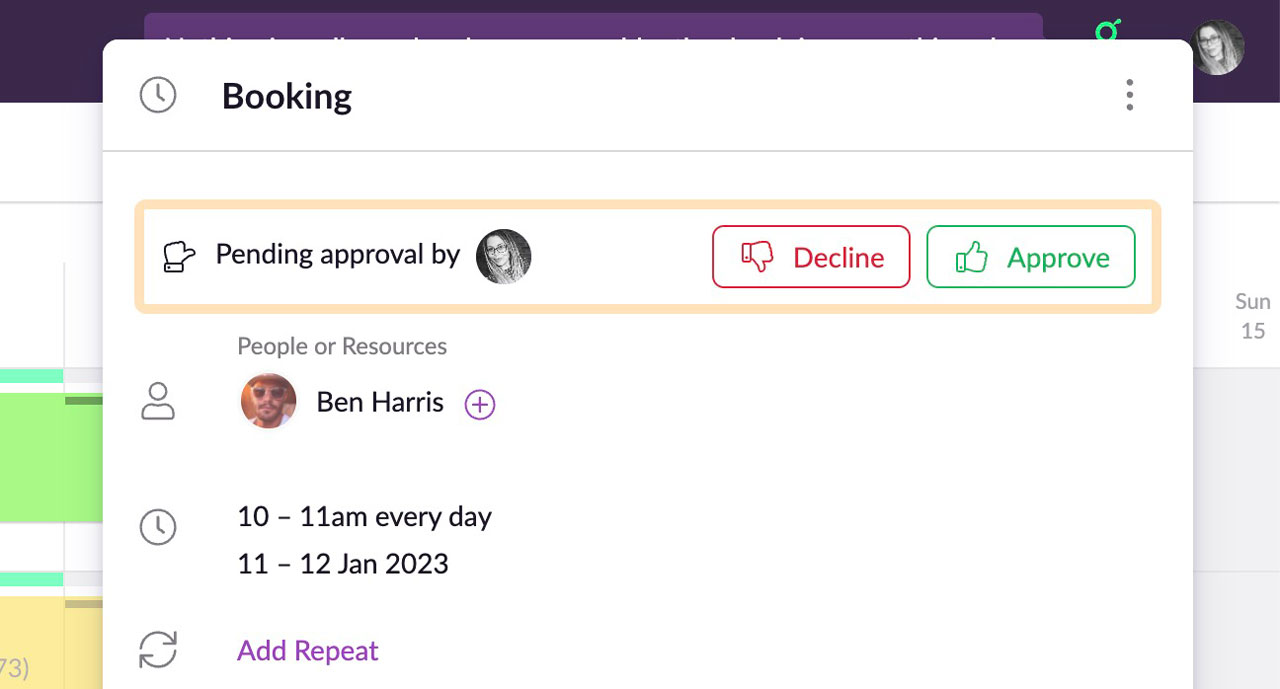
If you click on a booking which is pending approval and you are an approver for that resource, you’ll see the option to Decline or Approve the booking.
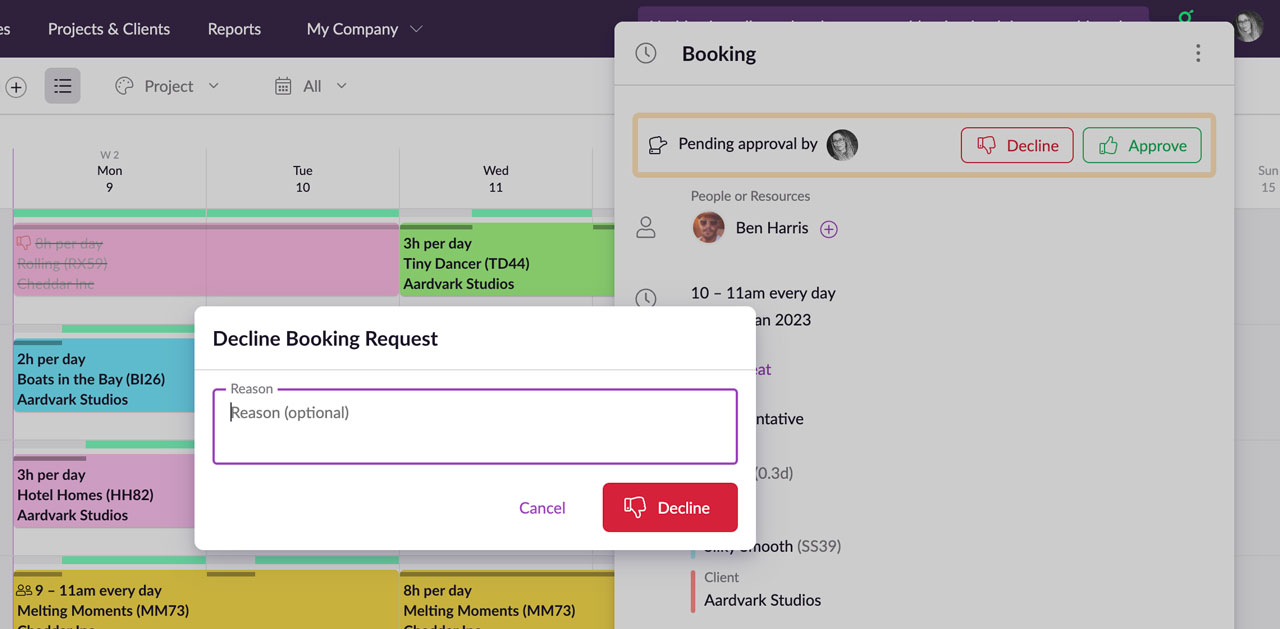
When declining a booking, you’ll have the option to enter a reason. Any information added here will be sent to the Booker via email when they are notified that the booking has been declined.

Declined bookings will appear on the schedule with a strikethrough to indicate that they’ve been declined, and further details will be displayed at the top of the booking form.
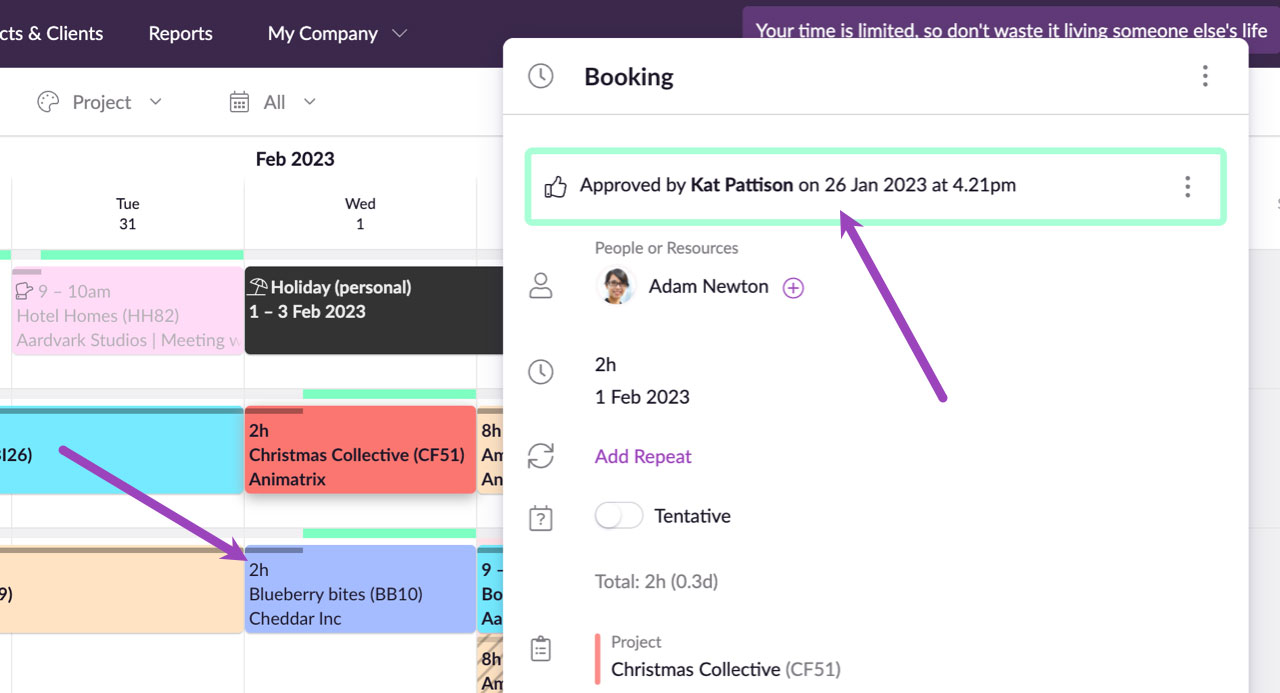
Approved bookings will appear with a note which documents the approver and when the approval took place.
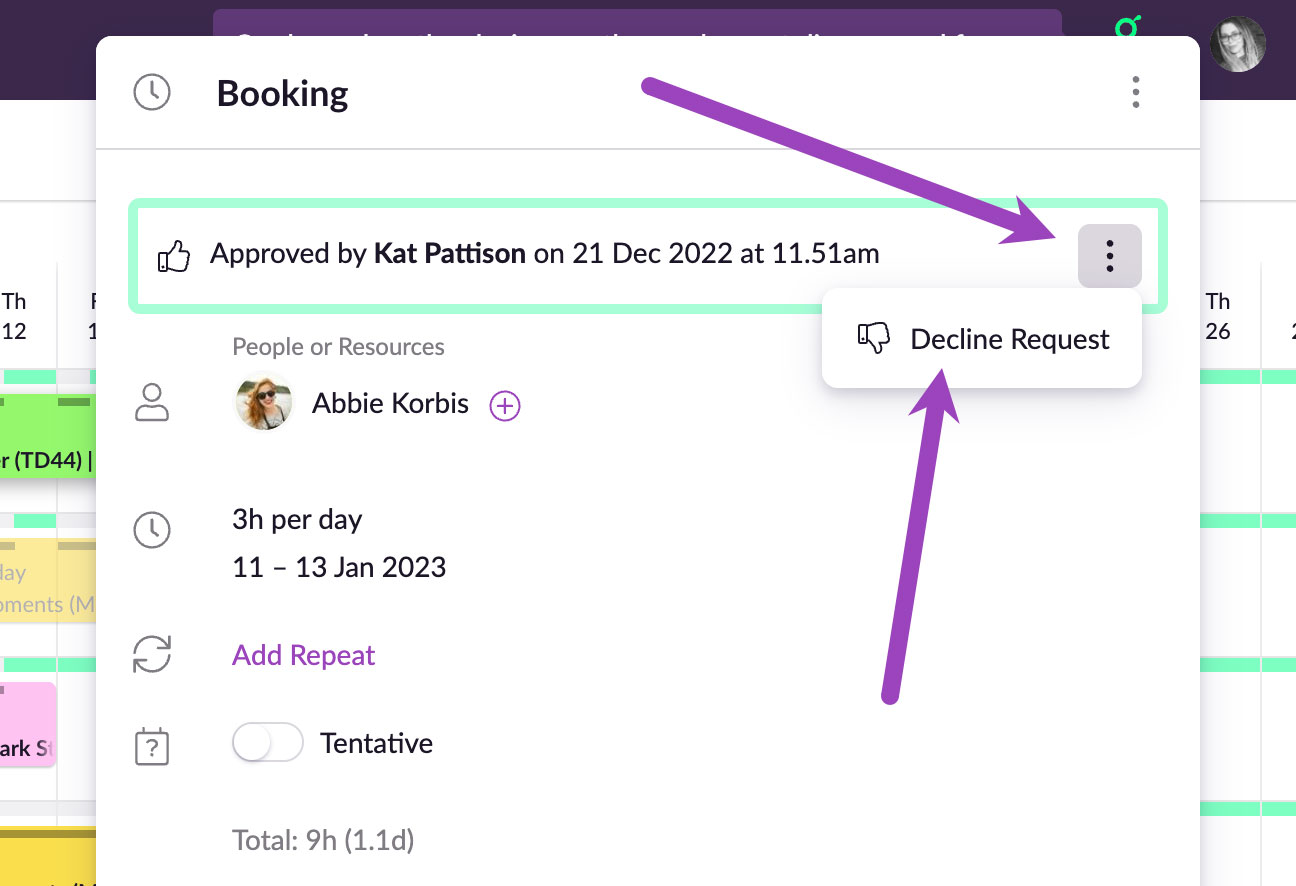
To decline a booking which has previously been approved, click on the booking in the Schedule and then click on the approval options menu followed by Decline Request.
Guru tip
If someone books a resource for whom they are already an approver, the booking will be approved immediately.
Bookings that are created by administrators will not be automatically approved unless the administrator is an approver for the resource being booked. However, administrators can approve bookings without being designated approvers, therefore by clicking on a pending booking they have created, an administrator can approve or decline any bookings which they have made (or which have been made by others).
Approving and Declining Multi-Resource Bookings
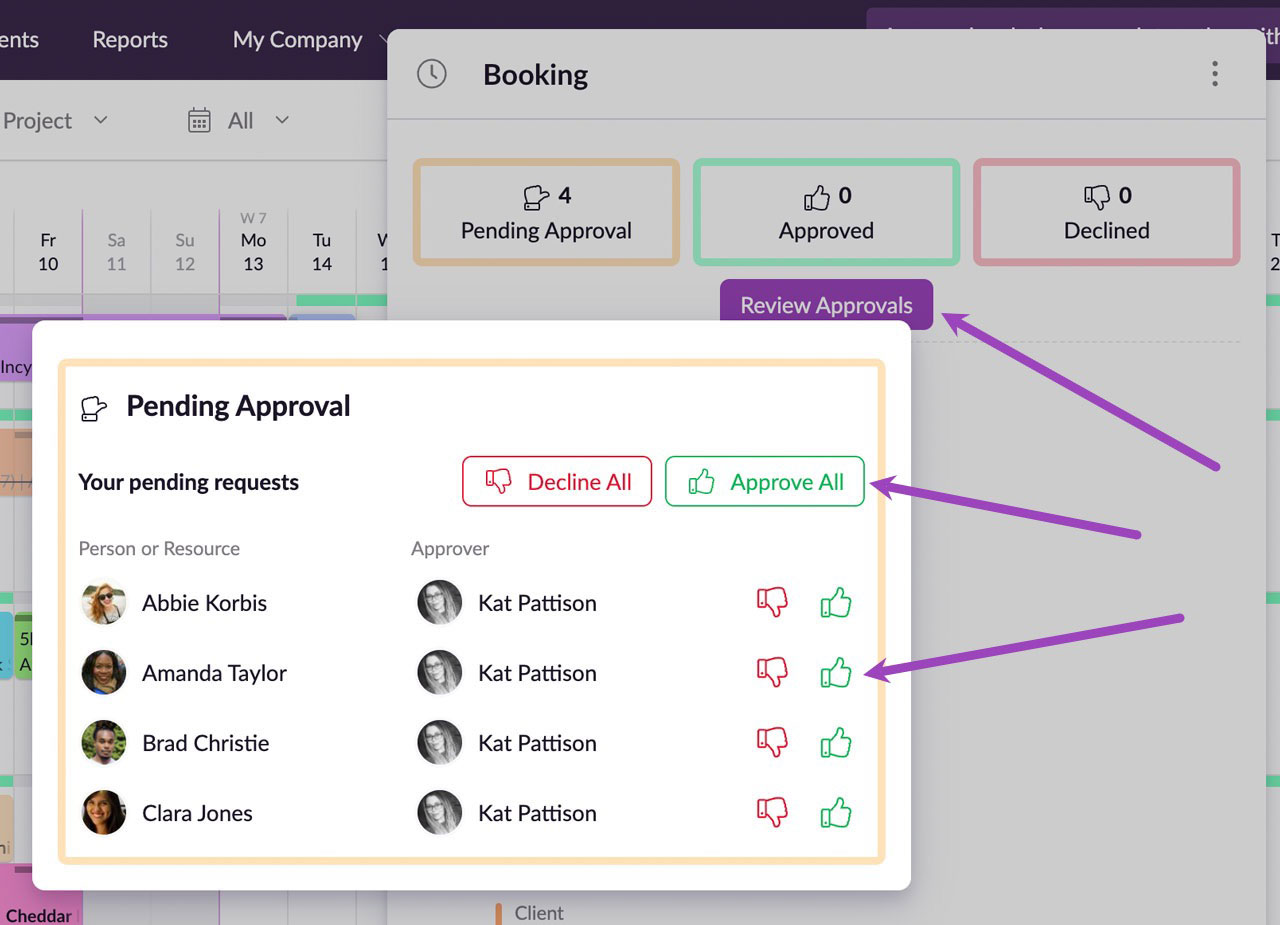
When a multi-resource booking requires approval, approvers can click Review Approvals to approve or decline all the bookings, or approve/decline bookings for each resource individually.
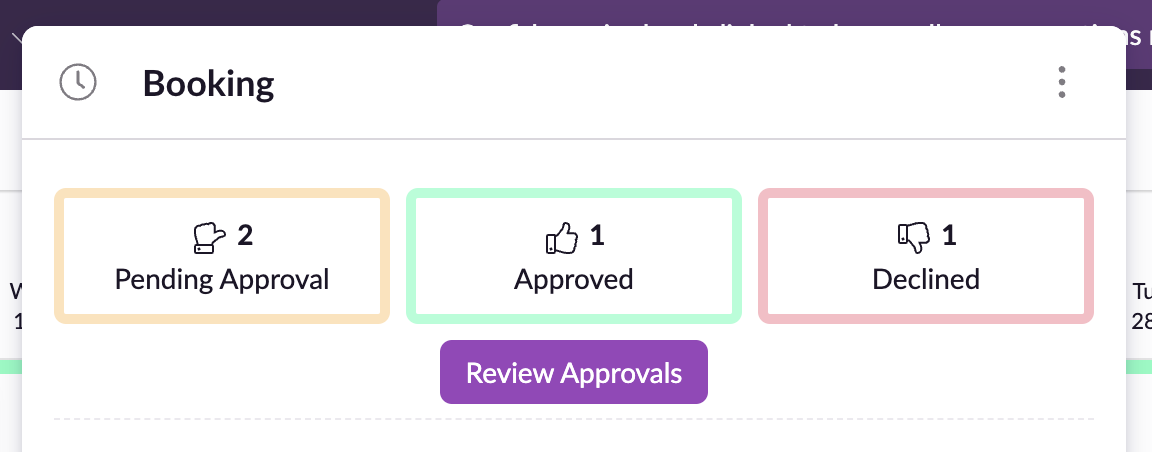
The summary at the top of the multi-resource booking form will show how many of the bookings have been approved, how many have been declined, and how many are still pending.