
Navigate and Filter the Schedule
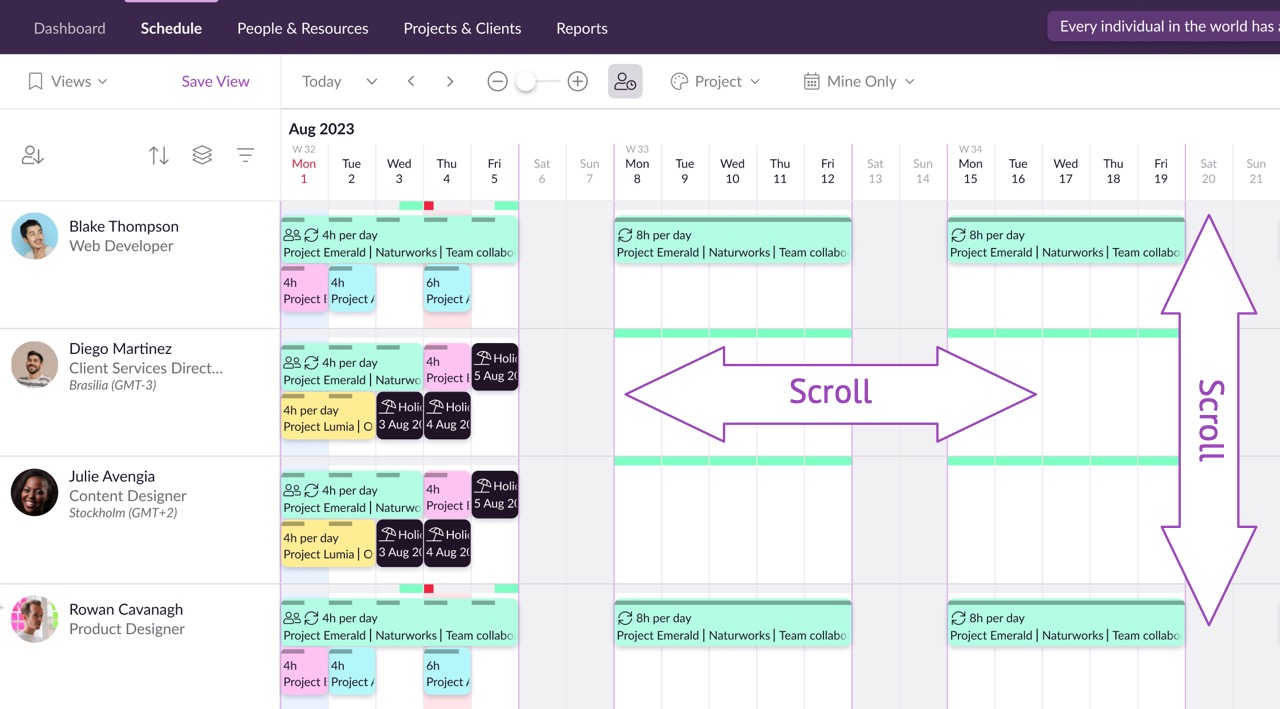
Scroll left or right to view dates in the past or future, or scroll up and down to move through your list of people and resources. The Schedule offers infinite scrolling, so there’s no need to pause and click any “load more” buttons.
When you’re in the Schedule, simply type G for Go, then type any letter or number on your keyboard to jump straight to people or resources that begin with that letter or number. For example, type G then T to jump straight to Tom.
Jumping to Specific Dates
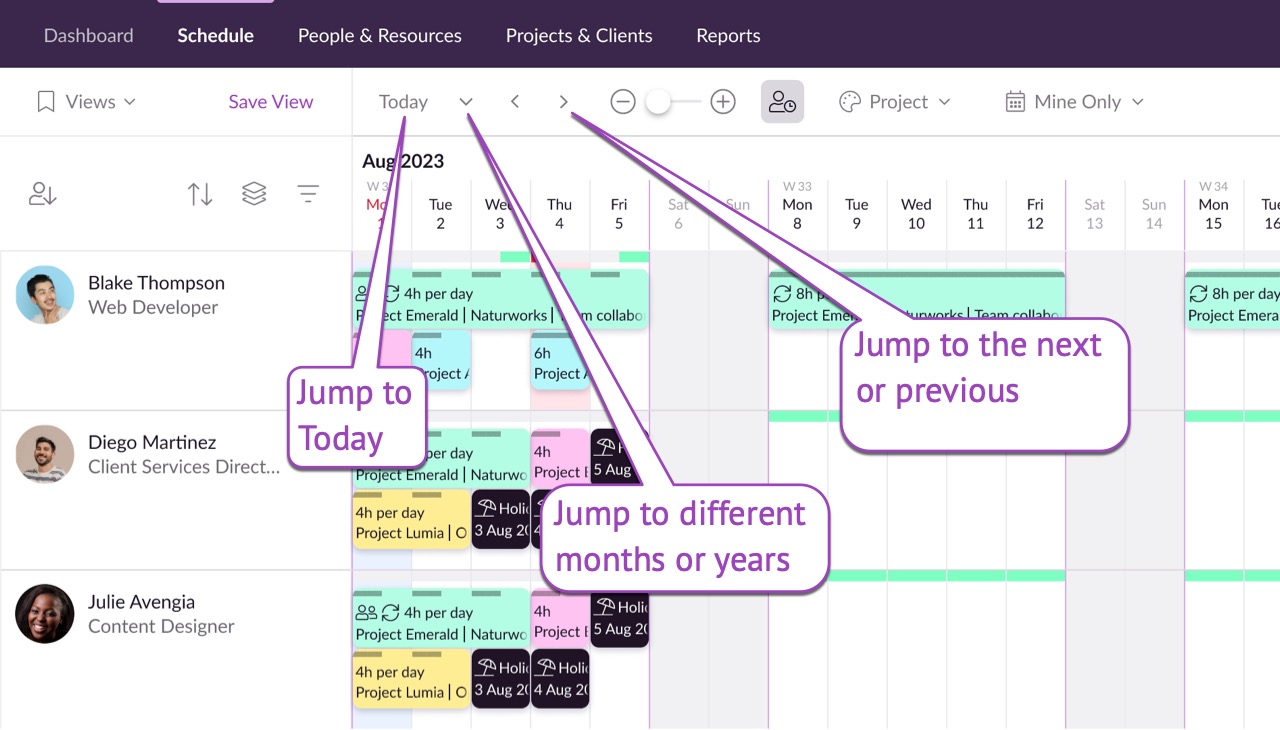
Use the date navigation to jump to specific months or years. And, you can always return to the current date by clicking Today.
Using Different Zoom Levels
You also have three zoom in and out options, depending on how much detail you want to see.
Using the Availability Bar
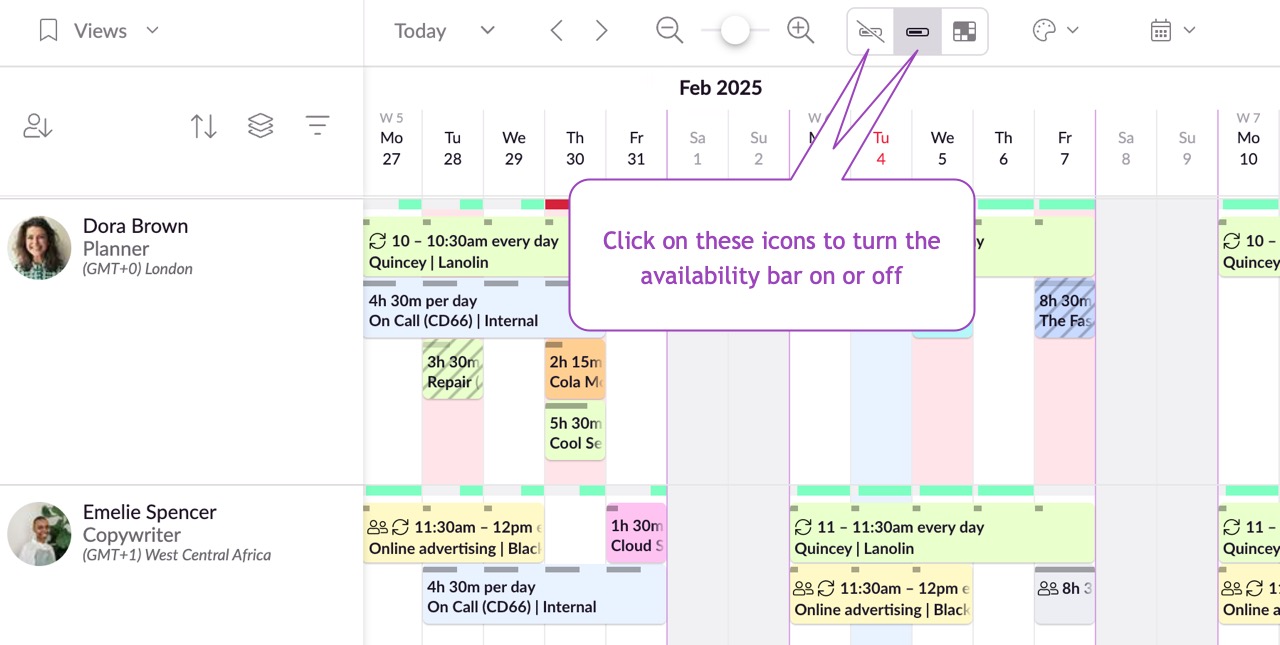
Your availability bars can be hidden if required. To hide or display them, just click the button between the zoom and the Schedule Heatmap setting. Your preferences will be remembered. Another way to get around is to right-click and drag your way around the schedule.
Using the Schedule Heatmap
To activate the heatmap, click on the Heatmap Toggle in the toolbar at the top of the Schedule, next to your availability bar settings. Once enabled, the heatmap overlays onto the Schedule, giving you instant visibility into team utilization.
You can choose from three different heatmap views:
Total Utilization – Shows overall workload based on all scheduled bookings.
Billable Utilization – Highlights time allocated to billable work.
Hours Available – Displays remaining availability for each team member.
The colors on the heatmap indicate:
Green – There is availability, indicating a lighter workload.
Orange – Higher workload levels, signalling heavy workload.
Neutral areas – Completely free time, showing no bookings scheduled.
Find more information on the Schedule Heatmap here.
Using the Color By Options
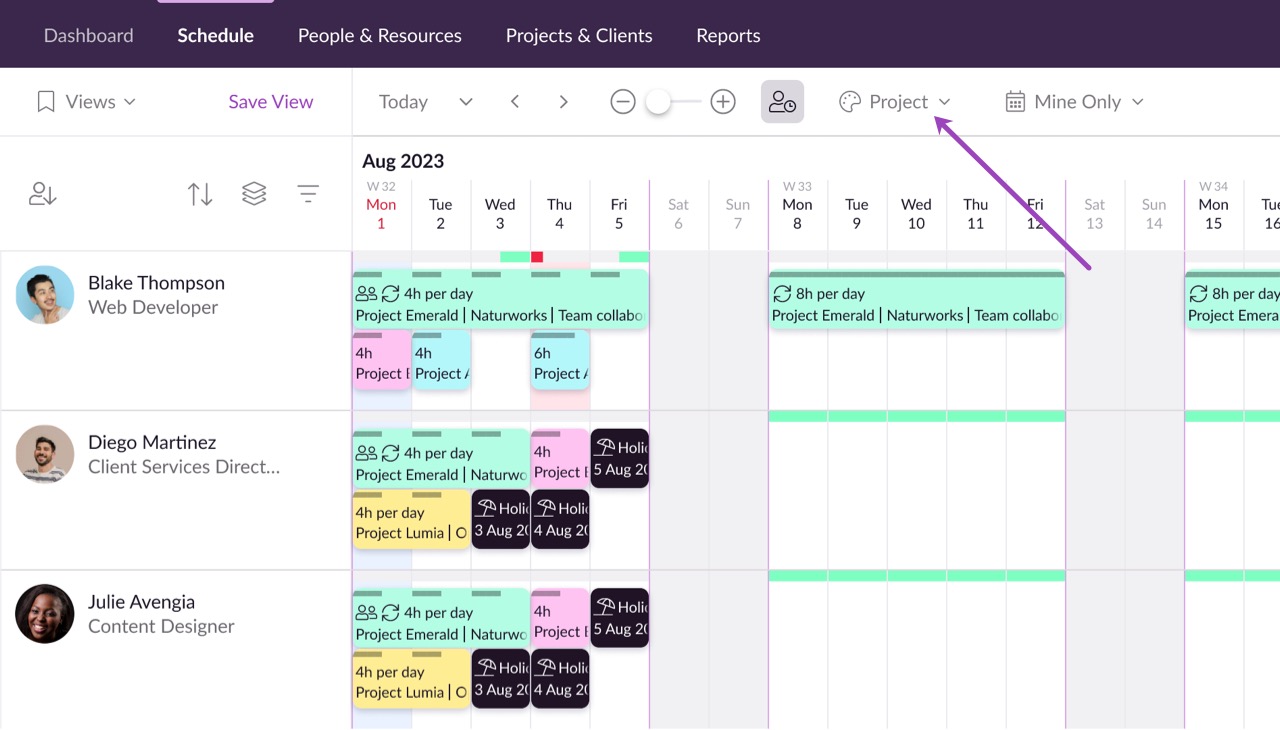
Click the Color by option to view bookings by the color of either the project, client, booker, activity type or billable status.
Choosing to View External Calendar Events
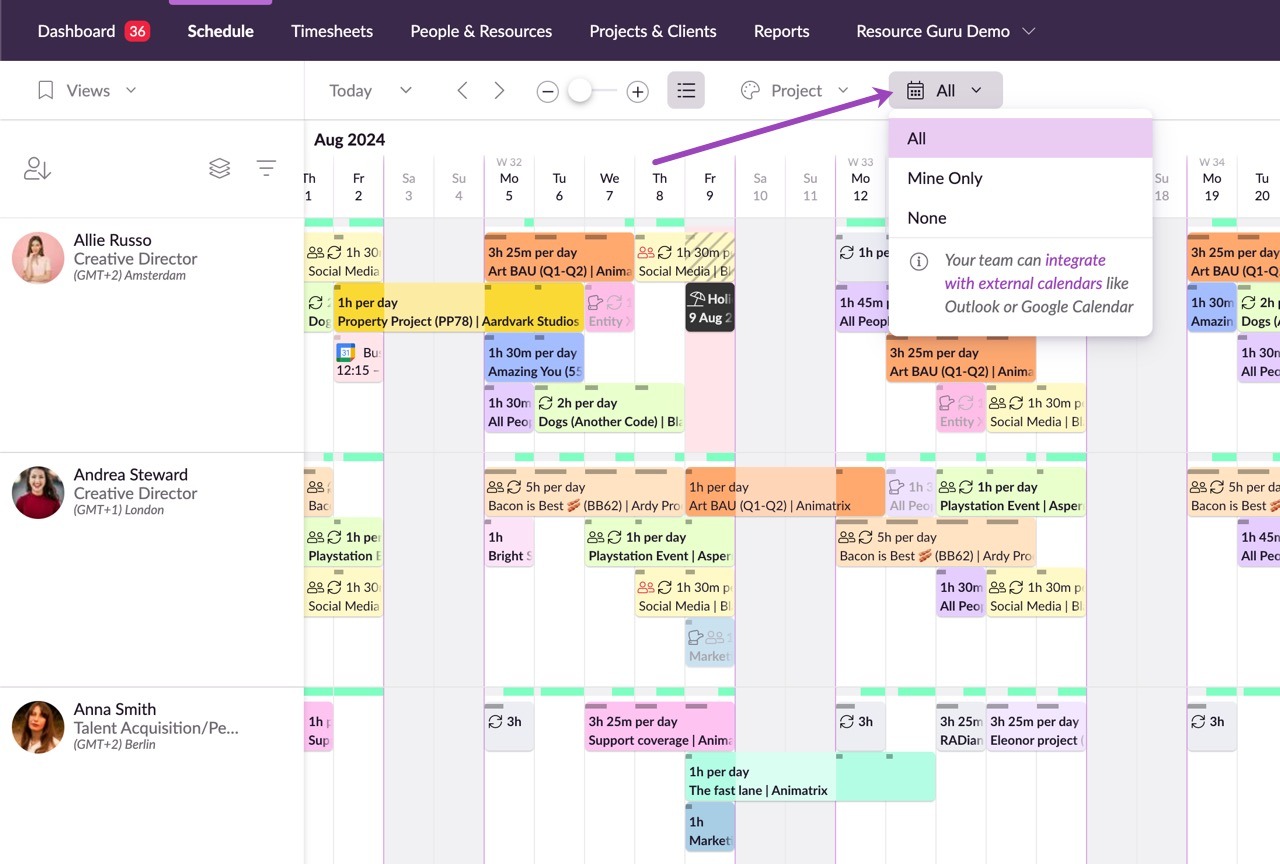
The calendar icon lets you choose which external events are displayed to you on the schedule. External events are those which have come from Outlook or Google Calendar via the 2-way calendar sync feature.
If you choose All you will see the external calendar events for anyone in your account who has synced Resource Guru with Outlook or Google Calendar. By default, you won’t be able to see the full details of other people’s events, these will remain private unless they choose to make them visible to everyone in their calendar integration settings.
If you choose Mine Only, everyone else’s external calendar events will be hidden, and you will only see events from your own Outlook or Google Calendar.
If you choose None, all external calendar events will be hidden.
Your preferences will be remembered even if you log out, and they will not affect what other people see in the account; this setting is specific only to you.
Action Drawer: Streamline Your Workflow
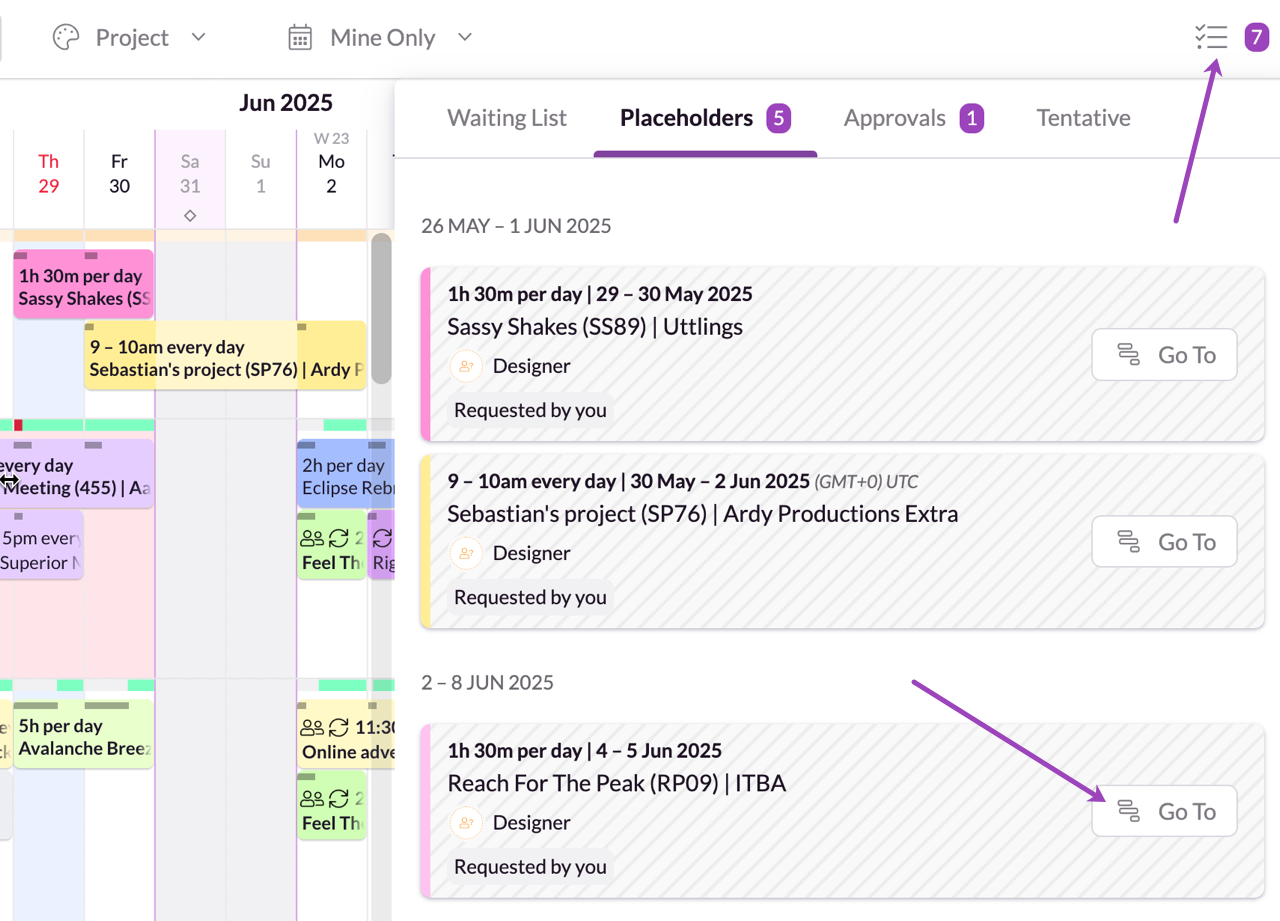
The Action Drawer enhances the way you manage your bookings by allowing you to take immediate action on items like Waiting List, Placeholder, Approvals, or Tentative bookings directly from the Schedule.
While you can also see these actions highlighted on your Dashboard, by using the Action Drawer, these critical tasks are readily accessible on the Schedule as well, allowing you to work through them without the need to switch between pages. Click on “Go-To” and the corresponding booking will be highlighted on the timeline.
Filtering your Schedule
Have you ever wanted to filter your team by things like department, location, projects or skills? If so, you're in luck! Resource Guru offers a universal search which lets you search by any type of resource or attribute, including custom fields.
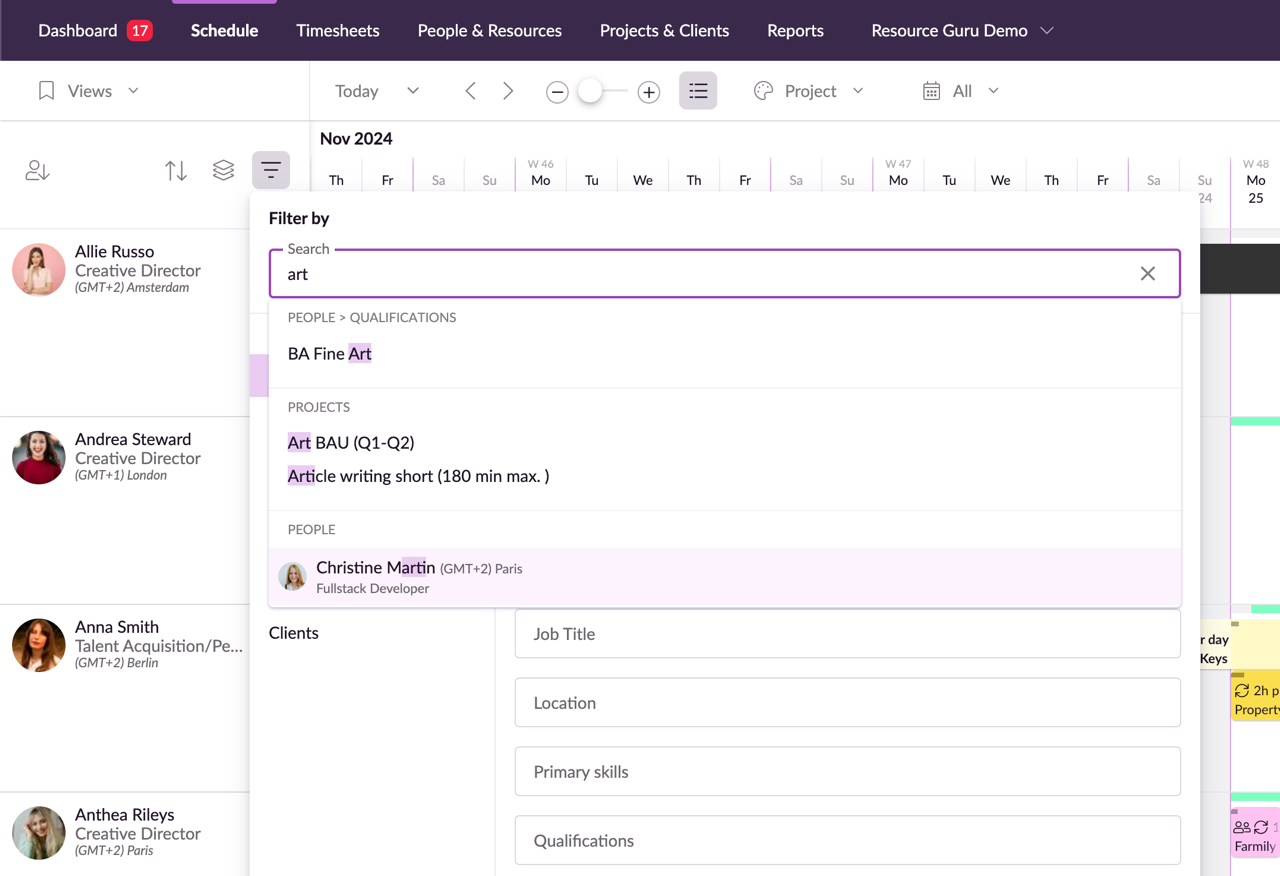
For example, if you typed “Art” into the Search bar, you’d be shown everything in the app which contains the word “Art”, such as all people from the Artwork department, or all those with the Art Director job title, anyone called Arthur and even your Spartan project.
Resources have some default fields, for example Job Title and Skills, and you can customise the options for these default fields. In addition, you can create custom fields to let you drill down and focus on the resources you're interested in. Custom fields are one of Resource Guru’s most powerful features.
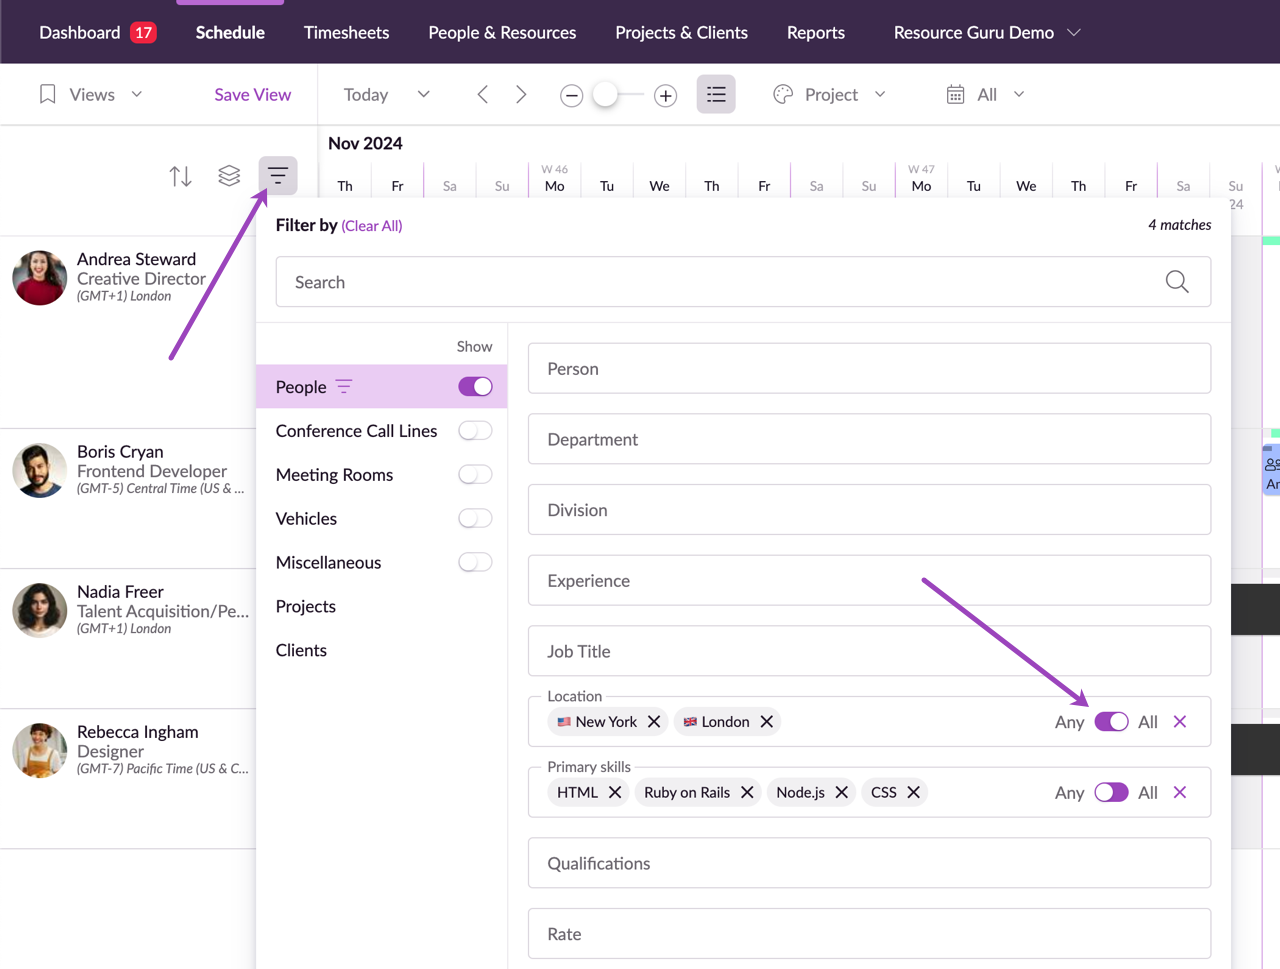
Let’s say you need to find people with any of HTML5 and CSS skills in London and New York. Easy! If you’ve already created custom fields for “Skills” and “Location,” it’s going to be a breeze. Just select the custom filters you need from those two fields, then choose “Any” for “Skills” and “All” for “Location.” Done.
Filter Projects and Clients
You can also use filters to quickly narrow down which resources have been booked for specific Projects or Clients.
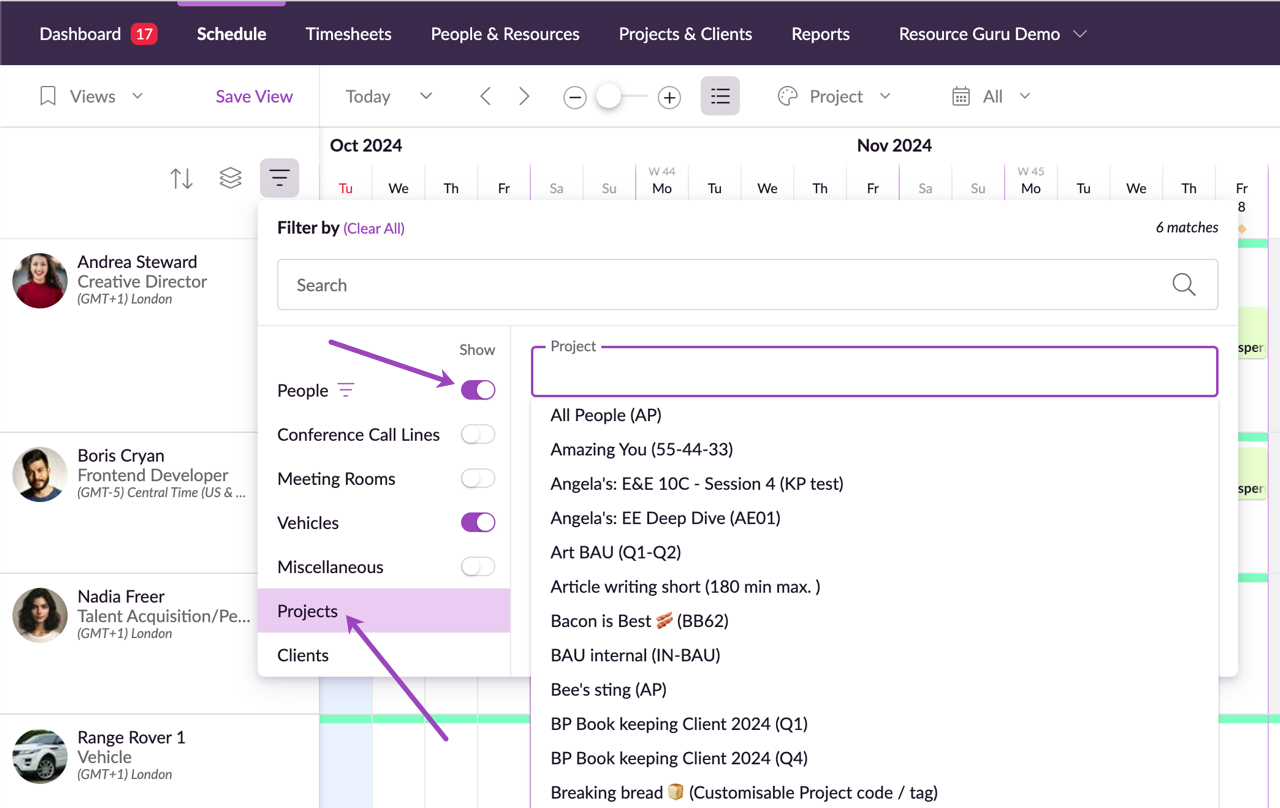
When you filter by client or project, you’re going to see all resources that have ever been booked for that client or project.
We think it’s important that calendar events are viewed in context; you don't want to move or add bookings where there isn’t sufficient availability. So, although the filter will only show you resources that are assigned to specific clients or projects, if those resources are booked for other clients or projects as well, all bookings will remain in view.
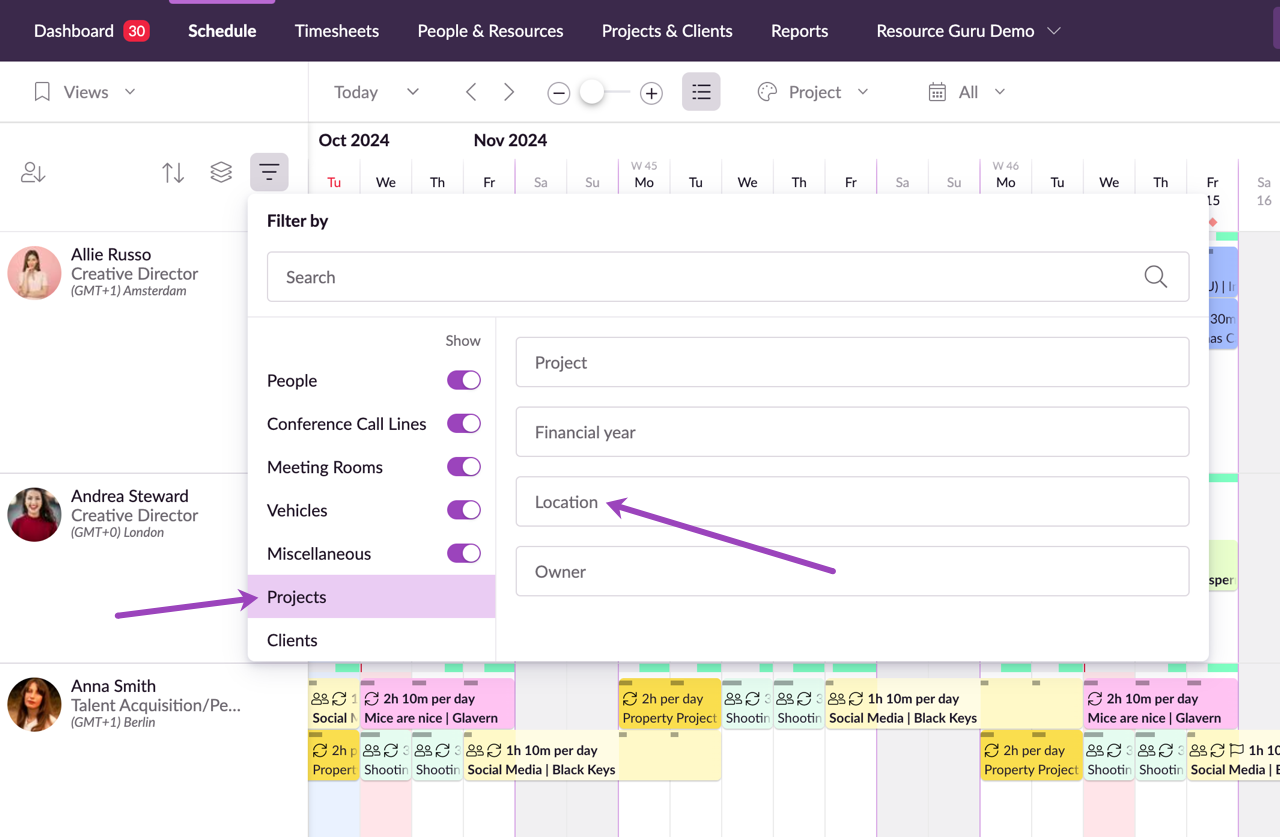
You can also use custom fields applied to your projects and clients to filter your Schedule. Anyone booked on a project with a specific custom field attribute will appear in the results. For example, this allows you to quickly find people with experience in certain types of projects, check the workload for low-priority projects, or analyze how work is distributed based on client location.
Match Any or All
Next to each filter there is an Any or All toggle.
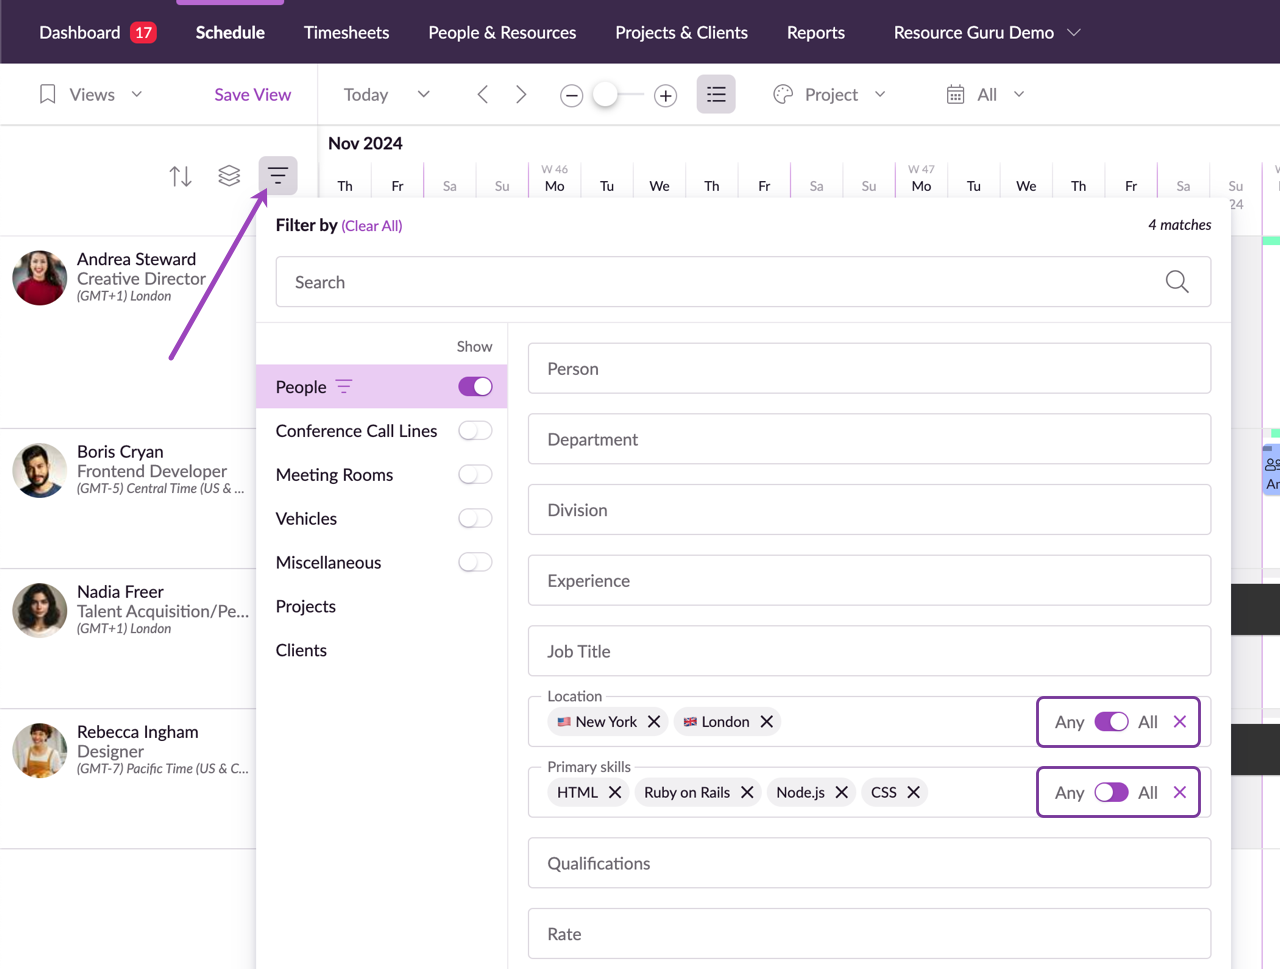
Select Any to match any options you’ve entered. Say you want to filter a custom field called “Location.” If you’ve entered London and New York as your values and select Any, all resources located in either London or New York will appear.
Select All to match all options you’ve entered. If you filter a custom field called “Skills” with the values HTML5 and CSS and have selected All, only those resources that have both HTML5 and CSS skills appear.
Grouping the Schedule
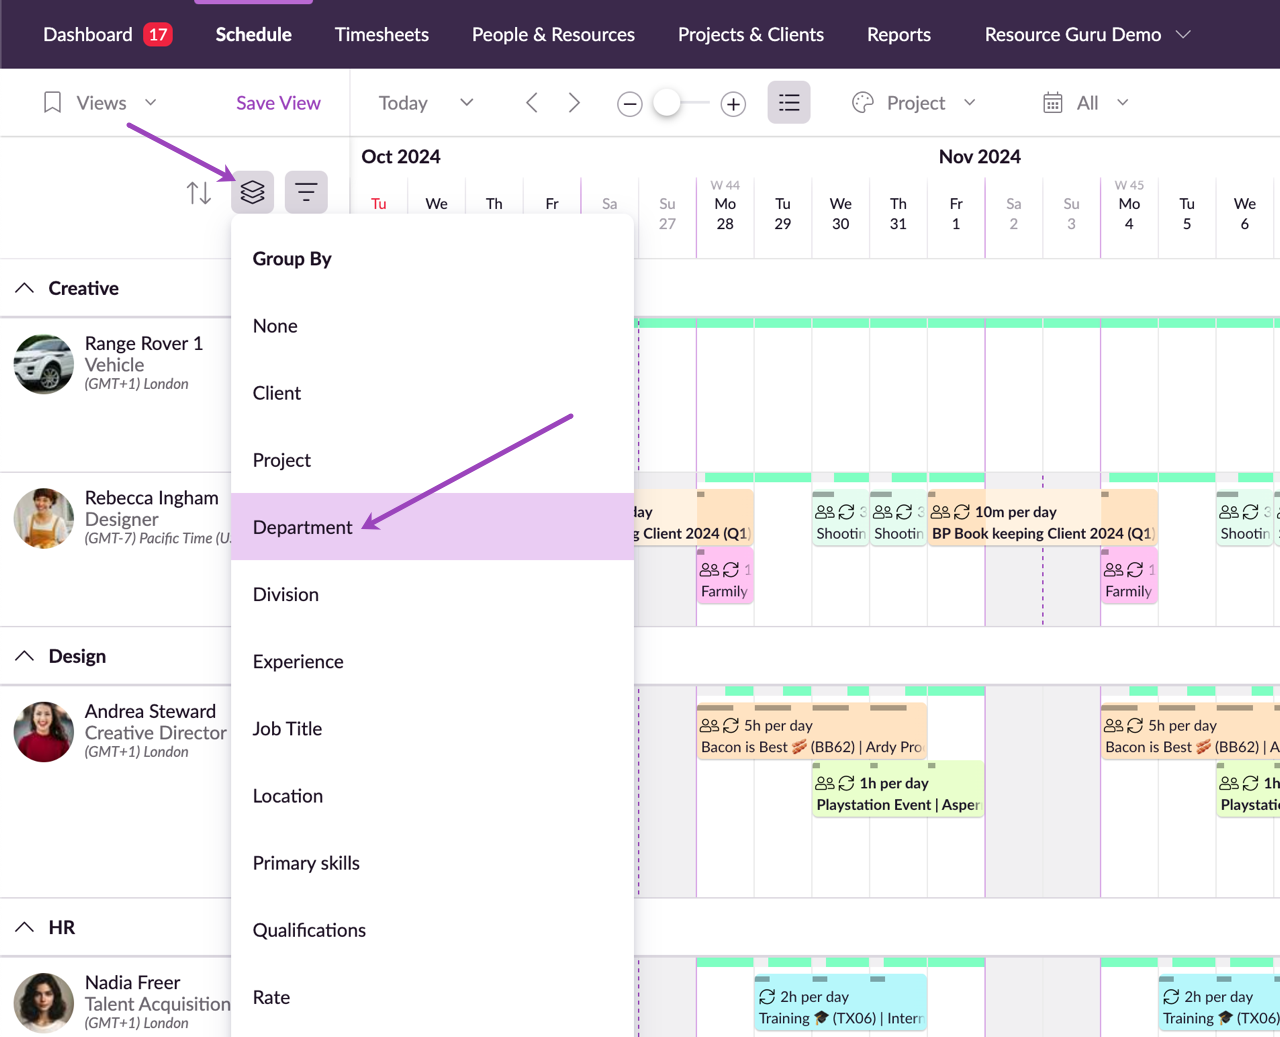
You can also group your Schedule not only by project and client but also by Job Title, location or any custom fields you've added to people or non-human resources, such as skills or department. Just hover over the option and choose to see your team grouped by the selected criteria.
For example, if you’re responsible for clients in London and want to see the time your team has allocated to projects with London-based clients, you can use the Group by Project functionality. Then, go to Filter By and select all clients in a specific location to view only the relevant projects.
Sorting the Schedule
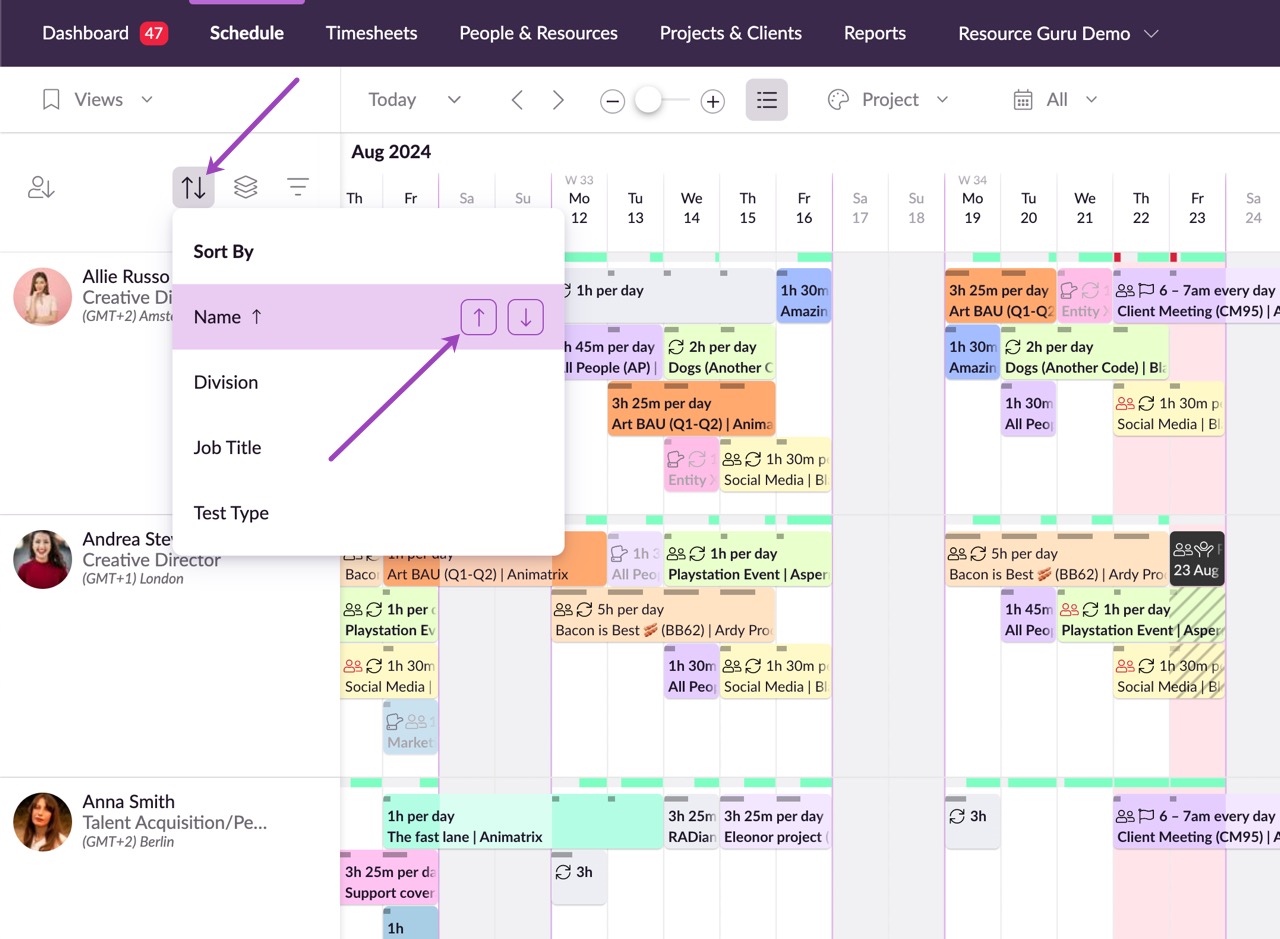
You can sort your Schedule by Name, Job Title, or any single-select custom fields you've added to people and non-human resources. Simply hover over the option and choose whether to sort your team in ascending or descending order based on the selected criteria.
Clearing all Filtering, Grouping or Sorting
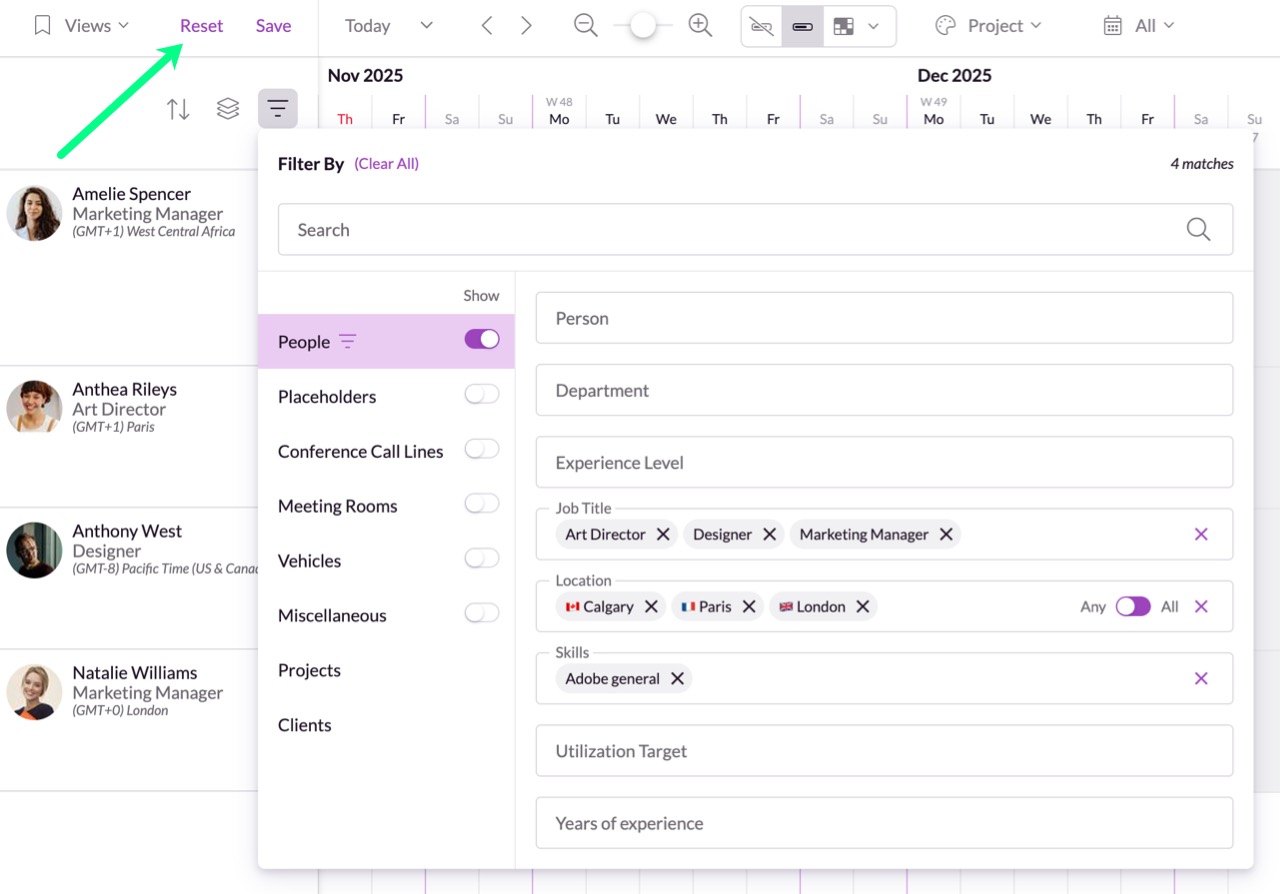
To return the Schedule to its default view, click Reset. This removes all active filters, grouping, and sorting.
Saving Views
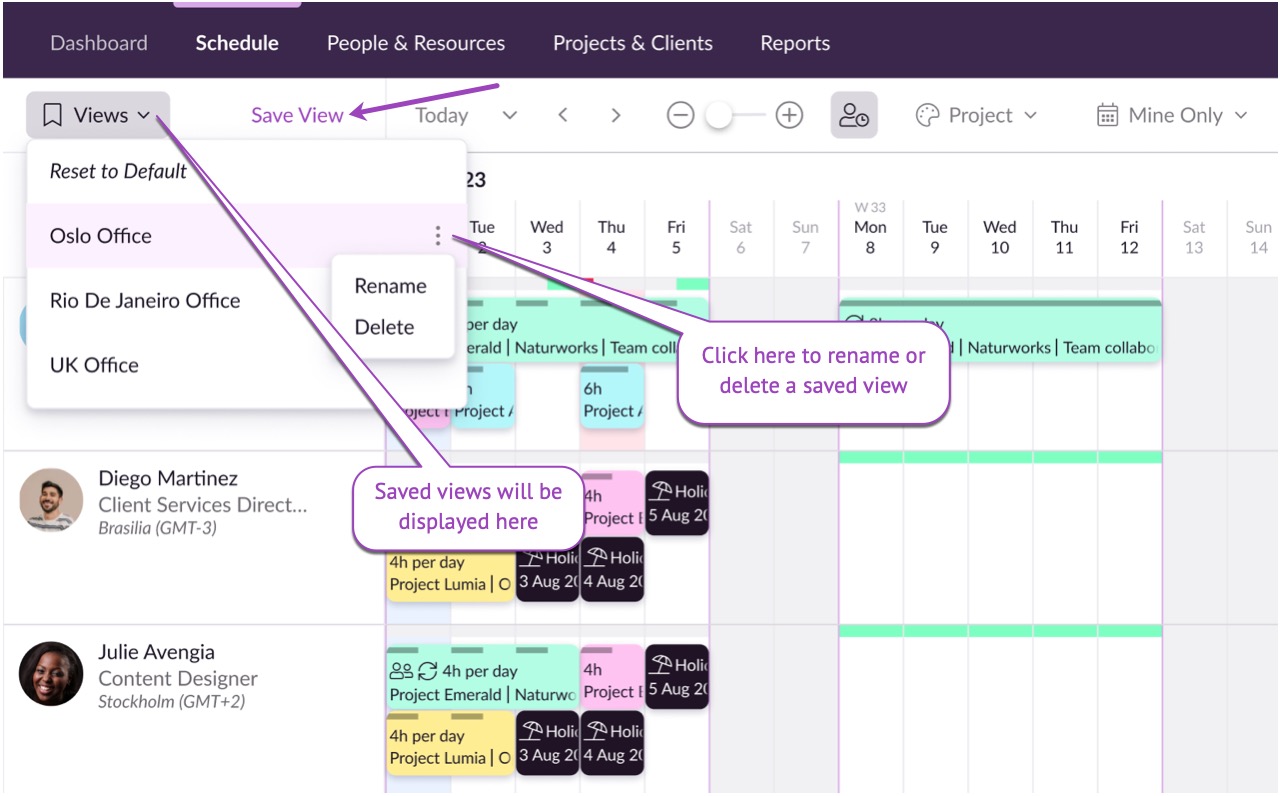
If you regularly use the same filters, you can save time by creating a Saved View. Suppose you regularly search for people with HTML5 and CSS skills—just apply the relevant filters, then click Save View in the control bar. Be sure to give the filter a meaningful name (such as"Team A"), then click Save View. You’ll now see “Team A” listed under Views in the top left of the control bar.
To delete or rename a saved view, just click on the three little dots next to the view name.
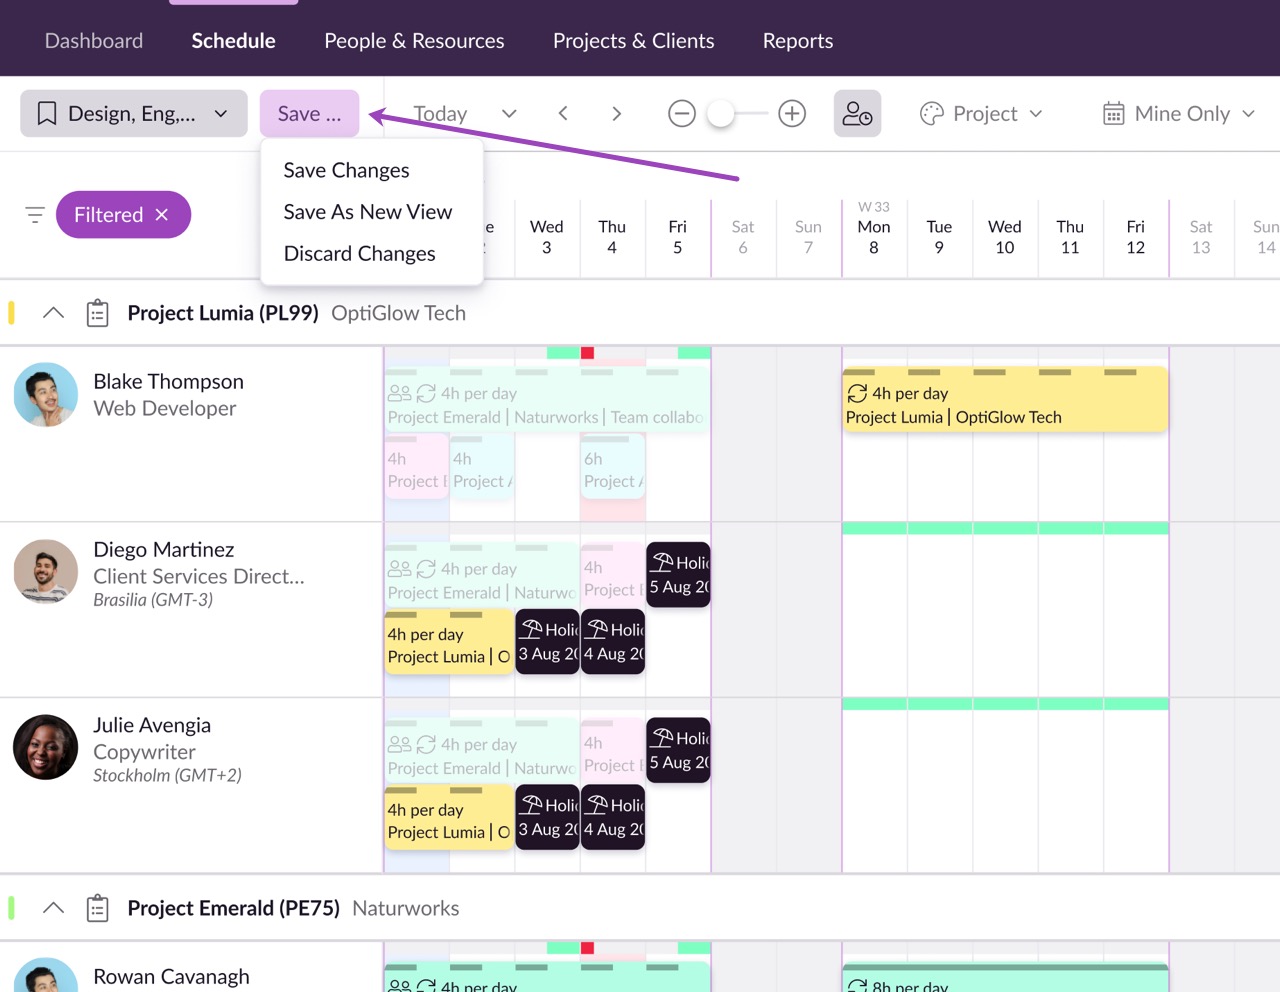
To edit a view, select the view you want to modify, make your changes, and then click Save. You’ll see three options: you can either update your current filter with the new changes (Save Changes), save this view as a new one, or discard the changes.
Sharing Saved Views
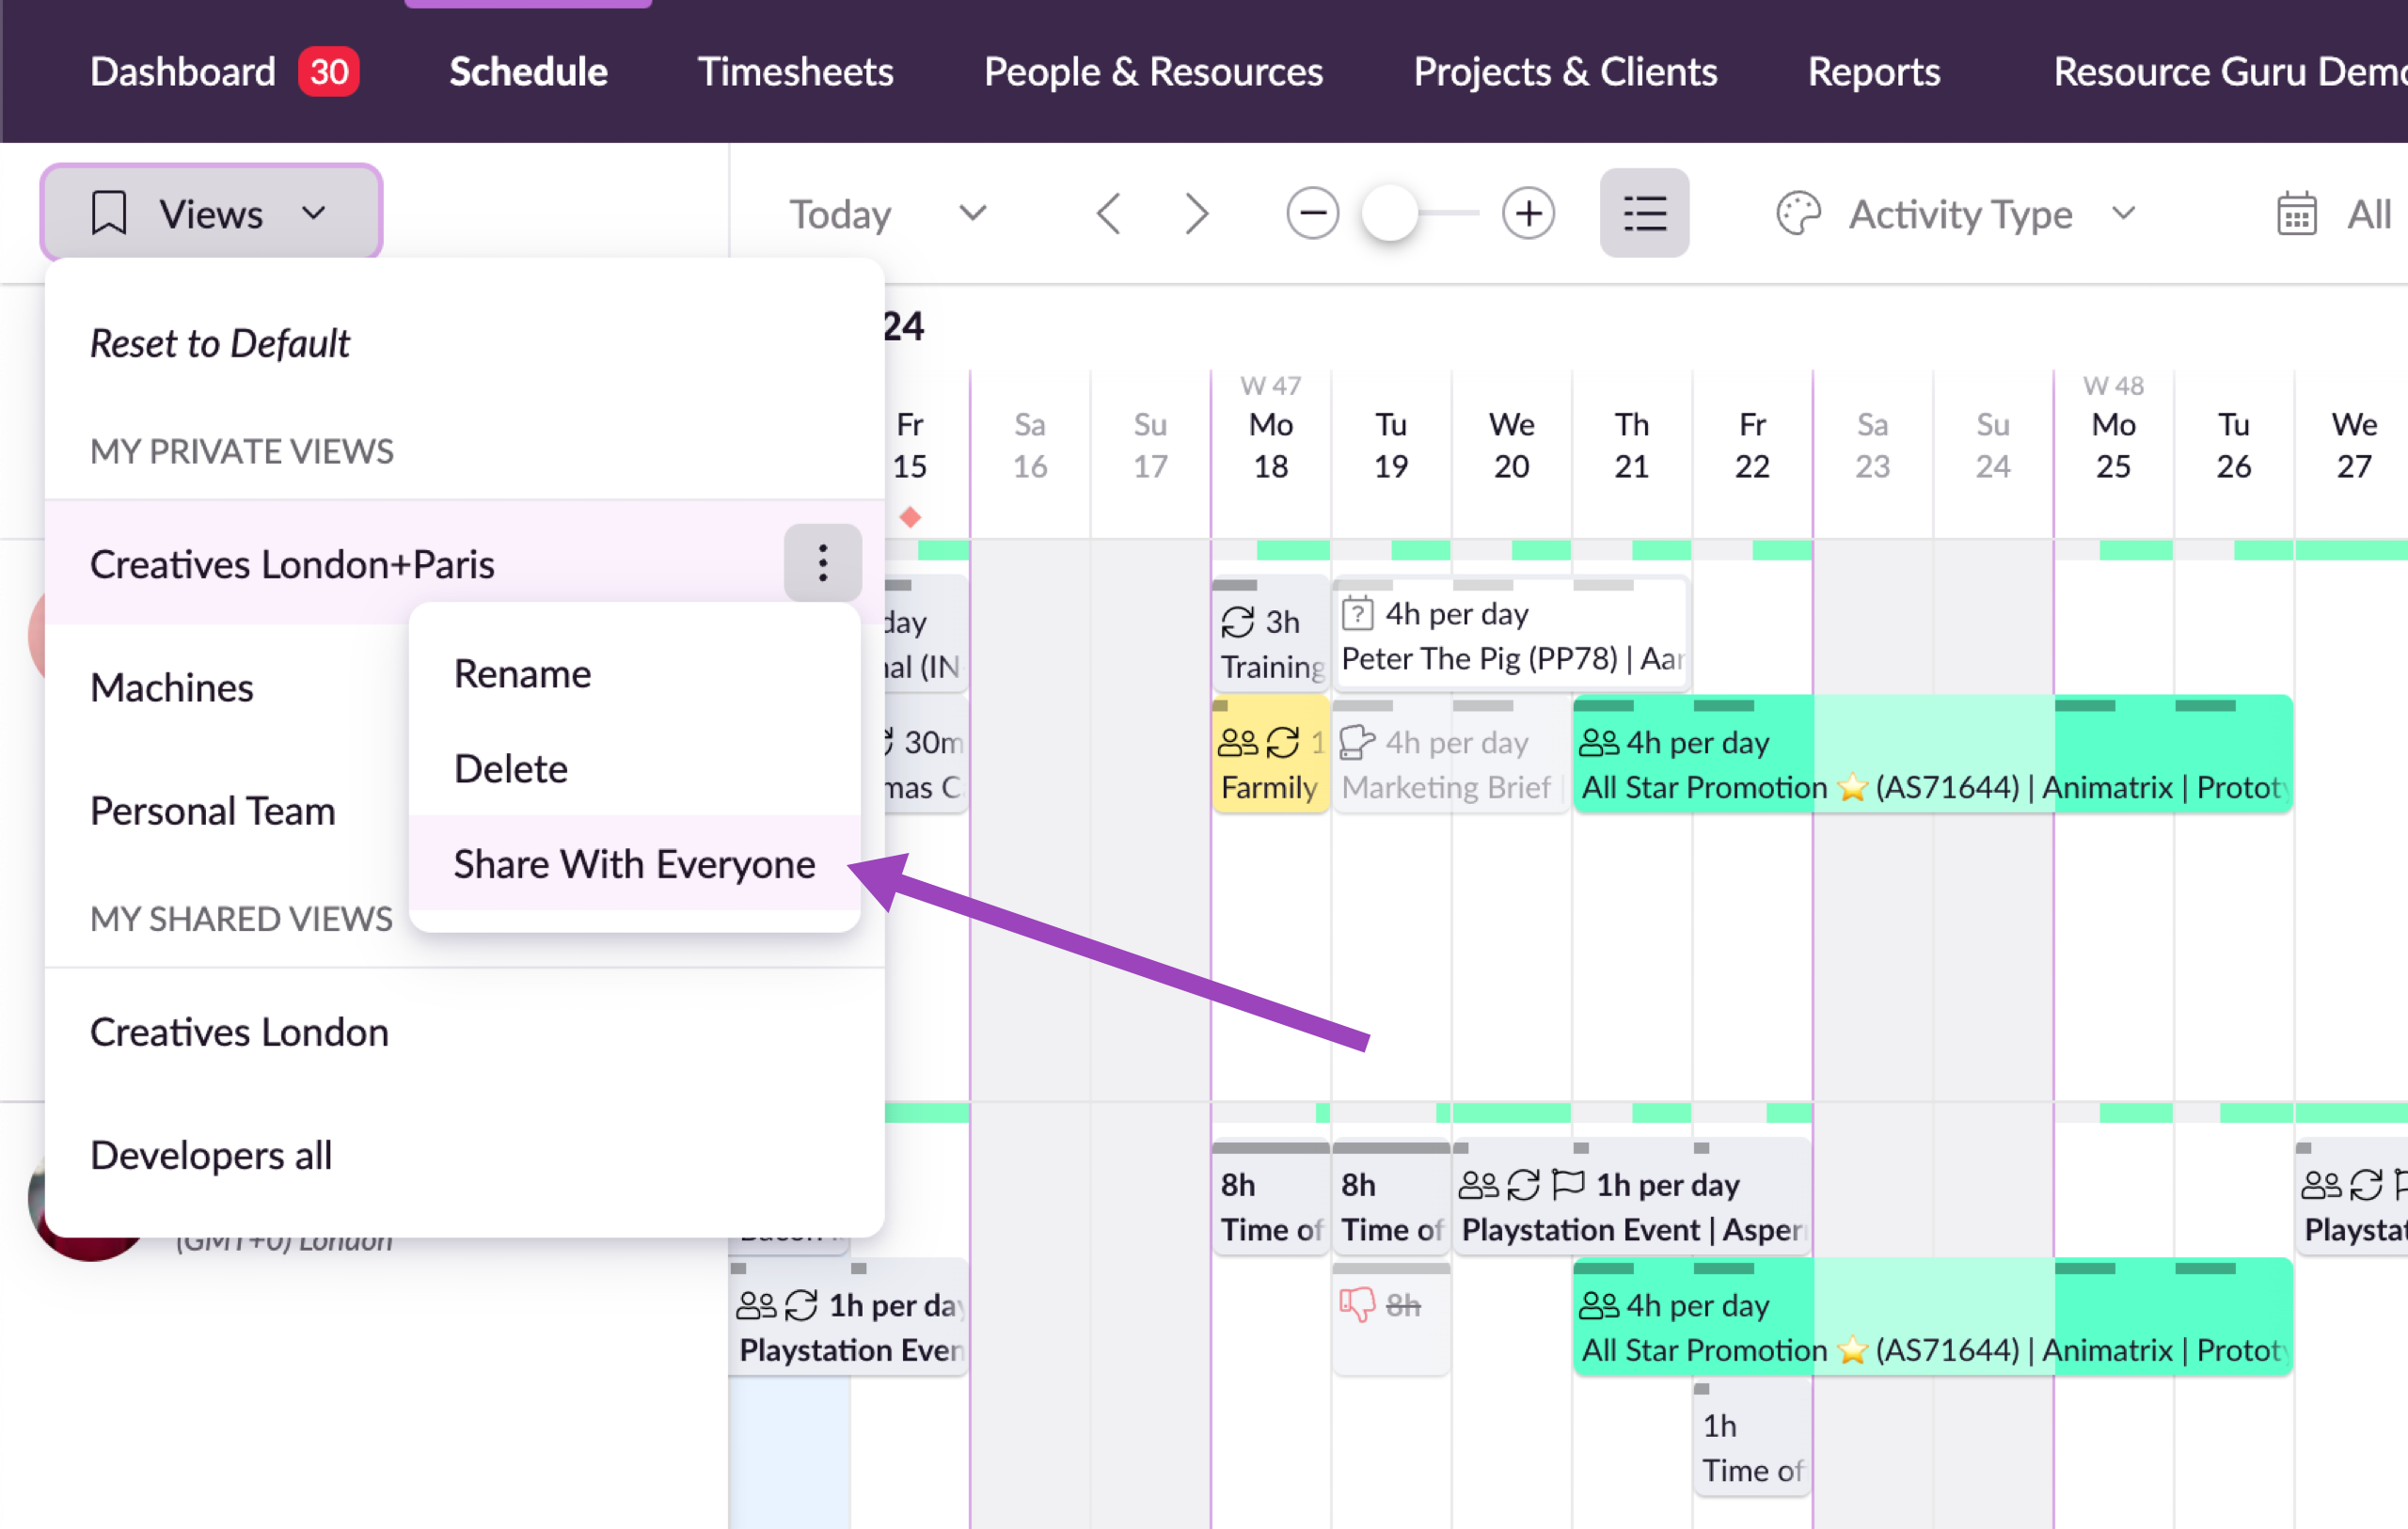
Want to save your team some time by sharing your saved views? Just click on your saved view and select “Share with Everyone.” Once shared, anyone with access to the full Schedule will be able to see and apply this view. Please note that once shared only you and account administrators have the ability to rename, delete, overwrite or unshare it for everyone.
If you just want to share a view with someone ad-hoc, without sharing it to the whole account, then you can also simply copy the URL and send it to a colleague. All parameters are saved in the URL, so if you share a link with someone they’ll be taken to the exact view that you see - including any filters and even the date you’re looking at!
Pinning People
Want to focus on a specific person in the Schedule? Simply pin them to the top by hovering over their name and clicking the pin icon!
Clearing Views
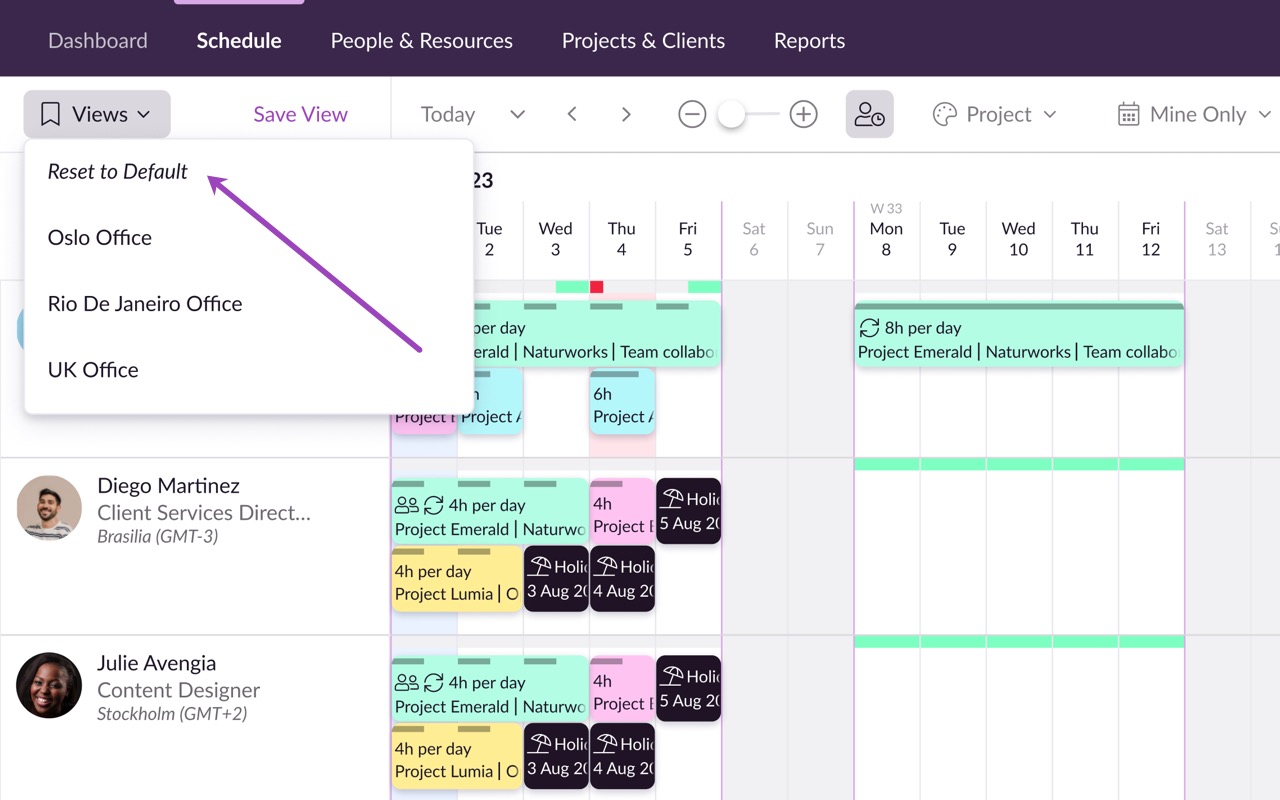
It’s quick and easy to see when saved views have been applied - find a label with your selected view name appear in the top left of your control bar. You can remove views by clicking onto the label and choose Reset to Default.