
Use Timesheets
Our timesheets feature makes it quick and easy to log the actual time you spend on bookings. This guide will show you how to log your time, whether you're adding manual entries or utilizing automatic time entry suggestions from the schedule.
What is a Time Entry Suggestion
To streamline the process of filling out your timesheet, we pre-populate time entry suggestions; the forecasted bookings from your Schedule. This includes:
Duration and time specific bookings from your Schedule.
Time off events from your Schedule.
Waiting List & Overtime bookings from your Schedule.
Calendar events from your synced calendars such as Outlook or Google Calendar.
Please note: these suggestions are not dynamically linked to your schedule. If a booking in the schedule changes after you've logged time against it, you'd need to manually adjust the entry on your timesheet (if relevant). Likewise, if you amend a time entry suggestion to log more or less time than was planned, this will not affect the original booking in the Schedule.
Enabling Timesheets
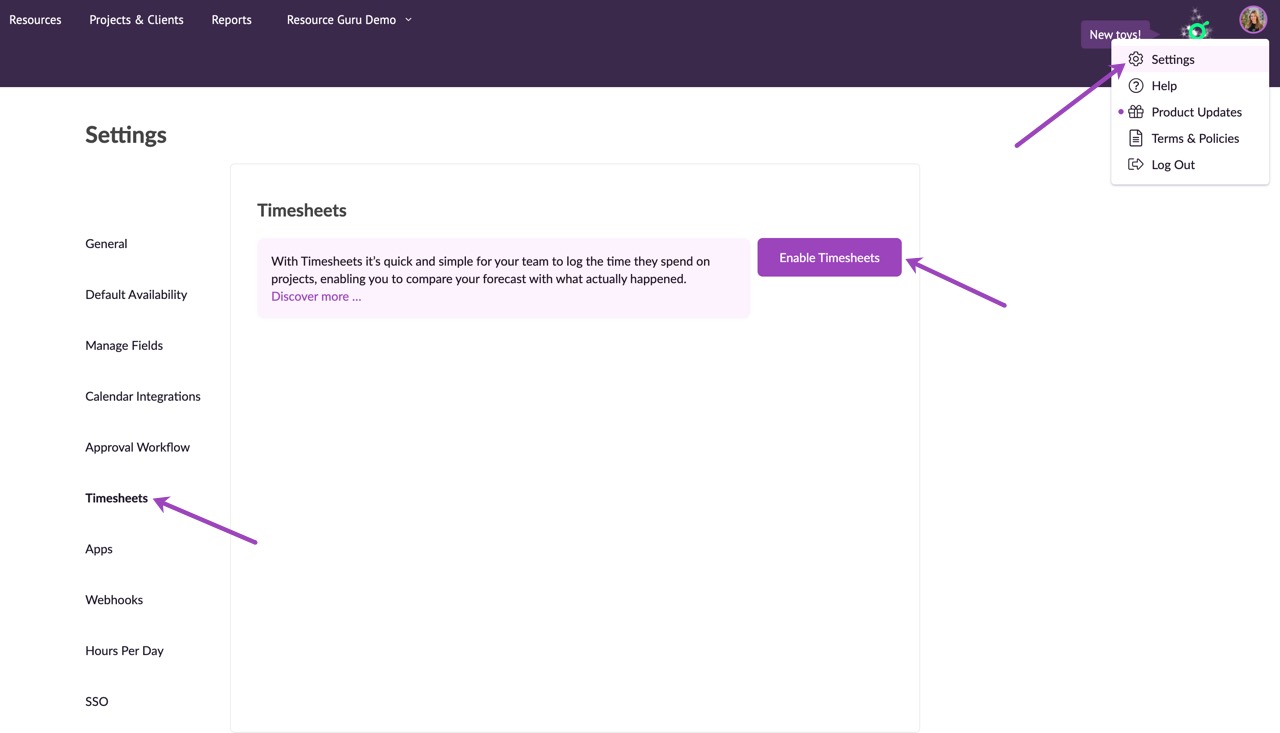
Click on your profile picture and then select Settings > Timesheets > Enable Timesheets. By default, everyone who has access to your account is granted the ability to edit their own timesheets. This means they can enter, modify, and manage their own time entries.
You can adjust individual permissions if required. To restrict someone’s access to the Timesheets section, change their permissions to No Access via their profile in the People & Resources section.
Disabling Timesheets
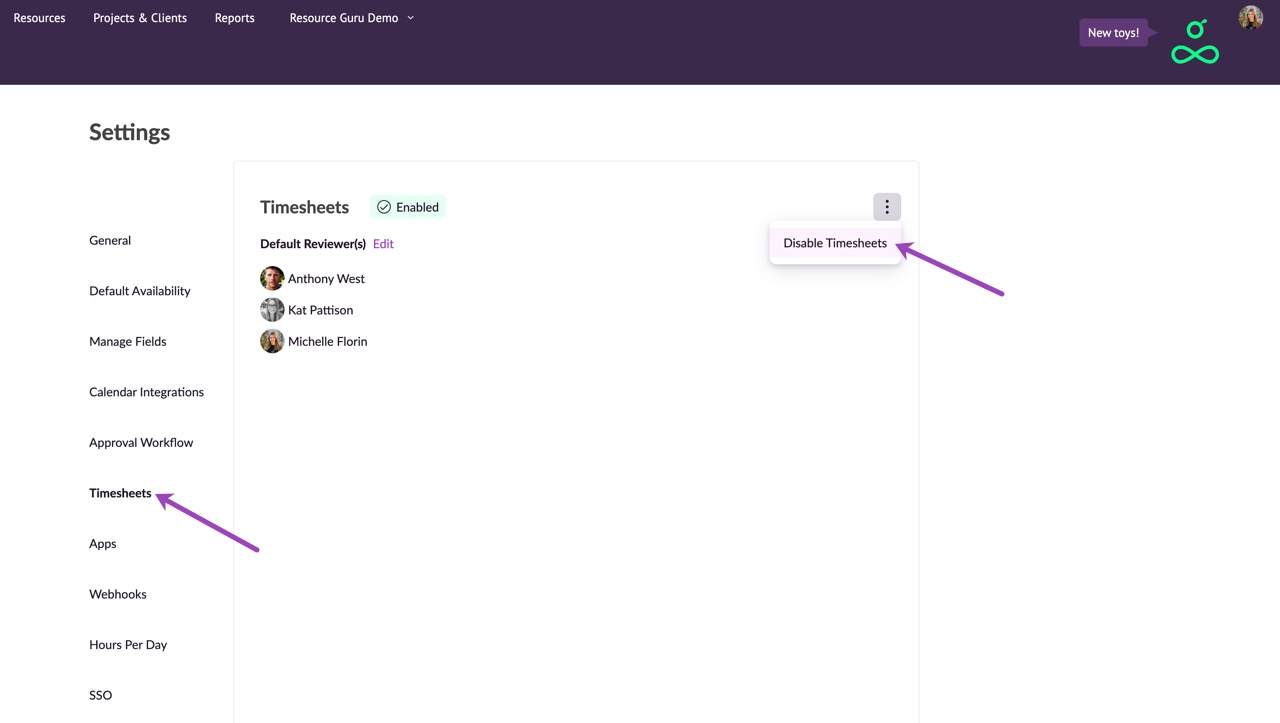
To disable Timesheets, go to Settings > Timesheets, then click the options menu followed by Disable Timesheets.
Please note: Disabling timesheets will remove the ability for your team to log the actual time spent on bookings. It's important to consider the impact this may have on your project reporting and time management before making this change.
Logging a Time Entry Suggestion
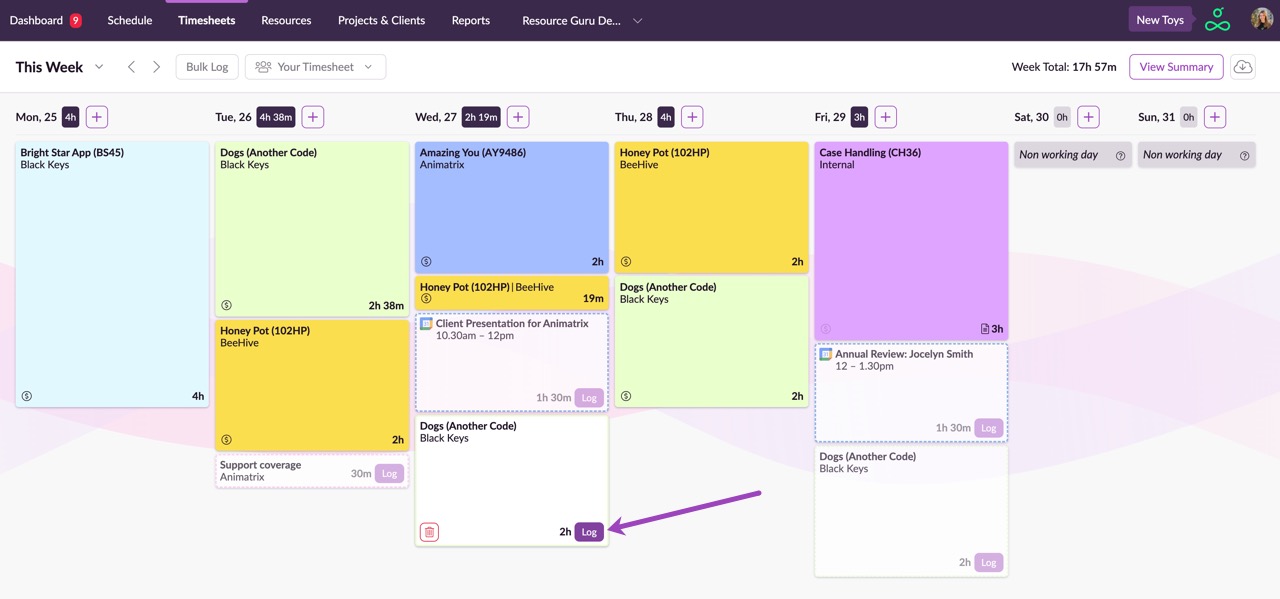
Suggestions will appear as transparent time entries in your timesheet. Click the Log button within a suggestion. It’ll be pre-filled with the suggested details.
You can amend the date, project/client, activity type, time duration, add notes or other details before logging the time by clicking Log Time.
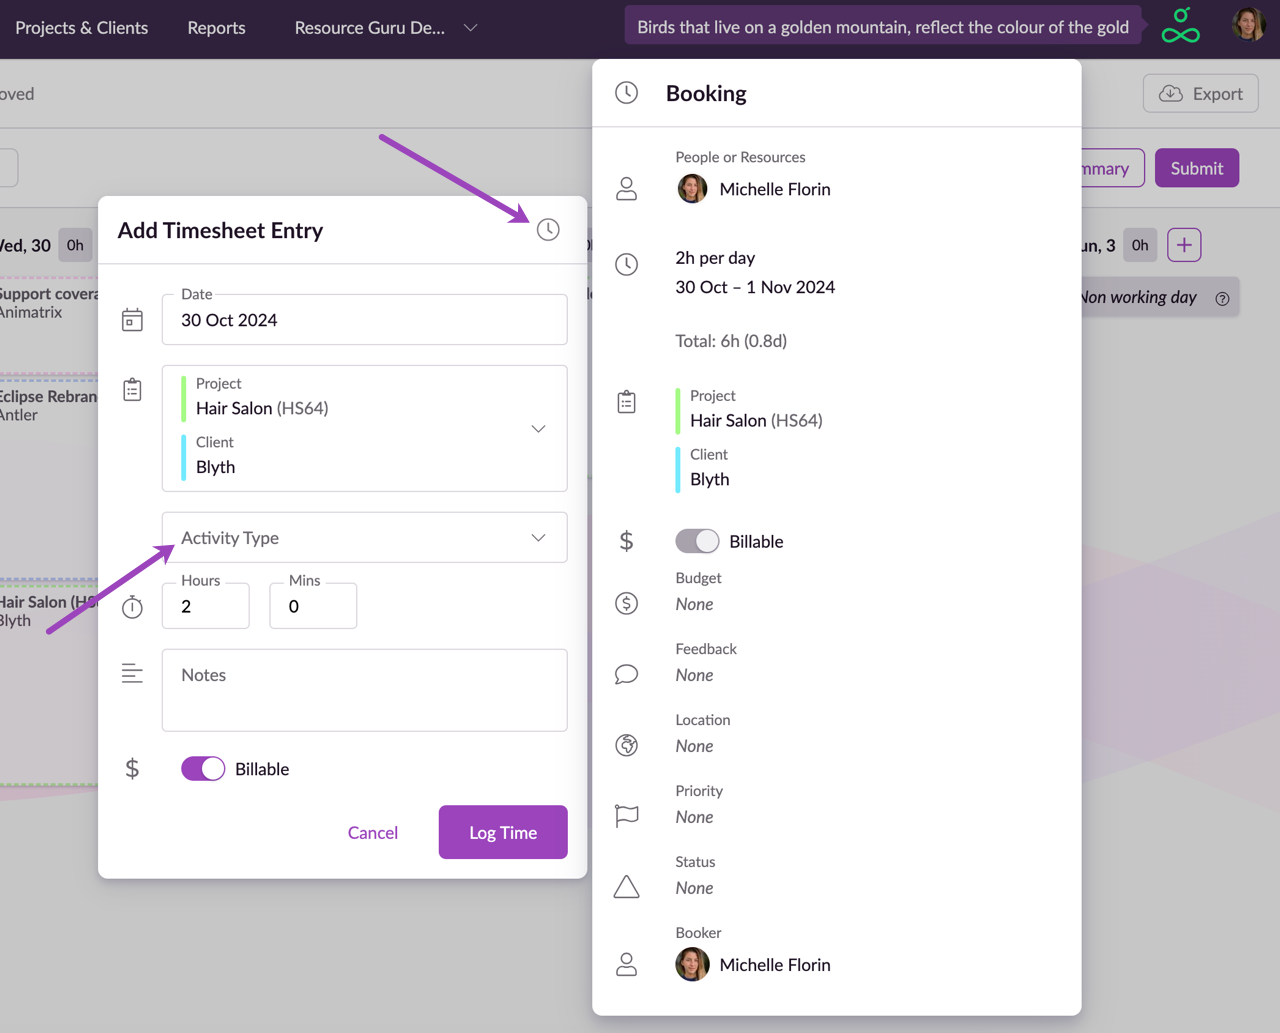
Hover over the project name in a suggestion or click on the clock icon to see further details of the booking. Add an Activity Type to categorize your timesheet entries, giving you a clearer picture of how time is allocated across different tasks and activities.
Your external Outlook or Google Calendar events will be synced into your timesheets. Log time against them to track the actual spent time on these events.
Removing a Suggestion
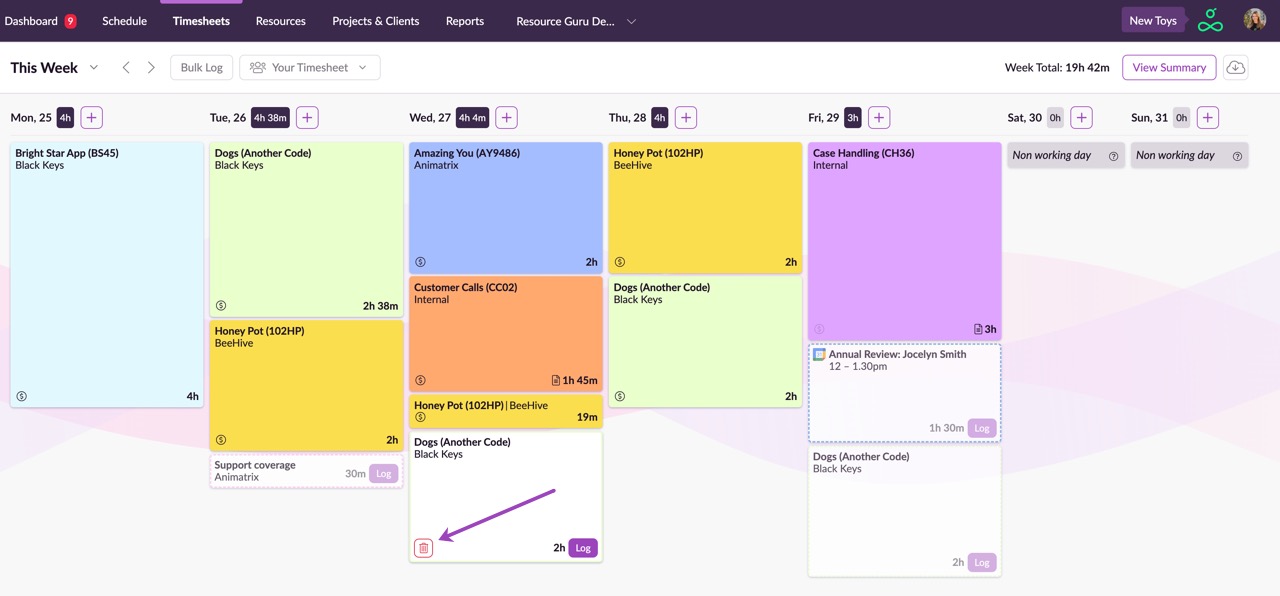
To remove an unwanted suggestion from your timesheet, hover over it and click the trash can icon. In the Timesheets report, this means, eg. that 2 hours were scheduled but not logged because the entry was deleted, resulting in a difference of -2 hours.
Creating a Manual Time Entry
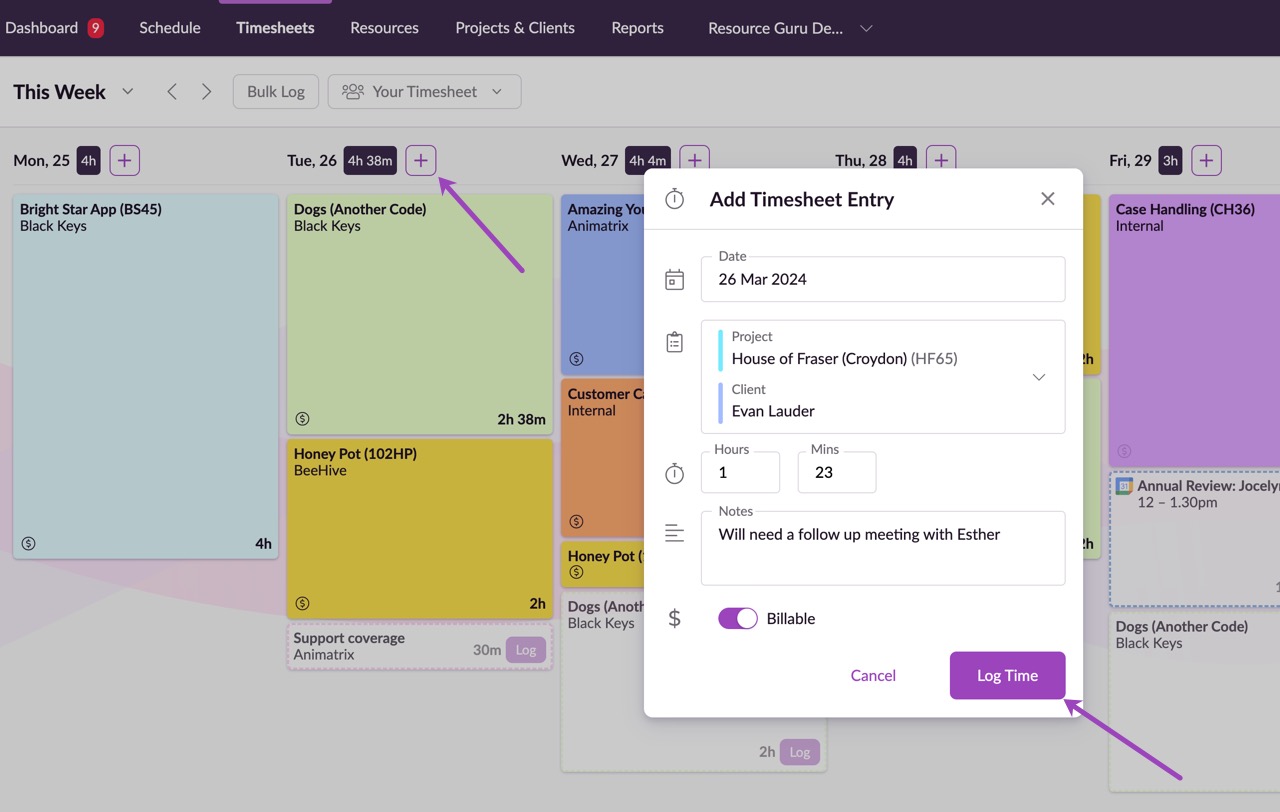
To manually add a time entry, click the + button next to any day on your timesheet. Complete the fields with the relevant details, then click Log Time. Your entry will now appear on your timesheet. In the Timesheets report, this means, eg. that 2 hours were not scheduled but logged because the entry was manually created, resulting in a difference of +2 hours.
Bulk Logging Suggestions

The Bulk Log provides a quick and easy way to view, edit and process all suggested entries up to, and including, the current day. Click on the Bulk Log button.
This opens a window displaying all suggestions for the current week. Clicking the Log Time button will log all scheduled work with the pre-scheduled time. If you prefer to log only specific entries, use the checkboxes on the right-hand side to select the ones you'd like to log.
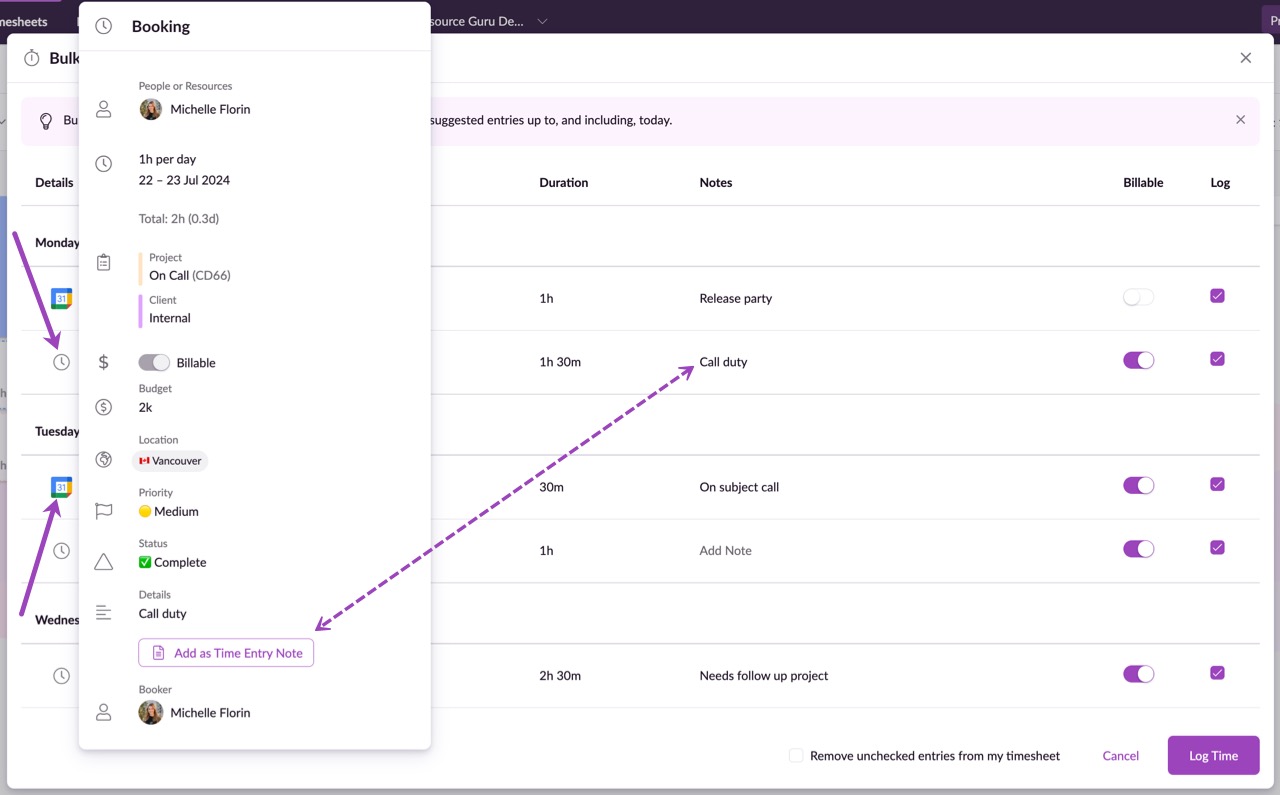
Hover over the clock or external calendar icon on the left-hand side to view additional booking details, such as the specific time, duration, or any notes in the Details field. To copy information from the Details field into your time entry notes, click Add as Time Entry Note.
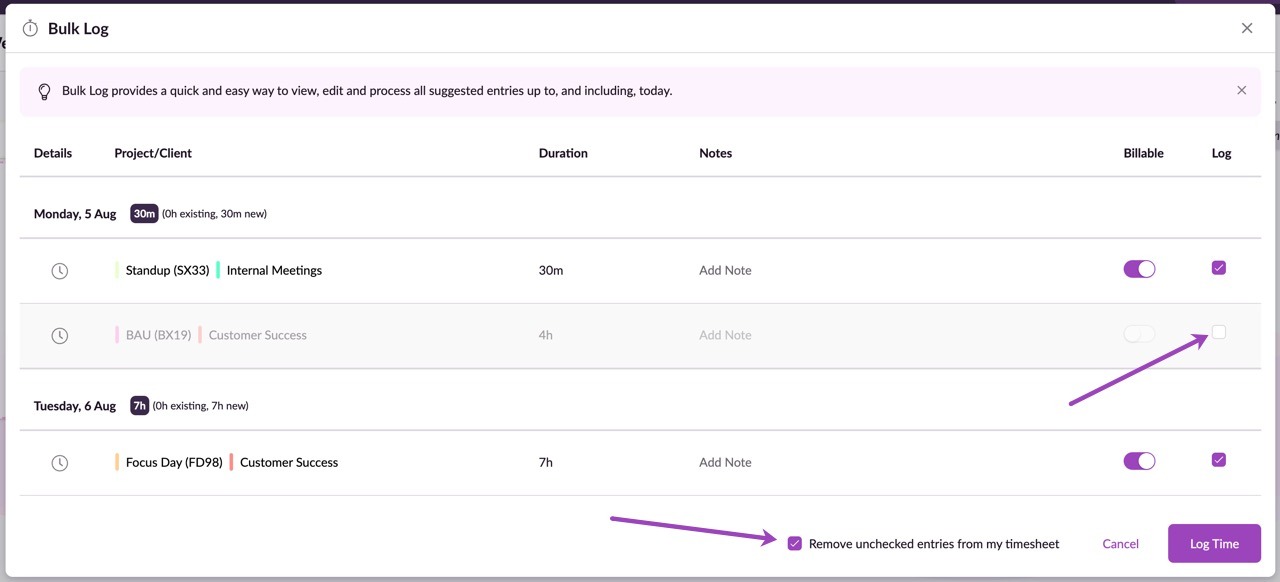
If you choose not to log some suggestions, you can opt to remove them from your timesheet by ensuring the Remove unchecked entries from my timesheet option is checked.
Before logging your time entries, you can adjust durations, add notes, mark them as billable or non-billable or assign entries to specific clients or projects. Once you're satisfied with your selections and edits, click Log Time.
Guru tip
Use bulk actions wisely: they can help you save time, but bulk actions apply to all selected entries, so review them carefully before applying changes.
Logging Time Off in Timesheets
Time off is automatically calculated and synced to your Timesheet based on your schedule. There are some important things to keep in mind:
Unlike bookings, if you move Time Off on the schedule, it also moves on your Timesheet. The schedule is treated as the source of truth.
If you have multiple, overlapping Time Off entries, they are calculated based on the following priority order:
Public holiday
Maternity/paternity leave
Holiday (personal)
Sick leave
Compassionate leave
None
For example, if you had a personal holiday booked for half a day (4 hours), and later added an all day sick leave event (8 hours), your Timesheet would show 4 hours of Holiday (personal) & 4 hours of Sick leave.
Editing a Time Entry
Navigate to your timesheet and click on the time block you wish to edit. Click on the field you want to change and after making your adjustments, click outside the field to save the changes automatically.
To quickly adjust the duration of your time entry, simply hover over the bottom edge of the entry and drag it up or down to shorten or lengthen the time.
Deleting a Time Entry
If you find that a time entry is no longer needed or was made in error, you can easily remove it.
Click the time entry you want to delete, then click the three vertical dots at the top of the window, followed by Delete.
Guru tip
We’ve built timesheets in such a way that makes them quick and easy to complete. We recommend logging your time regularly so you never have a lot of entries to review, and so your logged time accurately reflects the work you’ve done. Remember, Resource Guru pre-populates your timesheet with all the bookings that were made for you, so all you need to do is confirm how long the work took (and you can do this using bulk actions to keep it quick!).