
Configuring Single Sign-On (SSO) using Microsoft Azure
Please note that SSO is only available on the Master plan.
SSO/SAML enables members of an identity provider (IdP) of your choice to access Resource Guru without having to set up a separate Resource Guru ID (login). Resource Guru's SSO works with any IdP that supports SAML 2.0 including Google Workspace, Microsoft Azure, Okta, Ping Identity, Ping Federate, OneLogin, Bitium, LastPass, Centrify, Clearlogin, Auth0, and many others. Setting up SSO can be tricky, so we’ve provided a guide below using Microsoft Azure as the IdP.
If you would like to use SSO on multiple Resource Guru accounts with the same email domain, please reach out to happytohelp@resourceguruapp.com and we will be happy to help get you set up!
Configuring SSO using Microsoft Azure
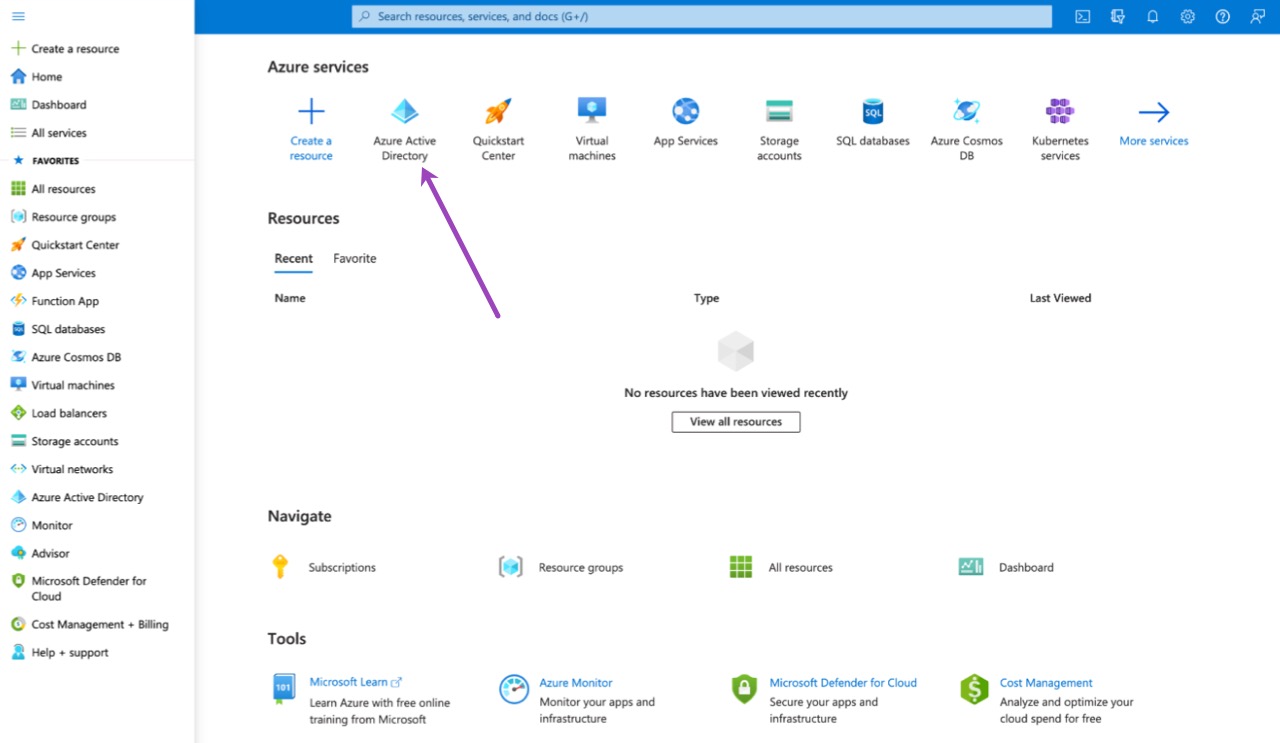
Sign into the Azure Portal and select Azure Active Directory from the left-hand menu.
Within Azure Active Directory, select the Enterprise Applications option and then choose New application.

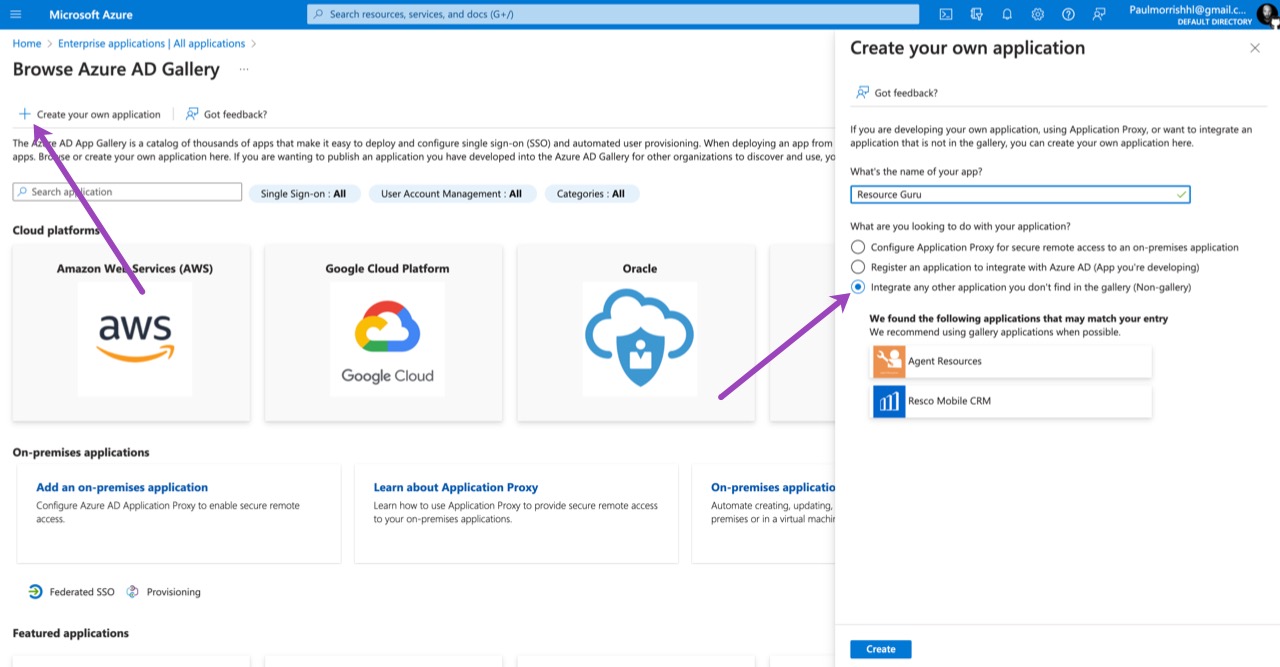
Choose the Create your own application option. Enter a name for the application and leave the Integrate any other application you don’t find in the gallery (Non-gallery) option checked. Select Create.
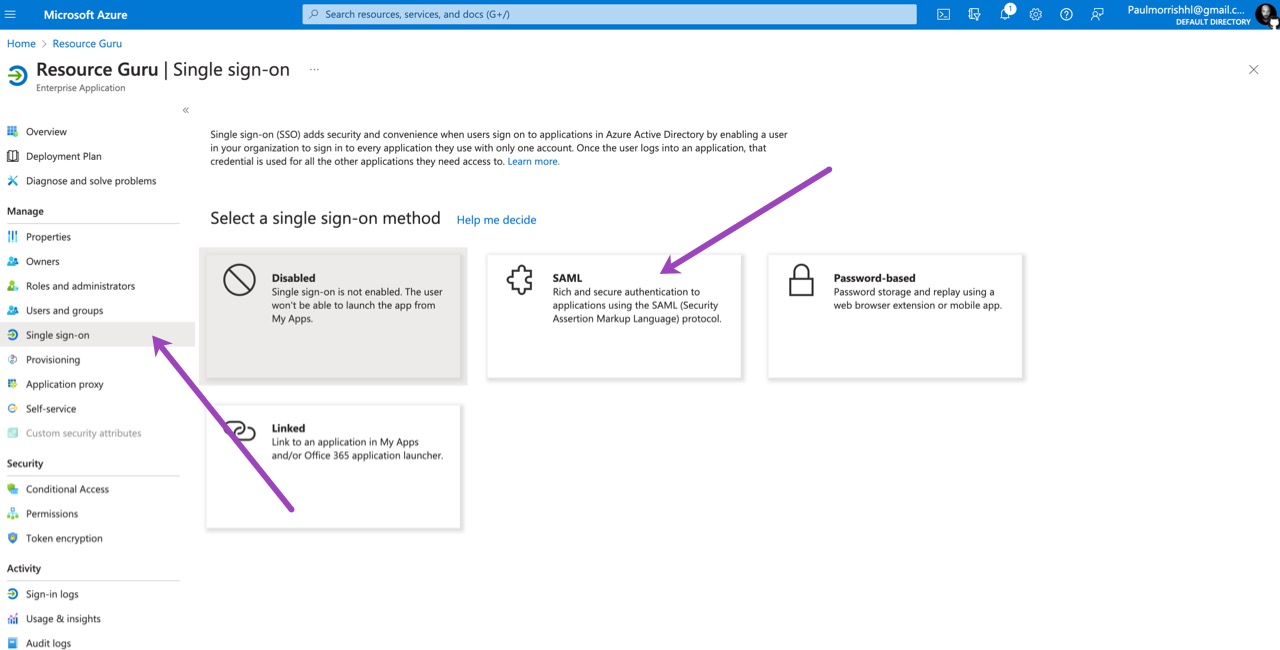
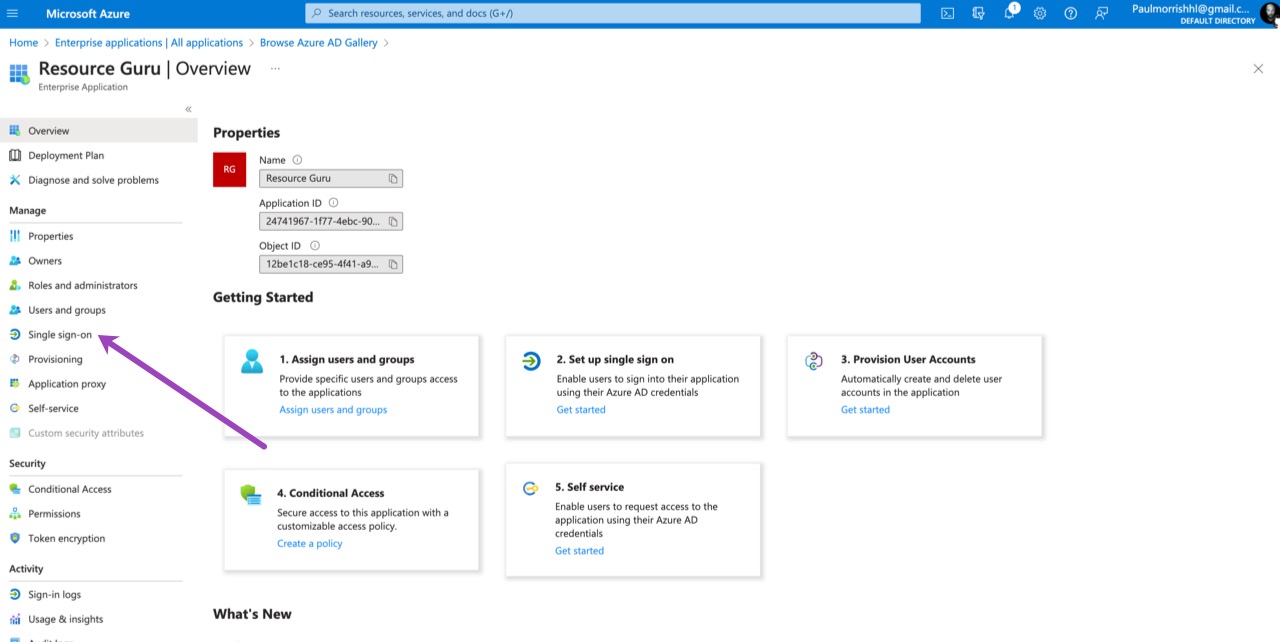
Choose Single sign-on from the application’s left-hand menu. Choose SAML as the SSO method.
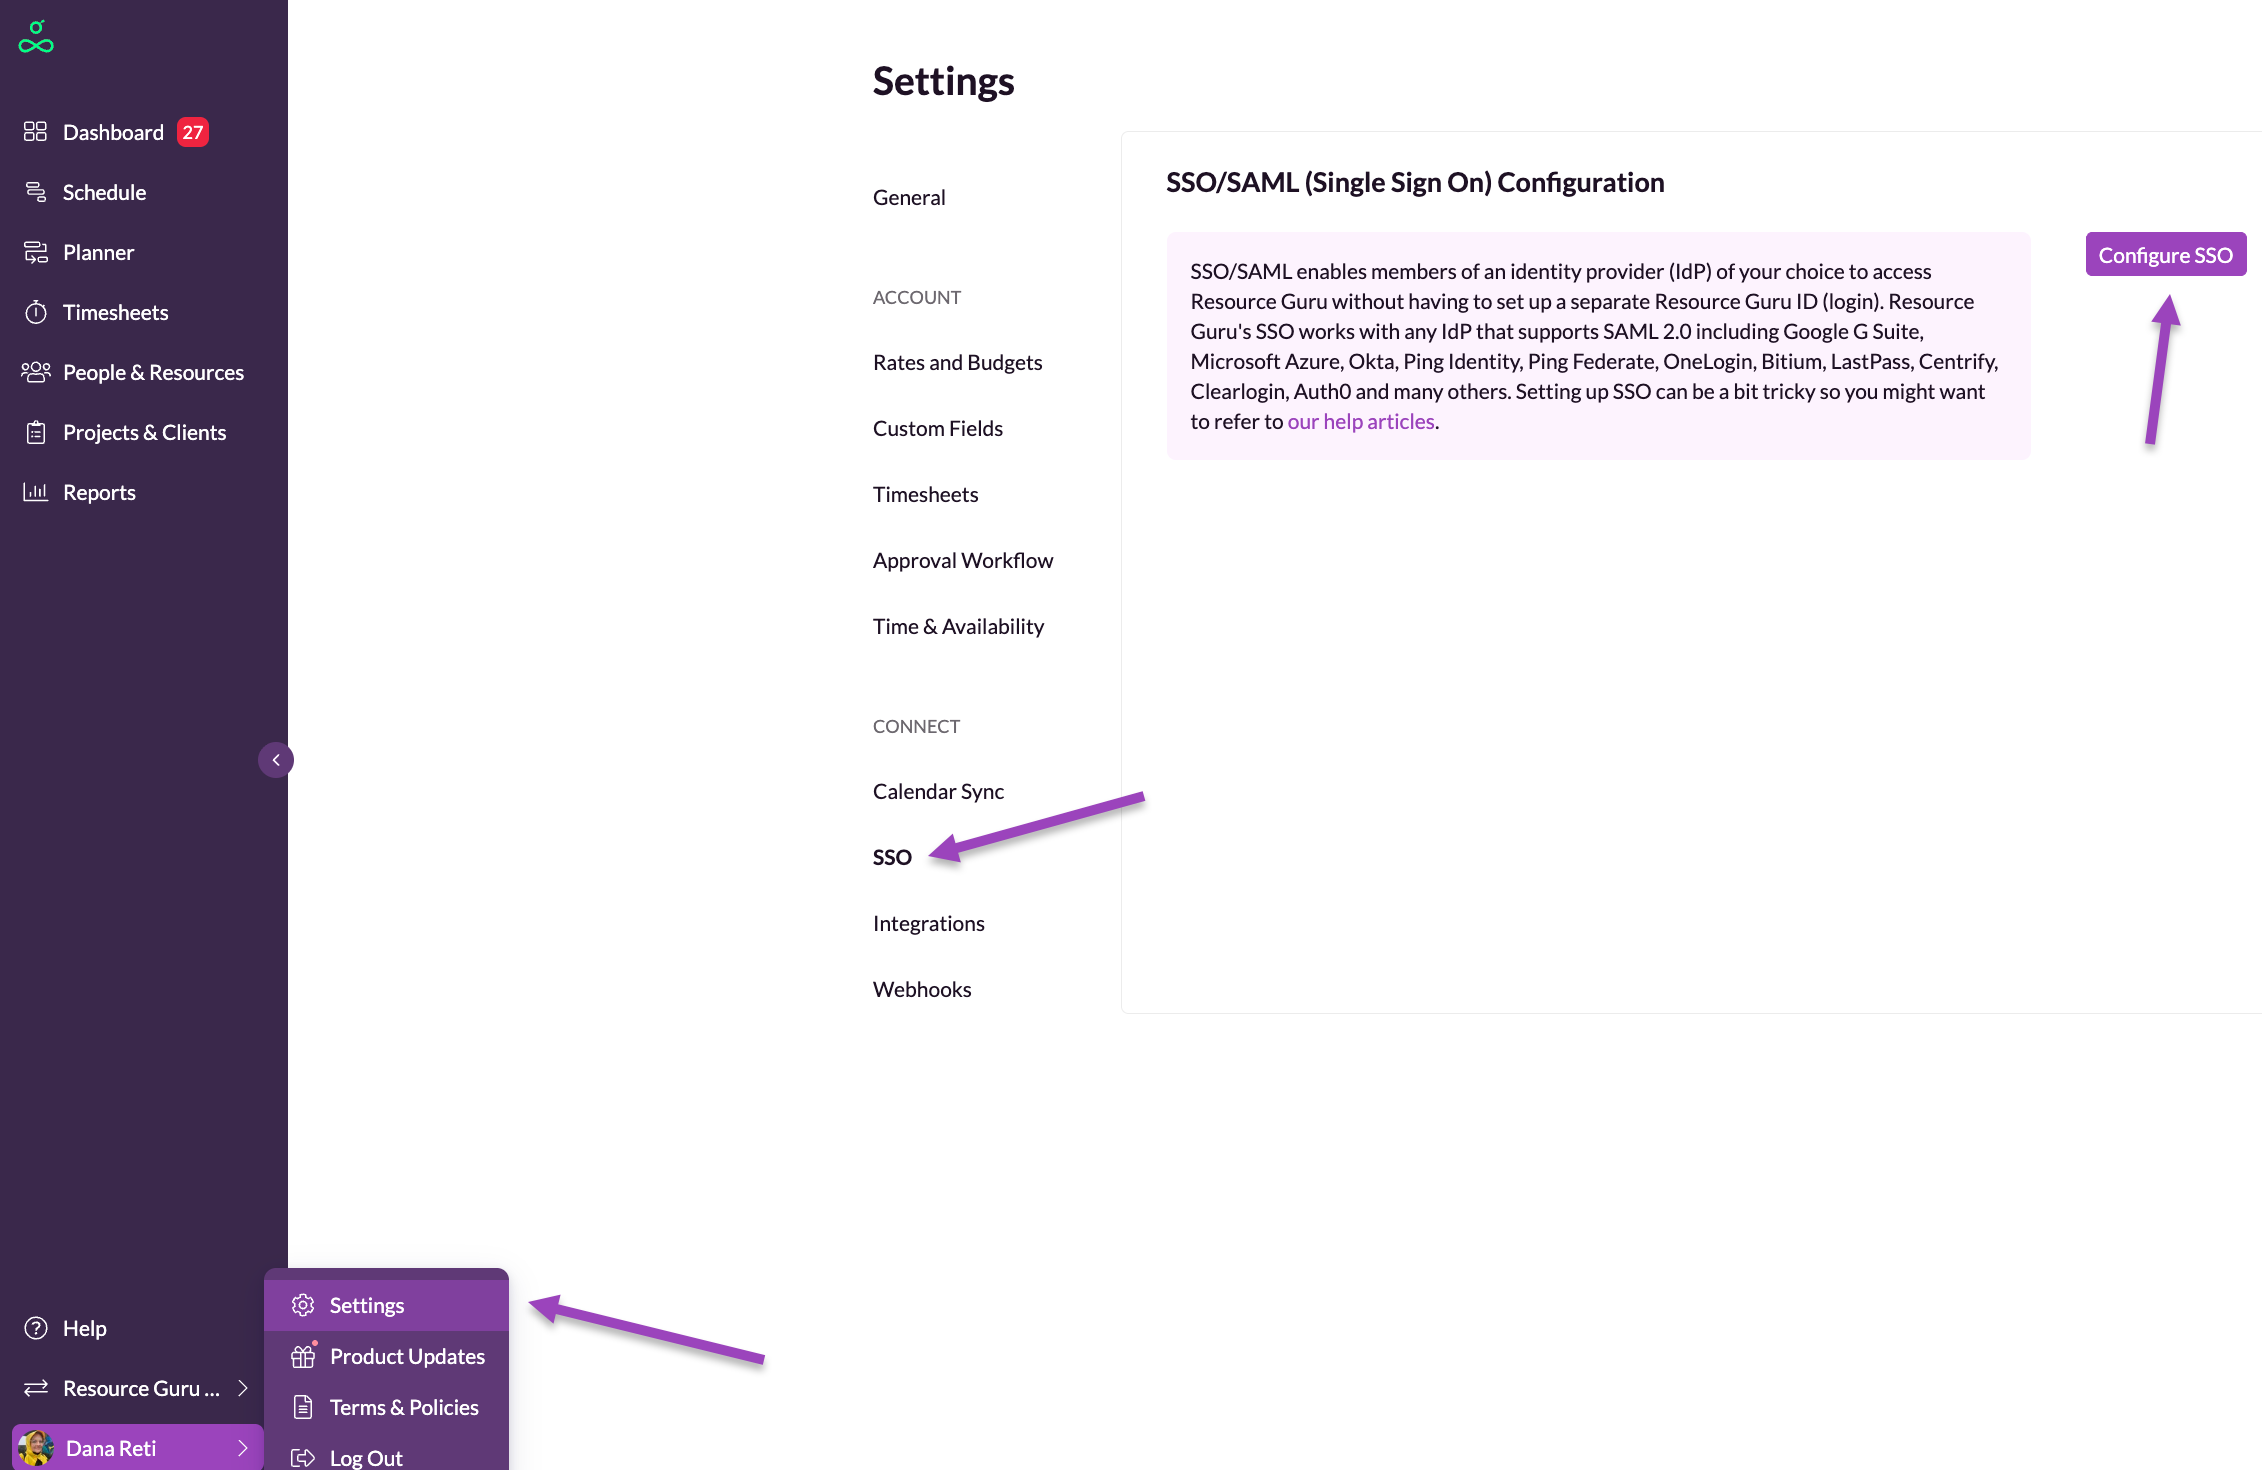
For the Basic SAML Configuration section you will need an Identifier (Entity ID) and a Reply URL (ACS URL). Both of these are provided by Resource Guru in Settings > SSO > Configure SSO.
Edit the Basic SAML Configuration and add the ACS URL and Entity ID from Resource Guru.
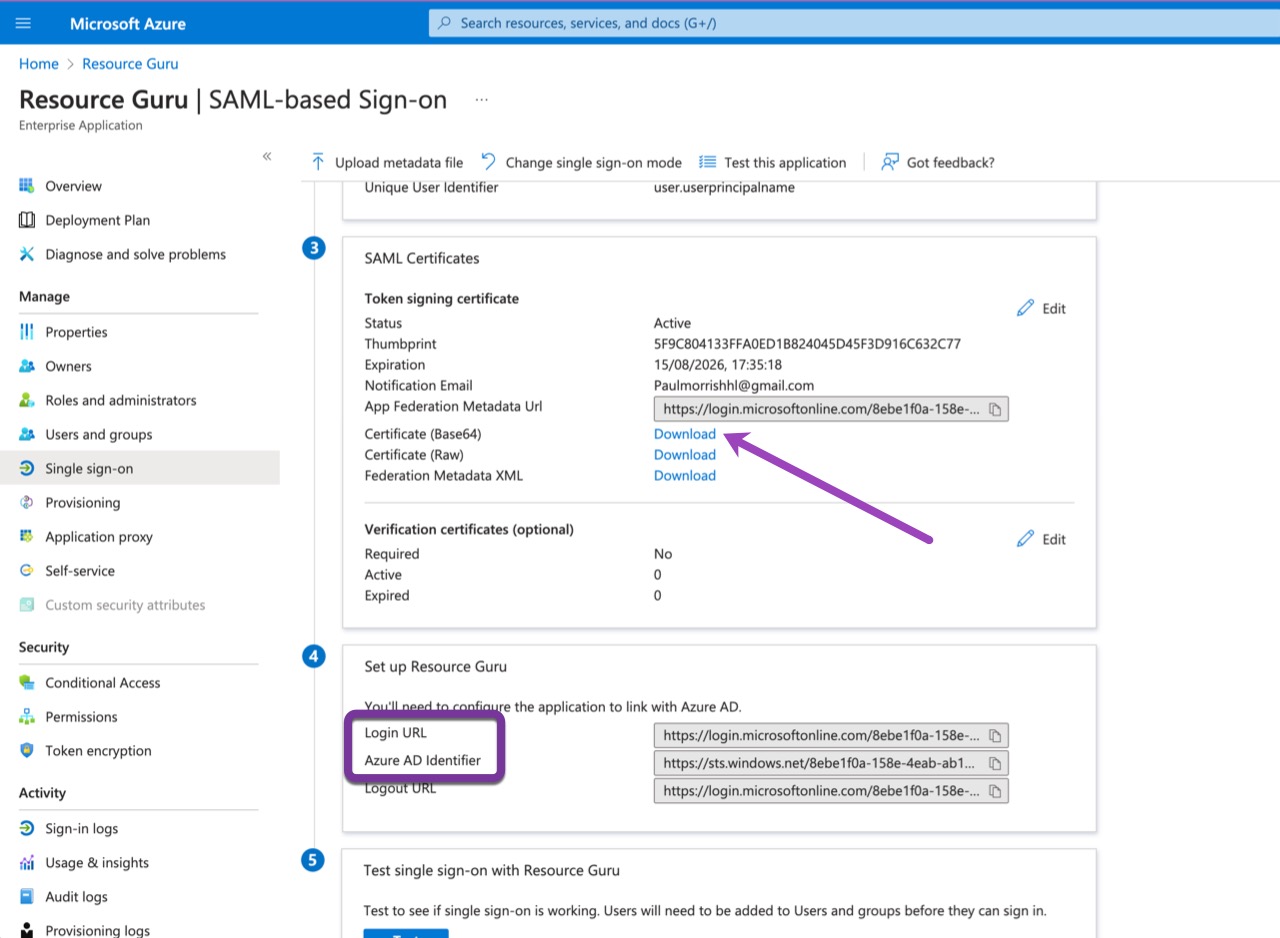
In the SAML Configuration window, download the Certificate (Base64) under the SAML Certificates section and keep it safe. We will need it later when we configure Resource Guru.
Additionally, make a note of the Azure AD Identifier and the Login URL and keep them safe. We will also need them later when we configure Resource Guru.
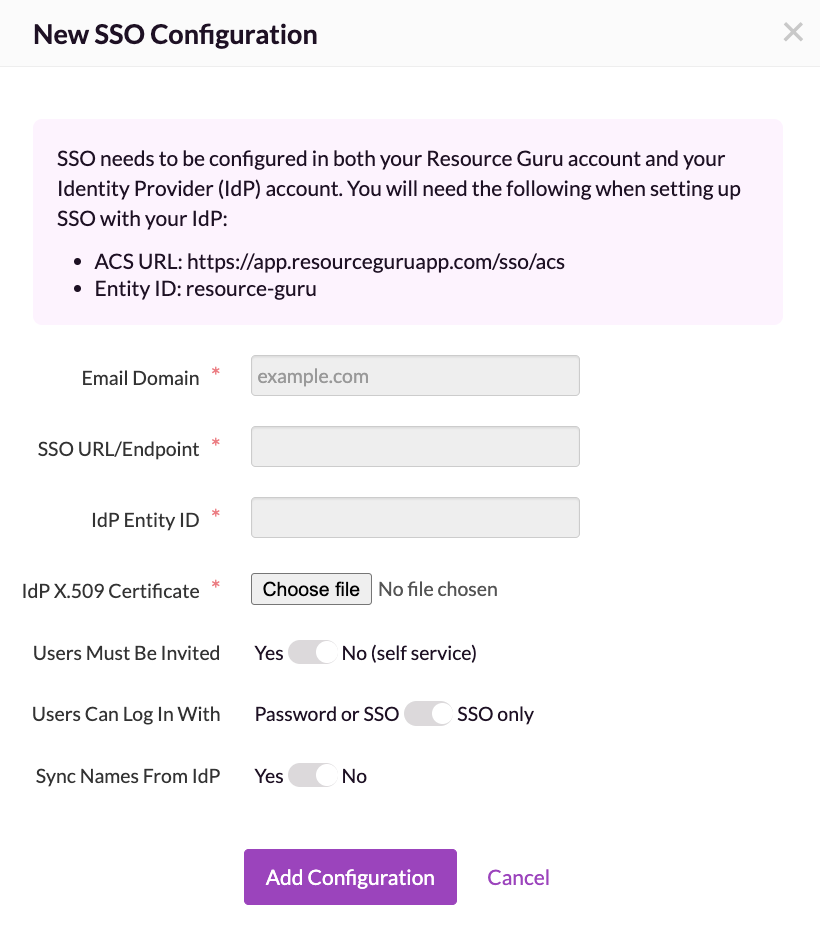
Log into Resource Guru. Navigate to Settings > SSO > Configure SSO. Enter the email domain for your organisation (e.g. mycompany.com). Then paste the Login URL and Azure AD Identifier from Azure into the relevant fields, and upload the certificate you downloaded earlier.
Users Must Be Invited: this option lets you specify whether people must be invited to join your account (if so, choose Yes), or whether anyone with a company email address (e.g. @mycompany.com) should be able to create their own login without being directly invited; in which case choose No (self service).
Users Can Login With: this option should be set to SSO only if you want to prevent people from accessing your account after they have been removed from your IdP. This setting provides centralised access control to your account via your IdP. Please note that account owners will still be able to log in using their Resource Guru ID (email & password) - this prevents everyone being locked out if the connection with your IdP fails for any reason.
Sync Names From IdP: this option is only available when Users Can Login With is set to SSO only. When enabled, Resource Guru uses the first and last name from your IdP as the source of truth for resource names and user profile edits do not overwrite their names in the account. If the setting is turned off — or if login is changed back to Password or SSO — resource names will sync from the user profile again instead.
Your IdP must provide first_name and last_name in the SAML assertion (attribute mapping required). If these attributes aren’t provided, users can enter their names manually during setup.
Finally, click Add Configuration.

Users from your company will now be able to log into Resource Guru with their email address by using the link above on the login page.
Guru Tip
If SSO only is switched on, only the account owner will be able to access the API. This is because users can’t use their Resource Guru ID to log in when SSO only is enabled and we can’t use SSO to determine whether API access should be granted or not.