
Adding People and Other Resources
Please note: You need to have manager or higher permissions to add people profiles and other resources. Contact an administrator in your account if you need increased permissions.
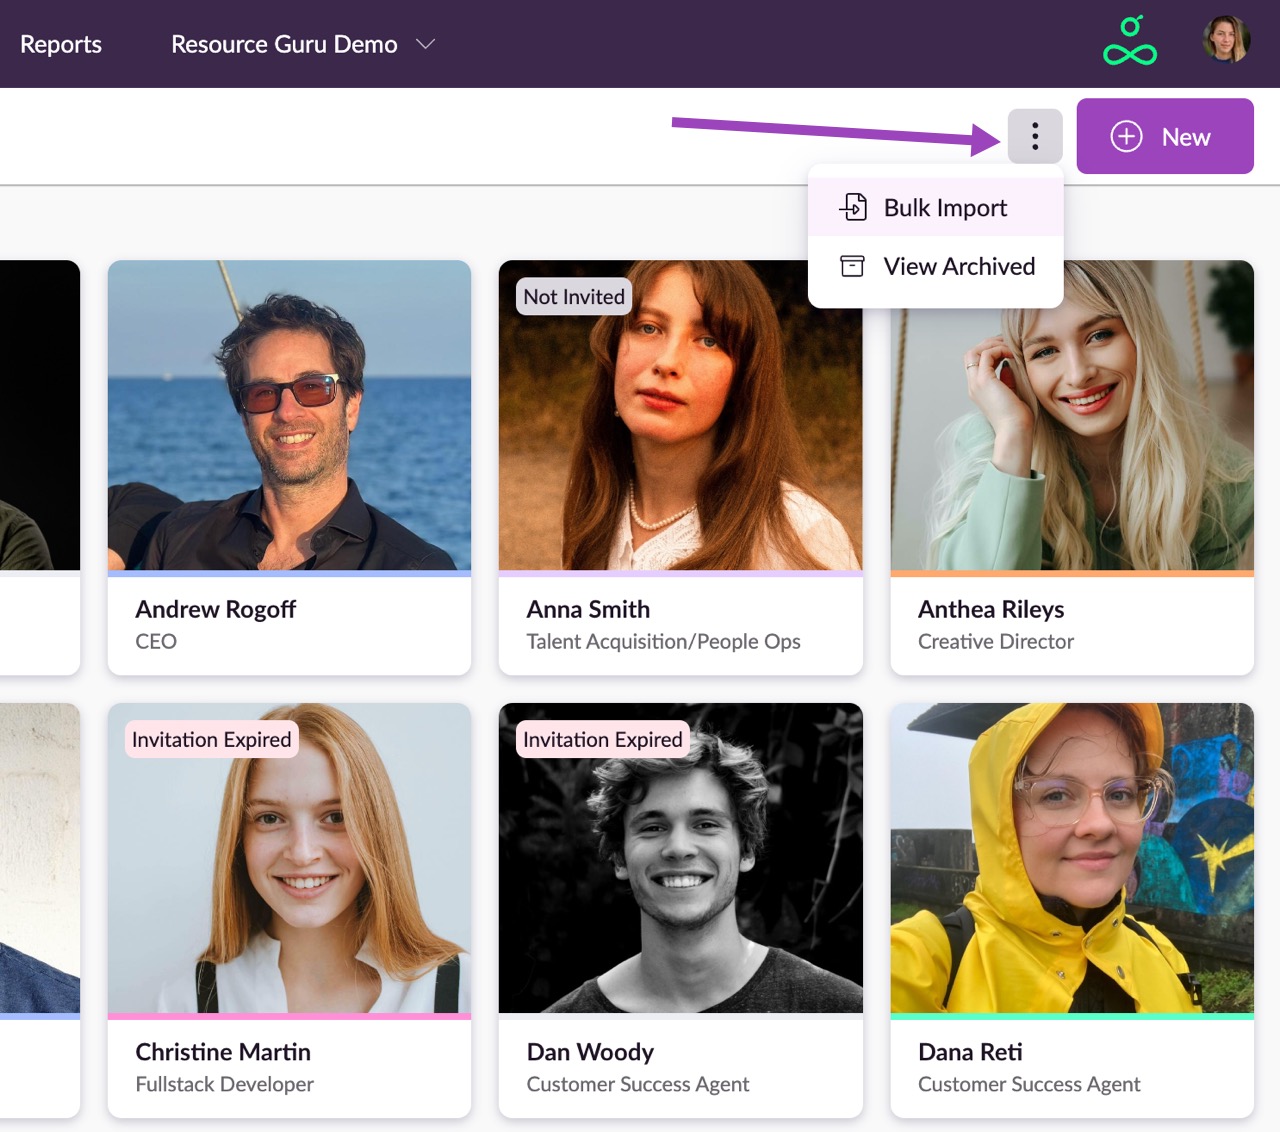
If you're setting up your account, you can save time by using our bulk import feature to add your entire team in one go. Learn more here.
Adding People
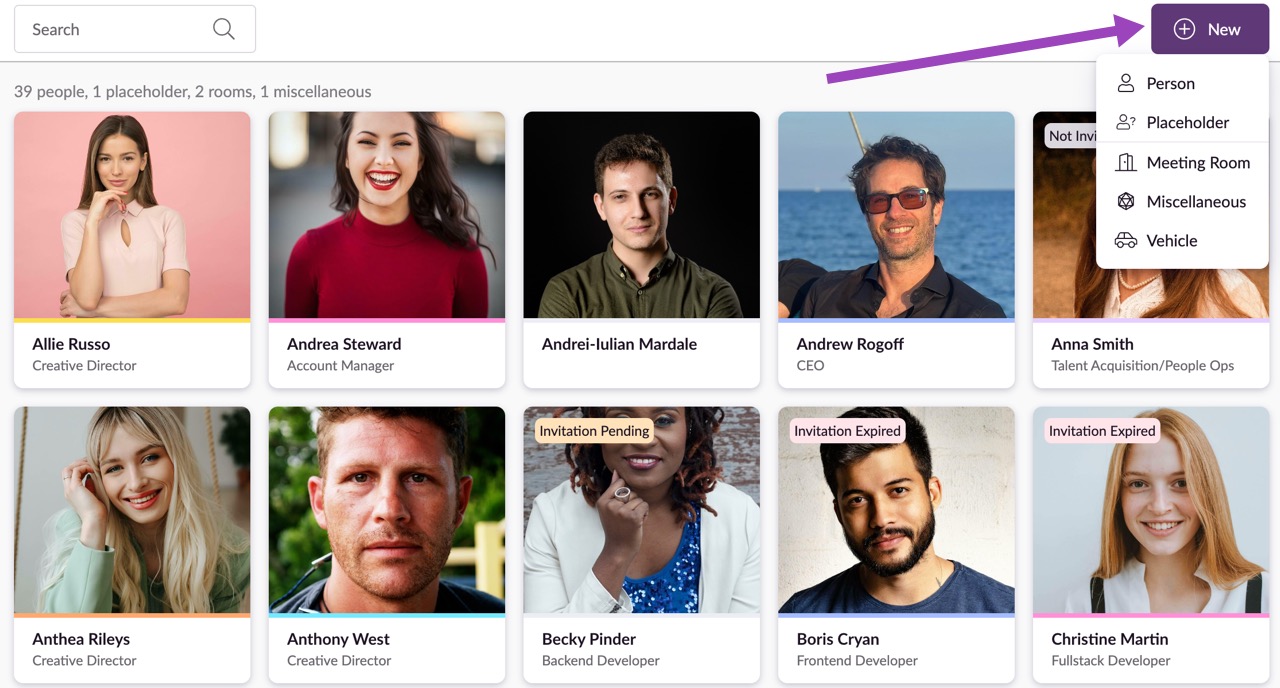
Select Person as your resource type from the +New button > dropdown menu.
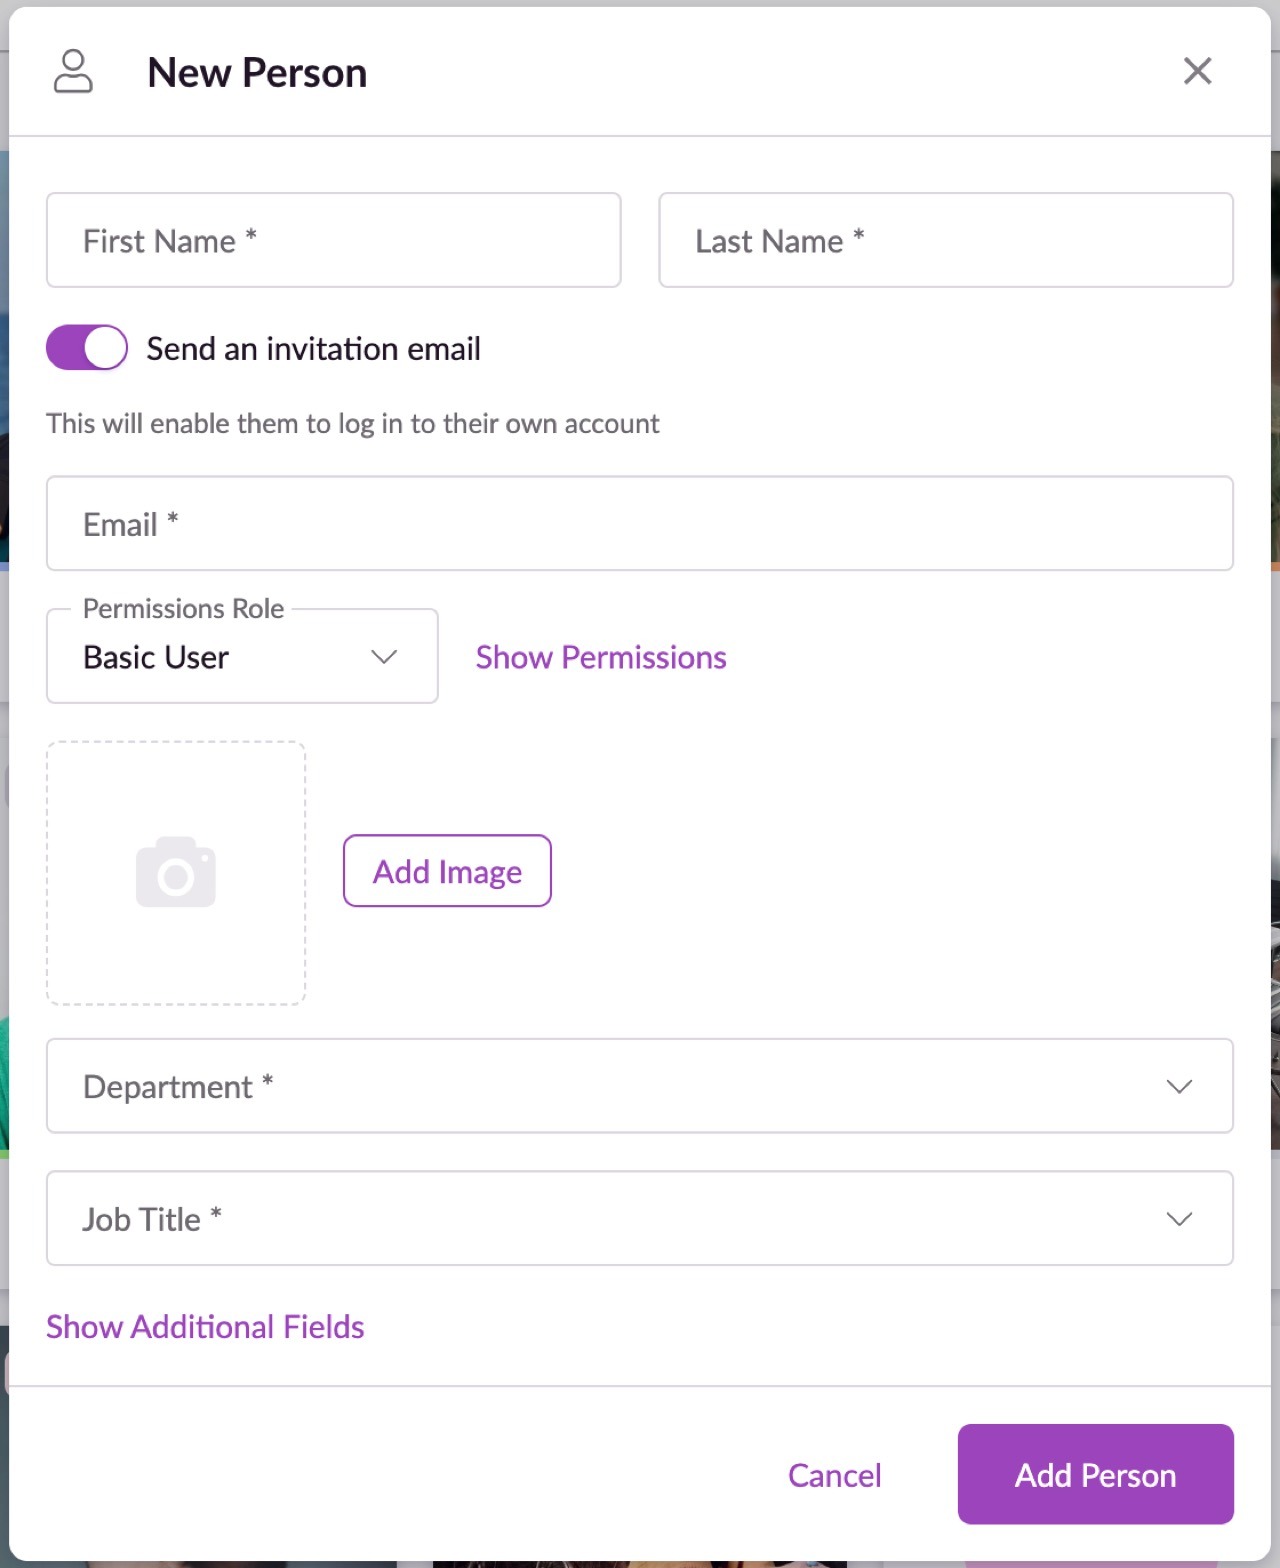
When adding a new person, you'll find several additional input options beyond those available for non-human resources such as Name, Time zone, Normal availability, Bookable status, what rate card they're assigned to, Booking approvers, Photo, and Notes:
Invite this person to join your account - If you want someone to have their own Resource Guru login, you’ll need to invite them into your account by leaving this option checked. You will also need to add a valid email address. You can always invite or re-invite an existing person at a later date by clicking Invite or re-send invite after the person has been added.
Email - Adding an email address is optional if you’re not inviting the person into your account.
Permissions - If you’re inviting a person into your account, the permission settings will appear in the New Person form. You can read more about configuring permissions here.
Additional Fields:
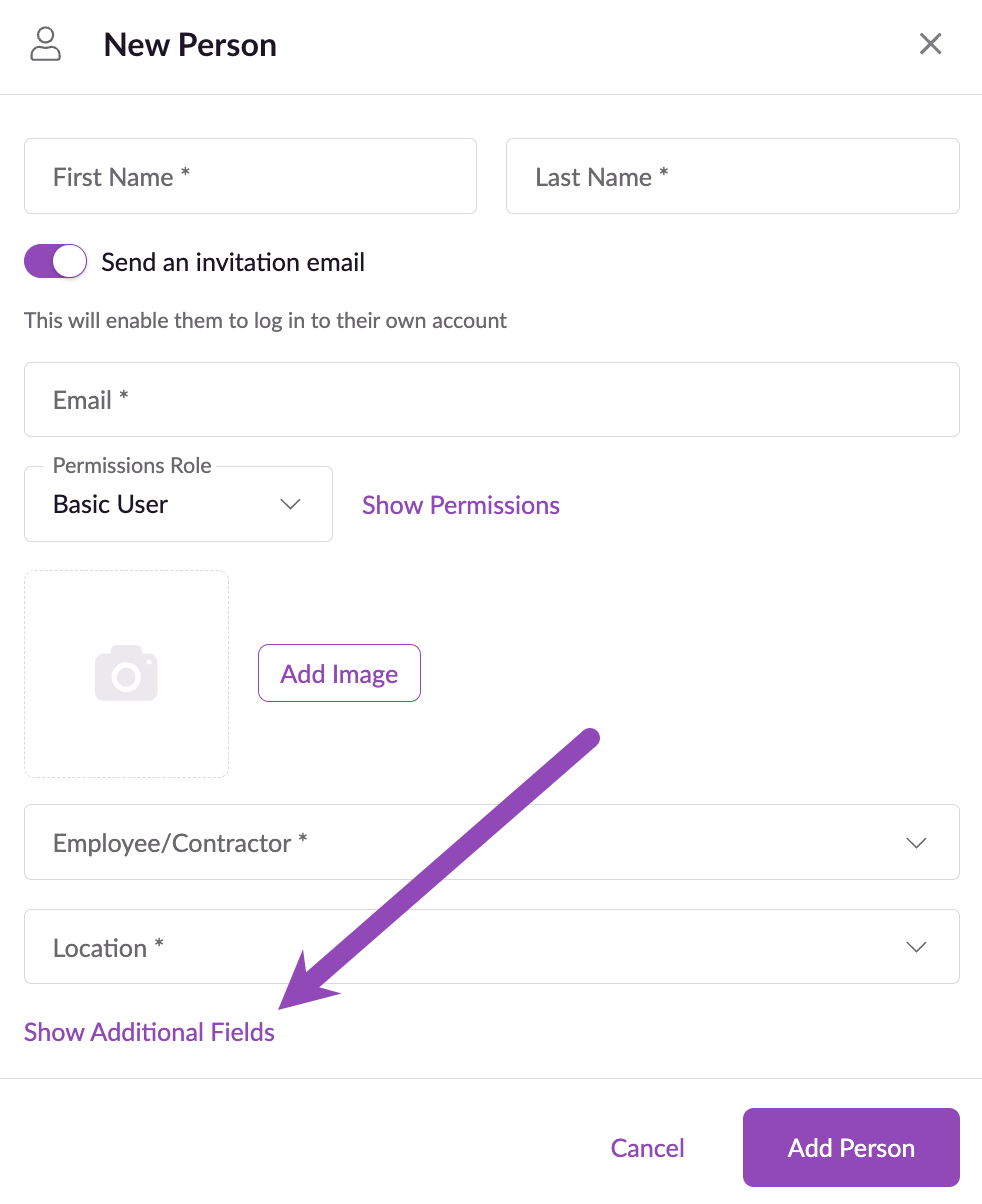
When you click Show Additional Fields you’ll be shown any custom fields you’ve created, along with Job Title, Department and Skills (which are default fields). You’ll also see the following:
Availability & Scheduling
After setting your time zone, designating whether the person is bookable, and assigning a reviewer for their timesheets, you can add their weekly recurring availability.
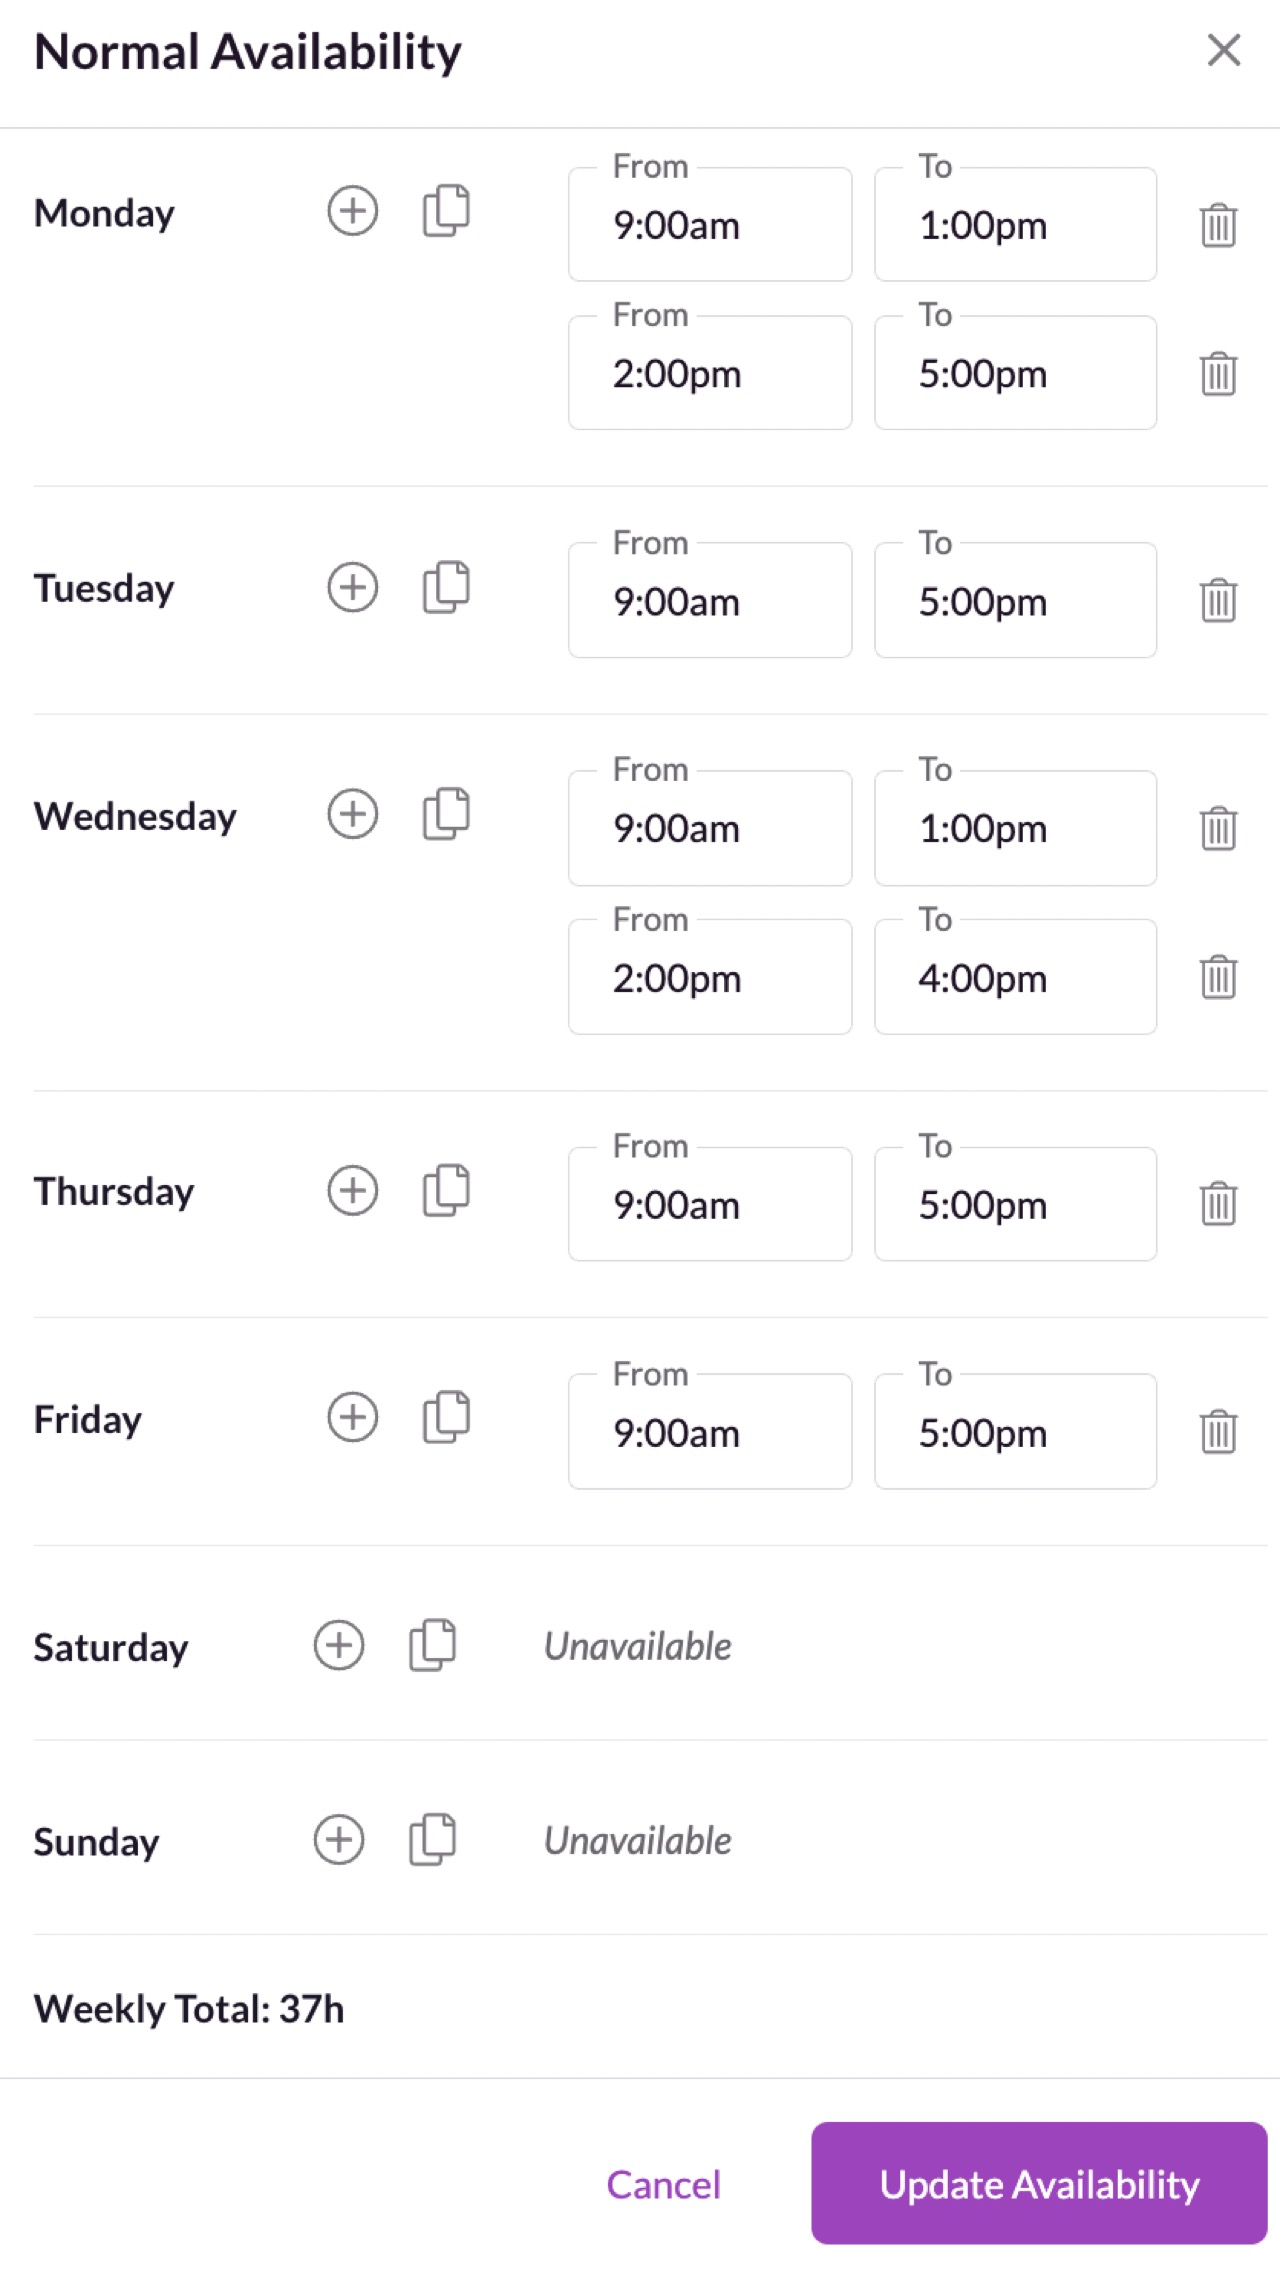
This is where you can configure “normal” availability, meaning the times that person or resource is typically available. Default availability is based on the settings in your account (only accessible to Admins), but you can override the default availability for each person or resource you add. To remove an existing time block, click the small trash can icon next to it. To add a new time block, click the + button for the desired day and a new block will be added; the times can then be edited.
Guru tip
Because Normal availability is based on the settings in your account, it’s a good idea to configure your account’s preferred default availability in Settings prior to adding resources.
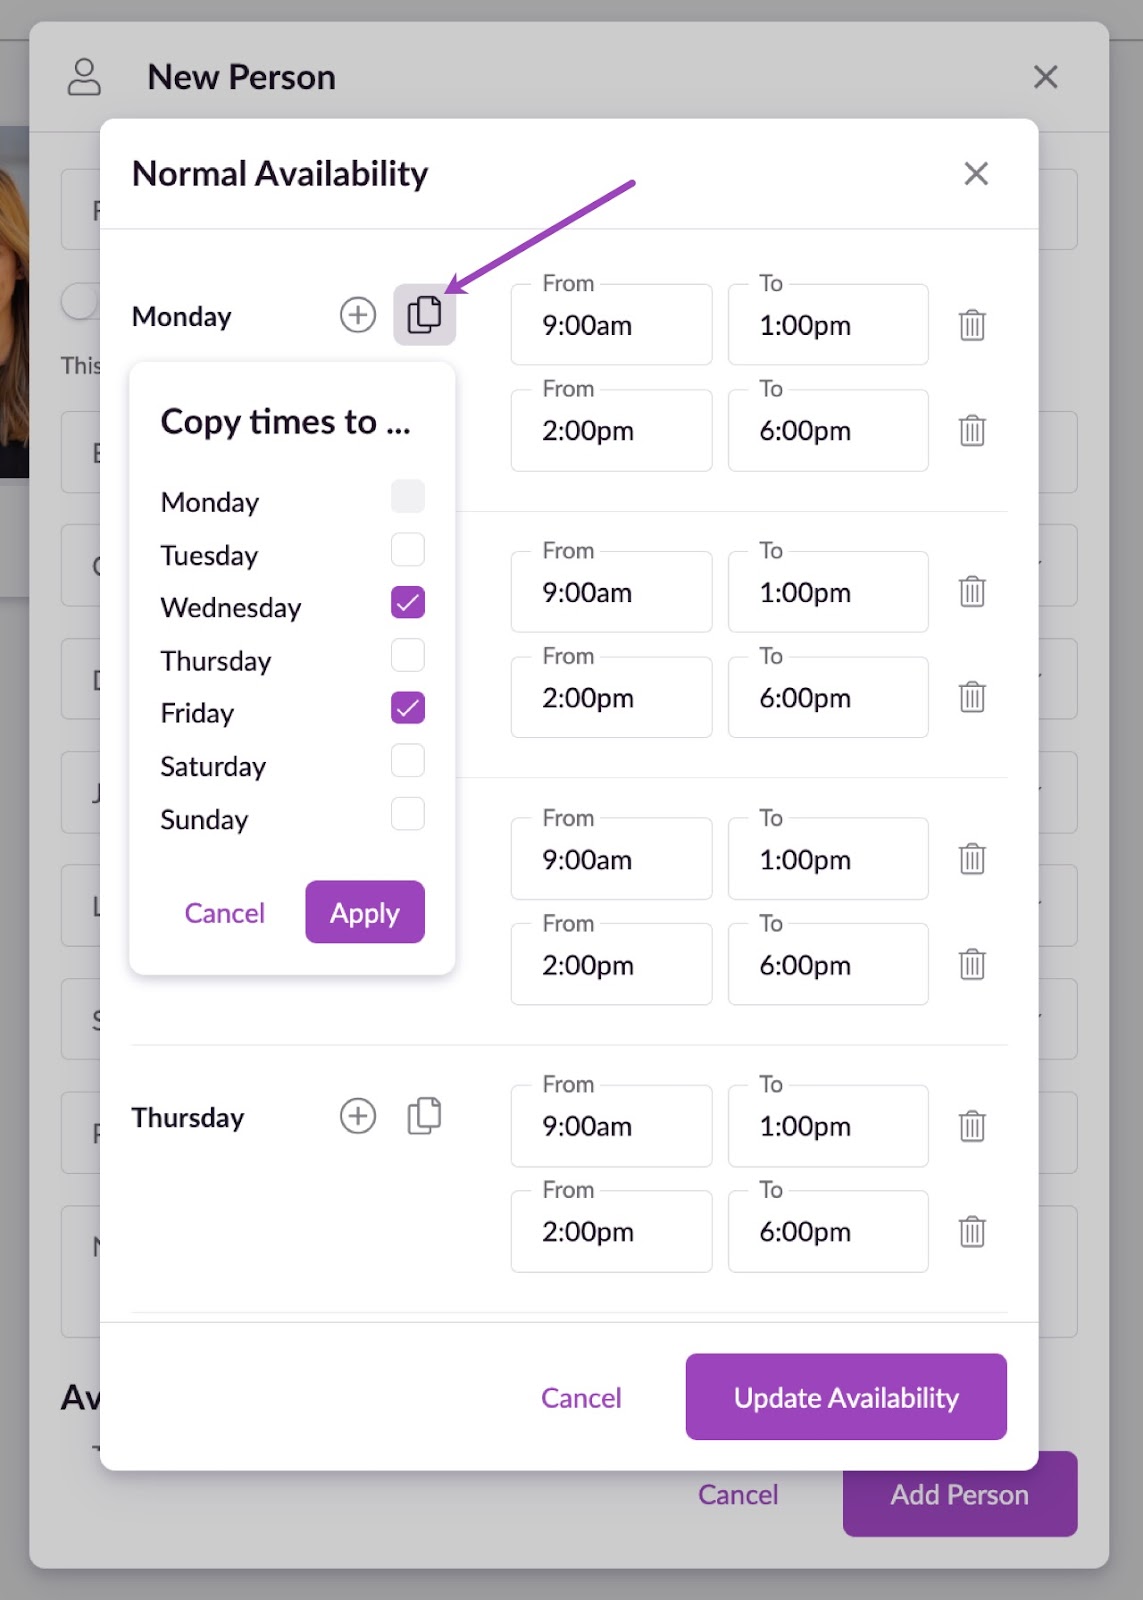
To speed up the process, you can copy the availability blocks from one day to other days. Click on the copy icon (next to +) and choose the days you would like to copy the time to.
Color
Assign a color to each team member. This works in conjunction with the Color by Booker option in the Schedule so you can easily see bookings that have been made by specific people. If a person has no profile picture, the color you assign to them will also be visible next to their name in the Schedule.
Adding Placeholders (coming soon)
Placeholder resources are ideal for planning projects in advance, when you know the scope of the work, but you’re unsure who it will be assigned to.
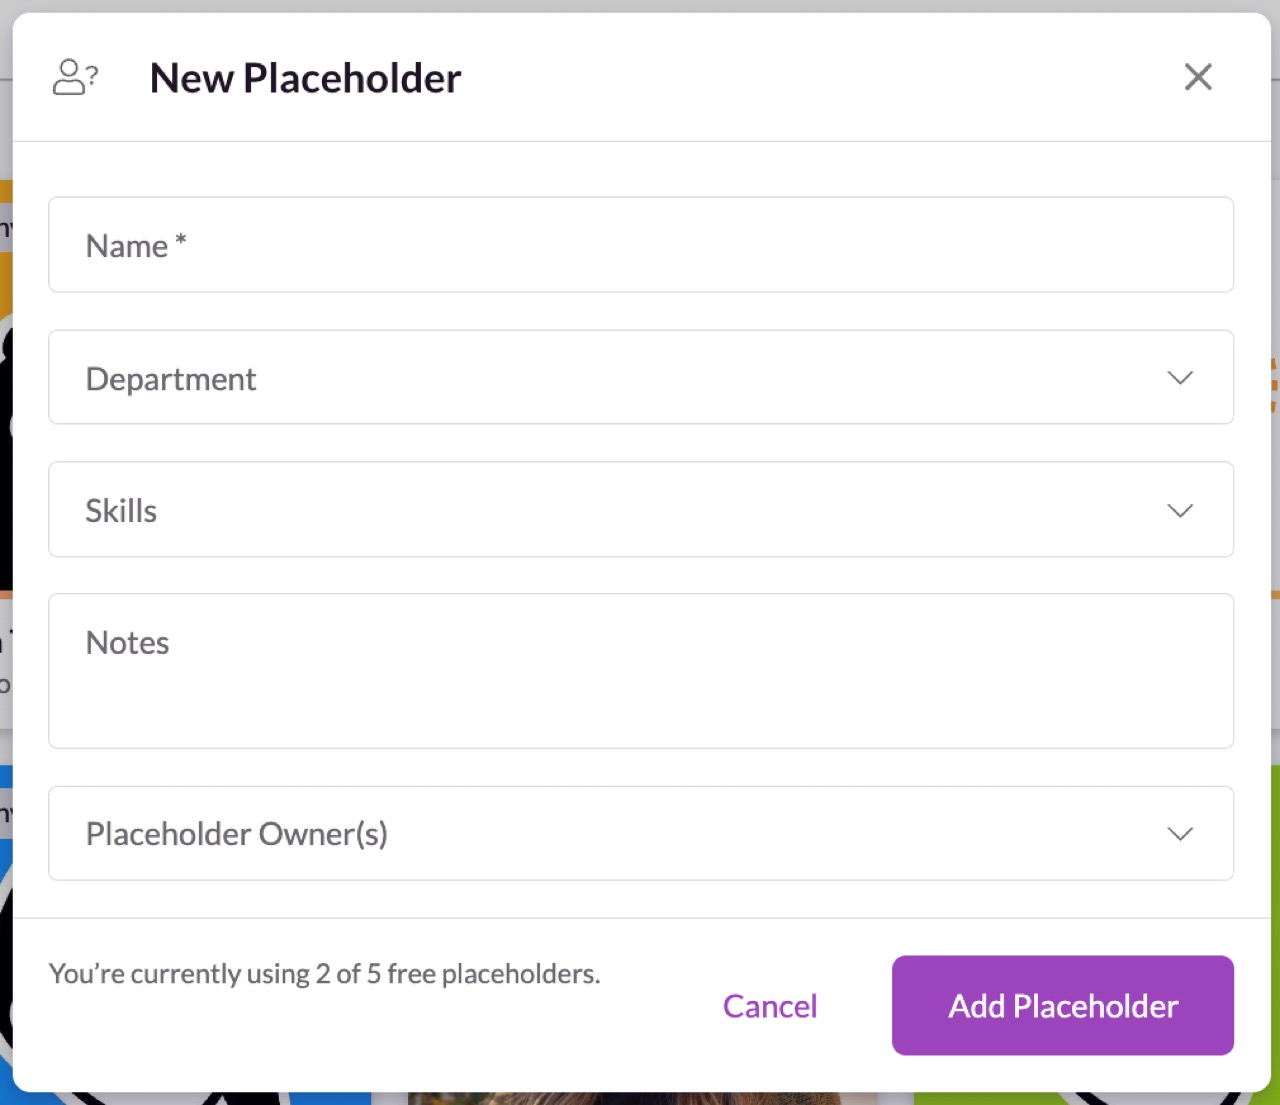
Instead of delaying your planning, you can "park" the booking on a placeholder to outline your project plans, then easily reassign it to the appropriate people or resources later. This allows you to forecast future work, gain clarity on resourcing needs, and plan accordingly. Find out more how Placeholders work here.
Adding Other Resources
Please note: Other resources can only be booked for specific times, as opposed to durations (e.g., 4h); this is because they can’t manage their own time. See Creating bookings for details on the different booking types.
There are three different types of other resources: Meeting Room, Miscellaneous and Vehicle.
Once you’ve entered the basic information for your new resource, click Show Additional Fields to amend the resource’s availability, give it a color, and enter any custom field options.
Learn more
Hide People who aren't Bookable
Resource Availability
Setting Approvers and Approving Bookings