
Connecting Jira with Resource Guru
You can integrate Jira with Resource Guru to simplify your scheduling workflow by creating bookings directly from Jira issues into your Schedule.
Setting up the Jira Integration
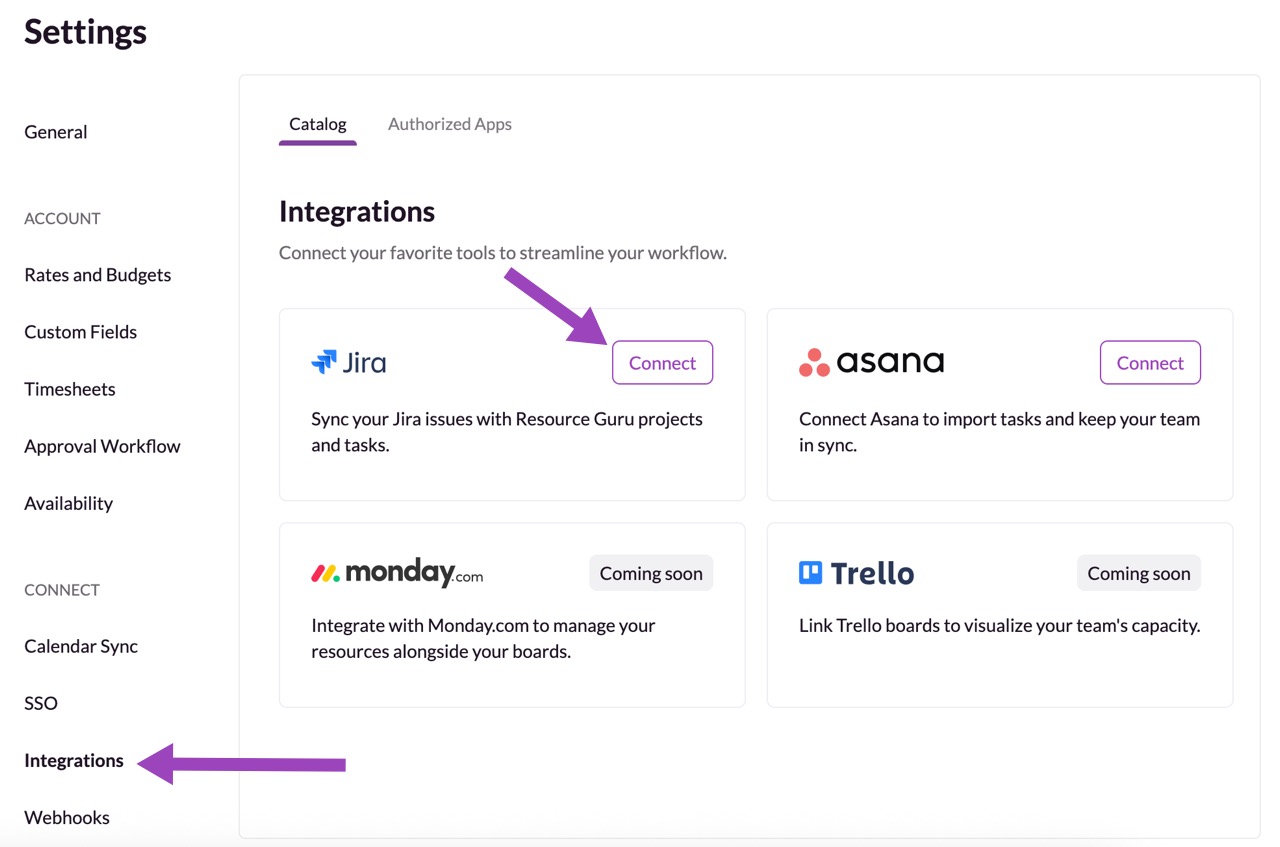
Go to Settings from the sidebar.
Under the Connect section, click Integrations.
In the Integrations Catalog, find Jira and click Connect Jira.
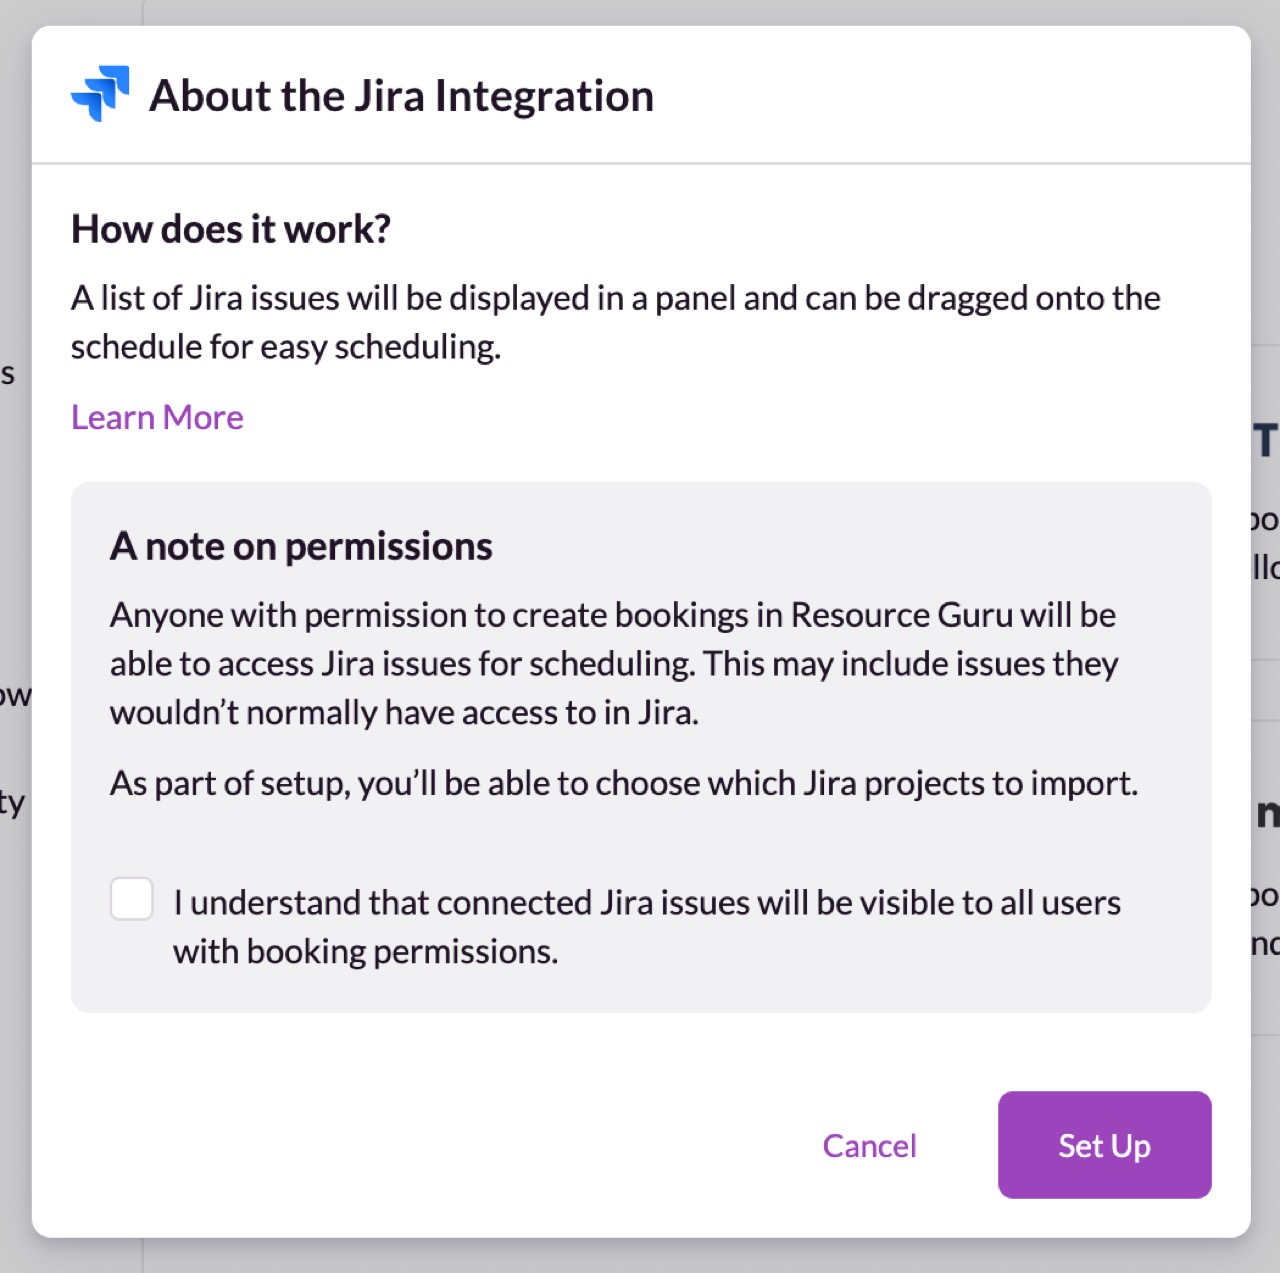
A pop-up will explain what to note:
How it works: Jira issues will appear in a panel beside the Schedule, ready to drag and drop.
Permissions: Any user with permission to create bookings in Resource Guru will be able to view and schedule imported Jira issues.
Check the box to confirm you understand how permissions work, then click Set Up.
Authenticate with Jira
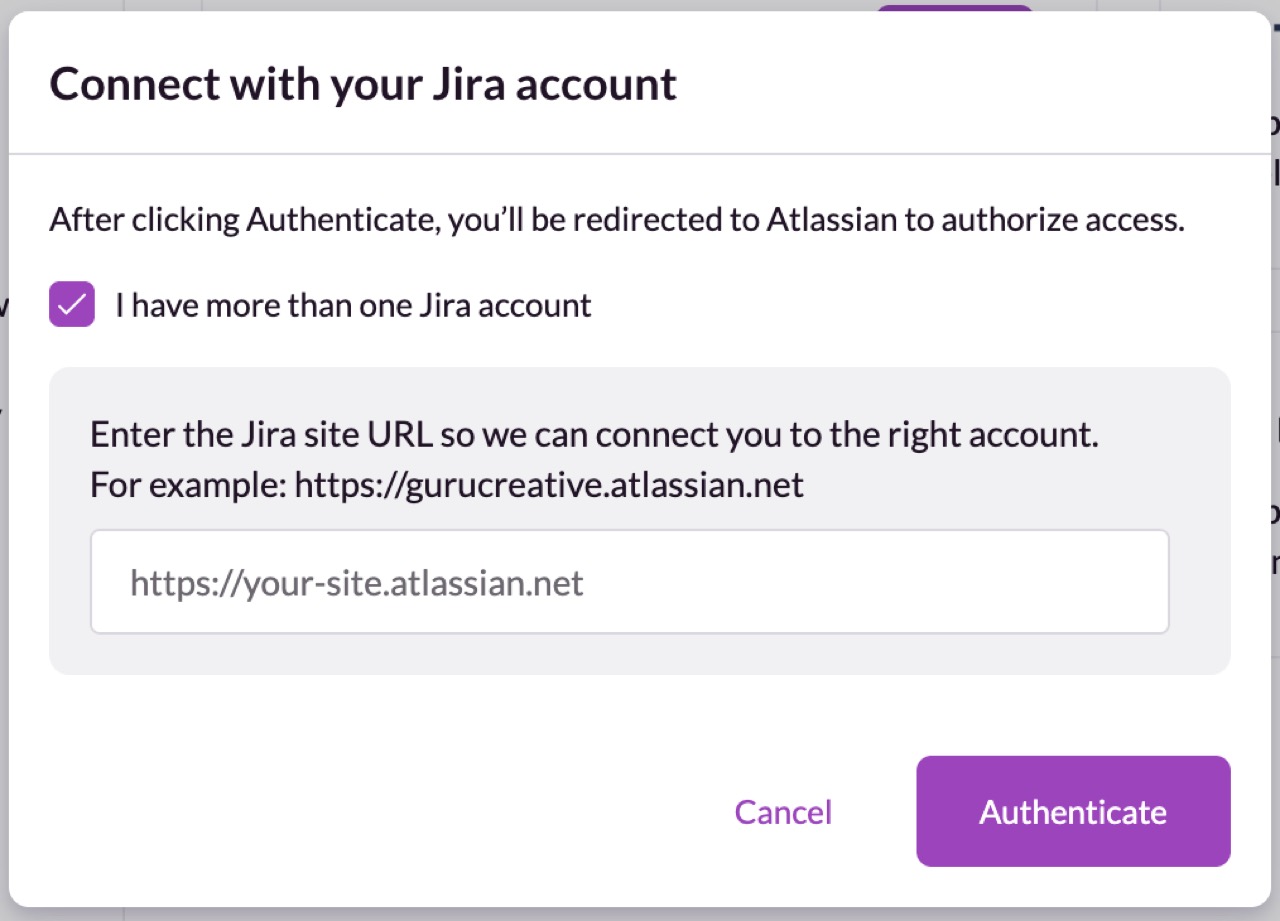
If you have more than one Jira account you're looking to connect, tick the box and follow the instructions.
Enter your Jira Site URL
Click Authenticate.
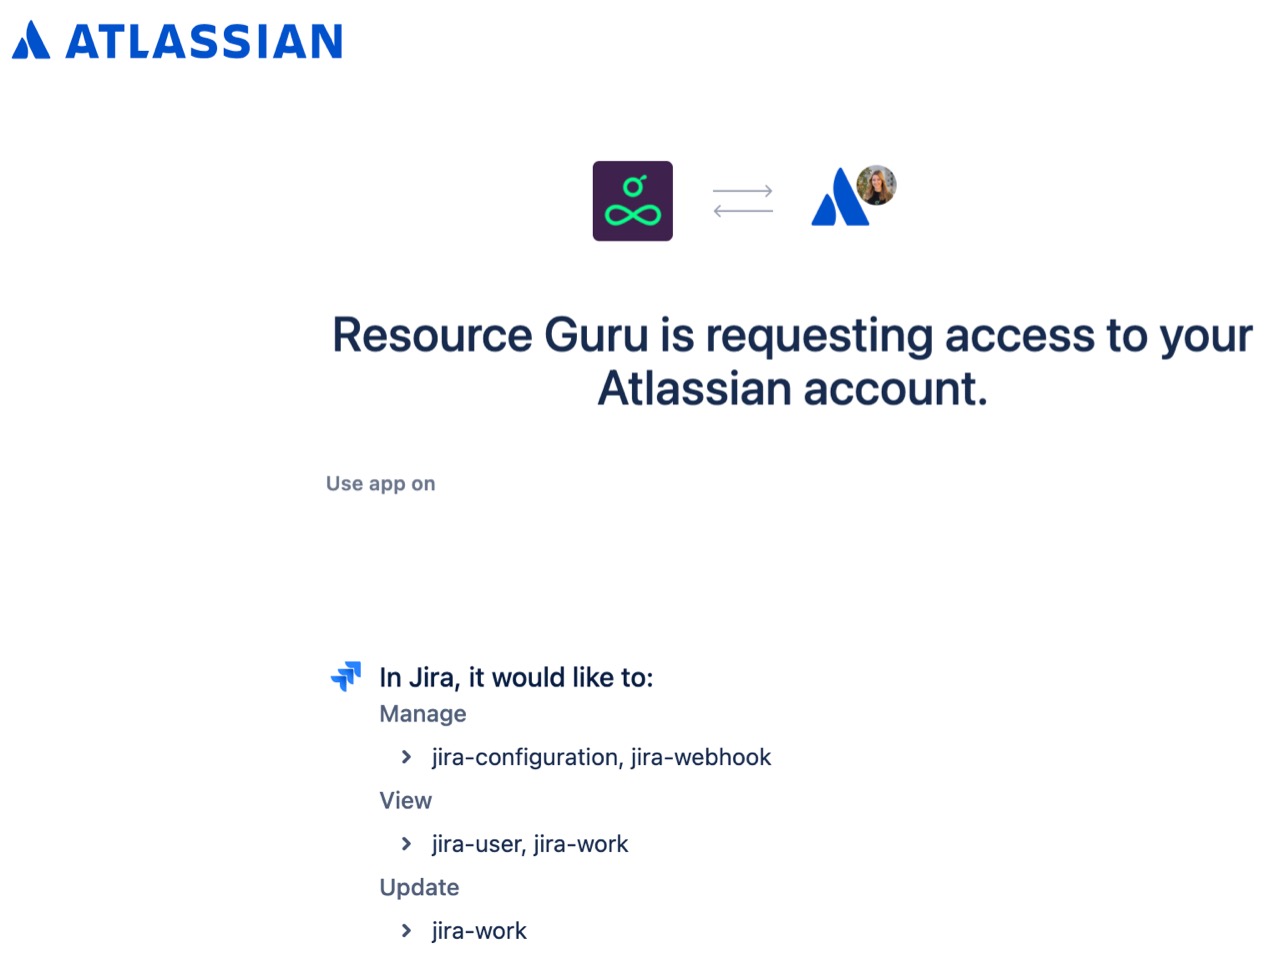
You’ll be redirected to Atlassian to authorise access for the integration.
Configure Jira Integration Settings
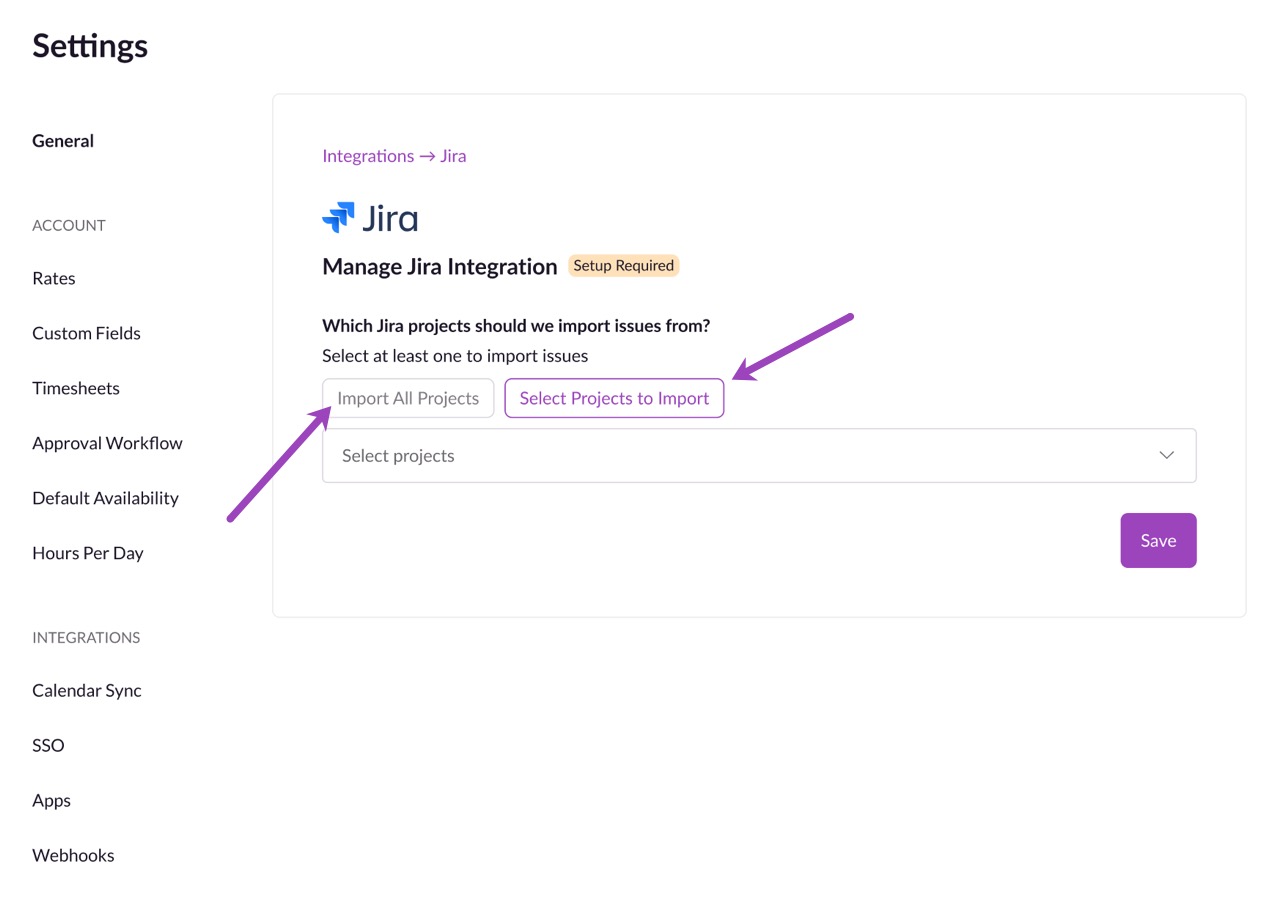
Once connected, you’ll be able to choose how Jira issues are imported. Choose between:
Import all Projects
Select Projects to Import from the dropdown menu.
Scheduling Jira Issues

After setup, Jira issues will appear in a dedicated panel next to the action drawer in the Schedule.
What you can do:
Drag and drop issues onto your team’s schedule, they’re converted into bookings. These bookings can be moved around, extended and contracted and split, like any other booking.
Soon you'll also be able to: Search and filter by issue summary, project, assignee, scheduling status, issue type, or priority.
You can open any scheduled Jira issue to view booking details, project info, and activity history.
See How Much Time Has Been Scheduled Against Jira Tasks
Once your Resource Guru–Jira integration is connected, you can easily track how much of each task’s estimated time has been scheduled.
This view helps you instantly spot whether a task is under- or over-scheduled, giving your team real-time visibility into workload and planning accuracy.
How It Works
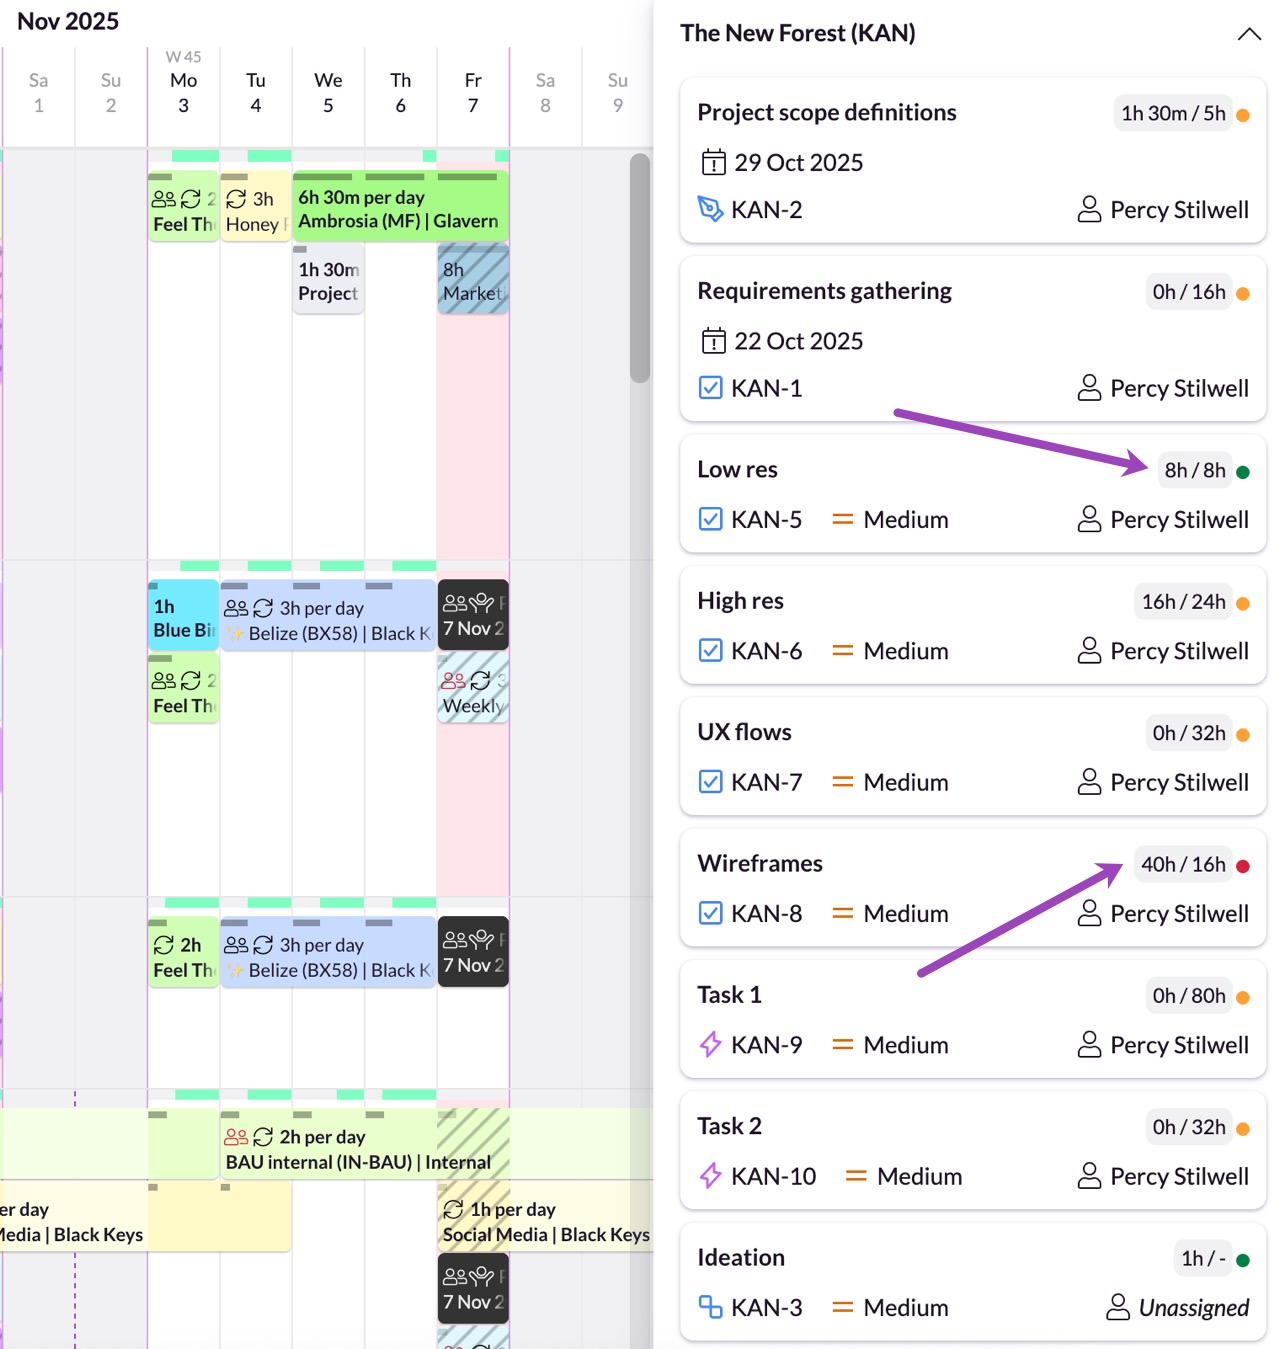
Each Jira issue that’s synced with Resource Guru includes:
The original time estimate from Jira
The total time scheduled in Resource Guru (across all bookings)
For example:
8h / 8h – means the scheduled time exactly matches the Jira estimate
40h / 16h – means the task is over-scheduled
Traffic Light Status
To make it even easier to understand at a glance, we uses a simple traffic light indicator beside each task:
🟢 On track – scheduled time matches the Jira estimate / there's no time estimate on this project
🟡 Still in range – hasn't been scheduled yet and requires action
🔴 Over-scheduled – scheduled time significantly exceeds the estimate
This updates in real time as bookings are added or adjusted in Resource Guru, so you’ll always see the current status of each Jira task without having to manually recalculate or cross-check.
Interested in exploring other integrations?