What Is Resource Guru and Where Do I Start as an Account Owner?
Resource Guru is the fast, flexible way to schedule people and projects. Get full team visibility in one calendar, create and edit bookings in seconds, and resolve scheduling problems on the fly.
With Resource Guru you can manage team members, freelancers, equipment, and meeting rooms, all in one place. Powerful filters help you find who you need fast and availability is tracked in real-time so you can avoid double-bookings and unrealistic workloads. Features like Activity Types allow you to categorize and analyze time spent on different tasks, while Milestones help you track key project dates and deadlines with ease.
Using the approval workflow you can even assign approvers for anyone on your team, giving you control over who can create bookings for which resources.
Built-in leave management makes it simple to manage vacation, sick days, and other time off. Powerful reports give insights into utilization rates, billable hours, clients and projects, making forecasting and budgeting a breeze.
Team members can stay up-to-date on assigned work with personal dashboards, calendar integrations, and enhanced email notifications.
Now that you’re familiar with what Resource Guru offers, let’s get started with a free 30 day trial. It’ll take just 20 seconds to sign up, and there’s no credit card required.
Select your time zone and don’t forget to sign up for your daily schedule email and our newsletter (you can change your mind anytime).
You’ve Signed Up – What’s Next?
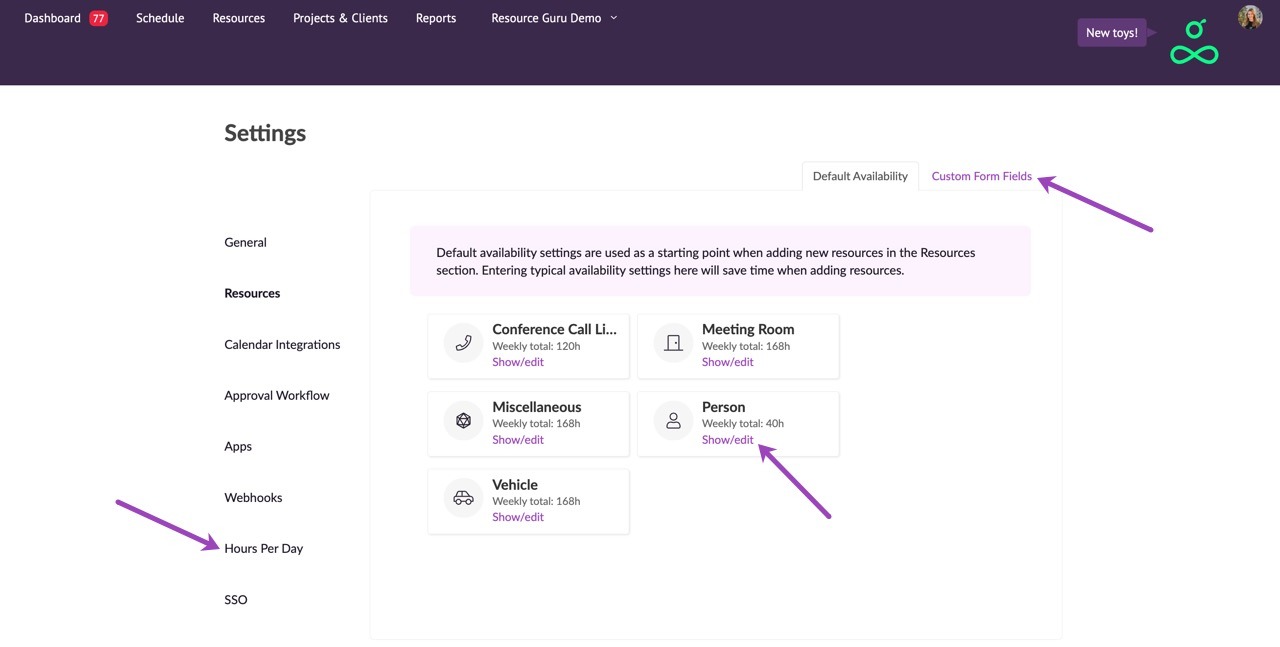
We recommend heading into your Settings first, upload a picture of yourself and set your account preferences. Make sure to review:
The default availability of your resources (this will save you time later on!)
The Hours Per Day for your Reports
And create some custom fields for your people, resources, bookings, projects and clients (e.g. skills, department, location, status etc.)
You can then start adding people to your account. You don’t need to invite them to join straight away - you can add them first and invite them later if you prefer.
Set Up Your Team
To get your account up and running quickly, head into the Resources section and invite your admins/managers first, because by giving them sufficient permissions they can help you to add the rest of your team.
You’re not a fan of the manual approach? No problem! We do offer an import service to Master subscribers to help get your account setup! Alternatively you can use our API if you have some programming capabilities at your end.
And last but not least, you may also be able to use our Zapier integration to import your resources from a spreadsheet. This approach doesn’t require any programming skills and it’s available to everyone, whether you’ve started a free trial or have already subscribed. Check out our walkthroughs on importing people and importing projects via Zapier.
Now you’ve added your team, it’s time to create some projects and clients so you can schedule your first bookings. And once you’ve scheduled some bookings, why not check out the reports to see how healthy your capacity and utilisation rates are, and make sure your team is on track for success.
Happy scheduling!
Learn more
Video: A Full Overview
Navigating the Schedule
Setting Up SSO (Single Sign On)


